Acer Veriton X488G User Manual - Page 22
To remove a memory DIMM
 |
View all Acer Veriton X488G manuals
Add to My Manuals
Save this manual to your list of manuals |
Page 22 highlights
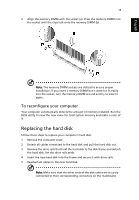
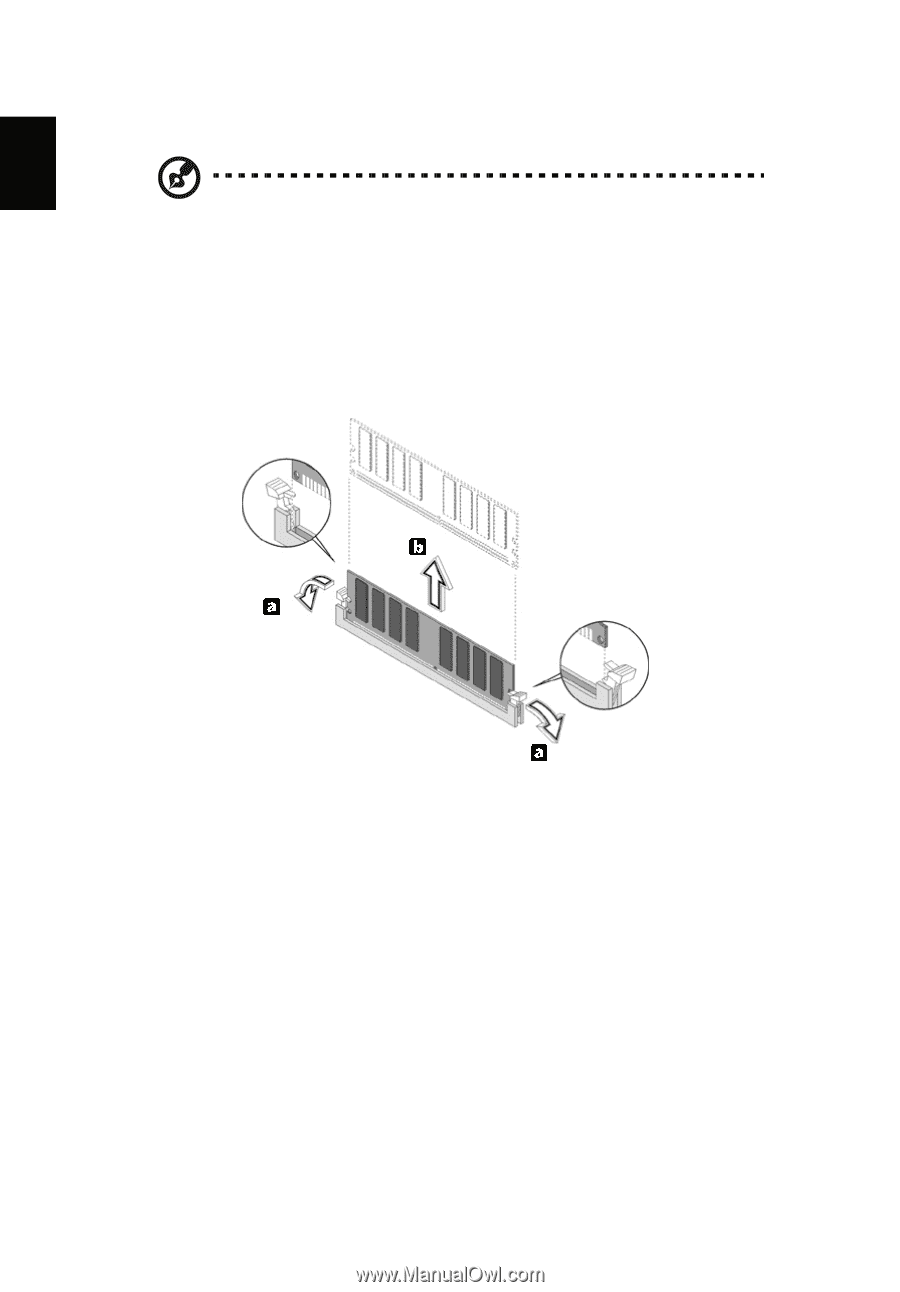
English 12 3 Upgrading your computer To remove a memory DIMM Note: The memory DIMM has only one notch located toward the center of the module. 1 Remove the side panel. 2 Locate the memory DIMM socket on the mainboard. 3 Press the holding clips on both sides of the memory DIMM socket outward to release the memory DIMM (a). Gently pull the memory DIMM out of the socket (b). To install a memory DIMM 1 Locate the memory DIMM socket on the mainboard.
-
 1
1 -
2
-
3
-
4
-
5
-
6
-
7
-
8
-
9
-
10
-
11
-
12
-
13
-
14
-
15
-
16
-
 17
17 -
 18
18 -
 19
19 -
 20
20 -
 21
21 -
 22
22 -
 23
23 -
 24
24 -
 25
25 -
 26
26 -
 27
27 -
28
-
29
-
30
-
31
-
32
-
33
-
34
-
35
-
36
-
37
-
38
-
39
 |
 |
3 Upgrading your computer
12
English
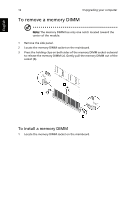
To remove a memory DIMM
Note:
The memory DIMM has only one notch located toward the
center of the module.
1
Remove the side panel.
2
Locate the memory DIMM socket on the mainboard.
3
Press the holding clips on both sides of the memory DIMM socket outward
to release the memory DIMM (a). Gently pull the memory DIMM out of the
socket (b).
To install a memory DIMM
1
Locate the memory DIMM socket on the mainboard.