Acer XF251Q User Manual - Page 20
Installation
 |
View all Acer XF251Q manuals
Add to My Manuals
Save this manual to your list of manuals |
Page 20 highlights
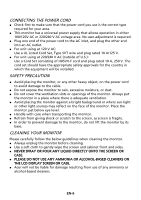
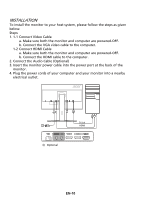
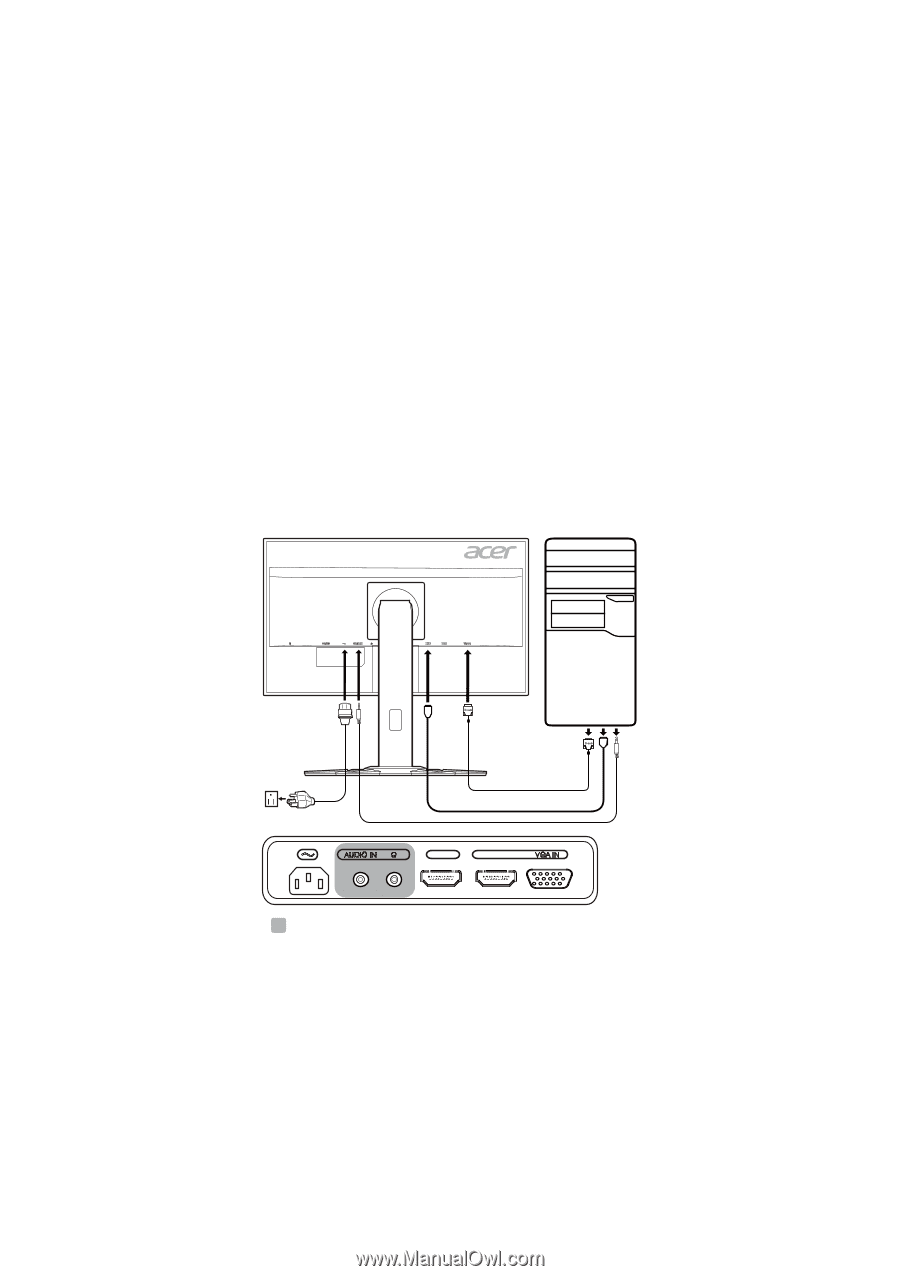
INSTALLATION To install the monitor to your host system, please follow the steps as given below: Steps 1. 1-1 Connect Video Cable a. Make sure both the monitor and computer are powered-OFF. b. Connect the VGA video cable to the computer. 1-2 Connect HDMI Cable a. Make sure both the monitor and computer are powered-OFF. b. Connect the HDMI cable to the computer. 2. Connect the Audio Cable (Optional) 3. Insert the monitor power cable into the power port at the back of the monitor. 4. Plug the power cords of your computer and your monitor into a nearby electrical outlet. Optional D-Sub HDMI HDMI 1 HDMI 2 EN-10
-
 1
1 -
2
-
3
-
4
-
5
-
6
-
7
-
8
-
9
-
10
-
11
-
12
-
13
-
14
-
 15
15 -
 16
16 -
 17
17 -
 18
18 -
 19
19 -
 20
20 -
 21
21 -
 22
22 -
 23
23 -
 24
24 -
 25
25 -
26
-
27
-
28
-
29
-
30
-
31
-
32
-
33
 |
 |
EN-10
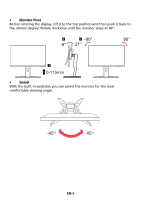
INSTALLATION
To install the monitor to your host system, please follow the steps as given
below:
Steps
1. 1-1 Connect Video Cable
a. Make sure both the monitor and computer are powered-OFF.
b. Connect the VGA video cable to the computer.
1-2 Connect HDMI Cable
a. Make sure both the monitor and computer are powered-OFF.
b. Connect the HDMI cable to the computer.
2. Connect the Audio Cable (Optional)
3. Insert the monitor power cable into the power port at the back of the
monitor.
4. Plug the power cords of your computer and your monitor into a nearby
electrical outlet.
HDMI
D-Sub
HDMI 1
HDMI 2
Optional