Airlink APSUSB1 Manual - Page 8
Rear View - reset
 |
View all Airlink APSUSB1 manuals
Add to My Manuals
Save this manual to your list of manuals |
Page 8 highlights
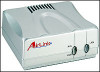
Rear View Rear Panel Component Description DC Power Input The DC power input connector is located on the Print Server's rear panel and is labeled DC 5V. Please note that the power supply included in the package is correct for this 1-Port USB Print Server; substitution of other equipment may void warranty. Reset Button 1.) Press and release this button to reset the print server. 2.) Press and hold this button for three seconds (the USB LED on the front panel lights up) and then release it, the print server will resume the factory default settings. USB Port The USB port allows you connecting the print server to a printer with USB connector. LAN Connector This LAN connector (RJ-45) provides the printer server with connection to the network through the Ethernet cabling. This printer port is configurable by commands in the PS Admin program, or by commands issued to the print server via Telnet. See the PS Admin User's Guide for configuration procedures. The print server also supports web configuration, which allows users to configure settings through the web browser. The print server's default IP address settings are: - 8 -
-
 1
1 -
2
-
 3
3 -
 4
4 -
 5
5 -
 6
6 -
 7
7 -
 8
8 -
 9
9 -
 10
10 -
 11
11 -
 12
12 -
 13
13 -
14
 |
 |
