Alesis Melody 54 Melody 54 - User Guide - Page 10
Rhythm Programming
 |
View all Alesis Melody 54 manuals
Add to My Manuals
Save this manual to your list of manuals |
Page 10 highlights
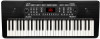
Rhythm Programming You can use the rhythm programming feature to create your own custom drum rhythm to accompany you while you play the keys. To create a custom accompaniment rhythm: 1. Press the Program button to enter Programming Mode. Prg will appear on the Display, and the keys will automatically shift to percussion sounds. 2. Program the rhythm by playing each drum sound in the order that you want to hear them repeat in the rhythmic pattern. You can play the drum sounds with the keys or with the Drum Kit buttons. If using the keys, see the image above each key in order to know what drum sound a key will play. The programmed rhythm can contain up to 32 drum sounds. Each drum sound in the pattern will be the length of a quarter note. Note: You cannot program two percussion sounds to play at the same time. 3. Press Play to stop programming and hear the rhythm play on a loop. Ply will appear on the Display. 4. After pressing Play, the keys will automatically switch back to the last selected tone, and you can play along to your custom rhythm. To change the tempo of the custom rhythm, press the Tempo + button or Tempo - button. Press the Tempo + and Tempo - buttons simultaneously to reset to the default tempo (120 BPM). To adjust the volume of the custom rhythm, press the Rhythm Vol + or Rhythm Vol - button. Press the Rhythm Vol + and Rhythm Vol - buttons simultaneously to reset to the default volume level (indicated on the Display as A07). To stop the custom rhythm from playing, press the Play button again. The keyboard will re-enter Programming Mode, and you can program a new rhythm or press the Play button to start the previously programmed rhythm. Alternatively, you can stop a custom rhythm from playing by pressing the Program button, which will make the keyboard exit Programming Mode and erase the rhythm that was playing. When you exit Programming Mode, OFF will temporarily appear on the Display. Note: If you turn off the keyboard while using a custom rhythm, the custom rhythm will be erased. Tip: With Programming Mode activated, press the Single chord button while a custom rhythm is playing or stopped. This will allow you to use the abbreviated chord shapes (pictured in the previous section) on the keys below G2 to play full chords. The chords will not automatically play along with the custom rhythm; they will stop ringing out after you release the keys. However, you will still have the ability to play full chords at the quick touch of 1-3 adjacent keys. 10
-
 1
1 -
2
-
3
-
4
-
 5
5 -
 6
6 -
 7
7 -
 8
8 -
 9
9 -
 10
10 -
 11
11 -
 12
12 -
 13
13 -
 14
14 -
 15
15 -
16
-
17
-
18
-
19
-
20
-
21
-
22
-
23
-
24
-
25
-
26
-
27
-
28
-
29
-
30
-
31
-
32
-
33
-
34
-
35
-
36
-
37
-
38
-
39
-
40
-
41
-
42
-
43
-
44
-
45
-
46
-
47
-
48
-
49
-
50
-
51
-
52
-
53
-
54
-
55
-
56
 |
 |
