Alesis Performance Pad Reference Manual
Alesis Performance Pad Manual
 |
View all Alesis Performance Pad manuals
Add to My Manuals
Save this manual to your list of manuals |
Alesis Performance Pad manual content summary:
- Alesis Performance Pad | Reference Manual - Page 1
] REFERENCE MANUAL - Alesis Performance Pad | Reference Manual - Page 2
- Alesis Performance Pad | Reference Manual - Page 3
CHAPTER 1: INTRODUCTION 1 1.1 WELCOME TO THE PERFORMANCE PAD DRUM MACHINE! 1 1.2 GROUND RULES 1 1.3 IMPORTANT: HOW TO COMMUNICATE WITH THE PERFORMANCE PAD 6 1.4 10 STEPS TO INSTANT GRATIFICATION (SETUP AND CHECKOUT) 7 CHAPTER 2: RECORD SETUP 9 2.1 PAGE 1: SELECT THE QUANTIZATION VALUE - Alesis Performance Pad | Reference Manual - Page 4
- Alesis Performance Pad | Reference Manual - Page 5
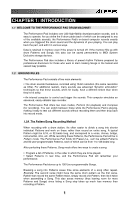
1.1 WELCOME TO THE PERFORMANCE PAD DRUM MACHINE! The Performance Pad includes over 230 high-fidelity drum/percussion sounds, and is easy to operate. As you strike the 8 drum pads (each of which can be assigned to any of the available sounds), the Performance Pad's on-board computer records - Alesis Performance Pad | Reference Manual - Page 6
introduces exciting new Song construction techniques. The Performance Pad excels at live performance-something usually not associated with drum machines. The key to using these advanced features is to understand the different types of available Patterns. • Preset Patterns provide a variety of rock - Alesis Performance Pad | Reference Manual - Page 7
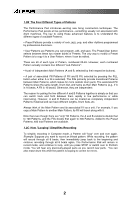
defaults to Stop-you have to purposely tell the machine to go into Record or Play. Stop is therefore the VCR's power-up default status. The Performance Pad includes a default setup that assigns particular drum sounds to particular voices (pads), at certain level and pan settings. The default - Alesis Performance Pad | Reference Manual - Page 8
Drum Set, Record Setup, MIDI Setup, and Util functions. • Pattern select buttons. These choose between the A, B, and Fill variations for a Pattern. • Mode buttons. These choose between Pattern and Song modes, Perform (on back of Performance Pad). This knob regulates the volume of the entire unit. 4 - Alesis Performance Pad | Reference Manual - Page 9
functions that have multiple "pages" of parameters (Drum Set, Record Setup, MIDI Setup, and Util), this portion of the display shows the currently selected page number. • Compose/Perform. This indicates whether the Performance Pad is in Compose or Perform mode. • Click. In Compose mode, shows the - Alesis Performance Pad | Reference Manual - Page 10
Song steps or step edit mode. 1.3 IMPORTANT: HOW TO COMMUNICATE WITH THE PERFORMANCE PAD 1.3A The INC/DEC Buttons The two small buttons with the up arrow The Mode buttons, FILL button, and several function buttons (DRUM SET, RECORD SETUP, MIDI SETUP, and UTIL) "toggle" between two states. Each button - Alesis Performance Pad | Reference Manual - Page 11
check out the sounds. 7. To hear the built-in demo, hold down the PATTERN/SONG button and press PLAY. To stop the demo, press STOP. If you want to play along with the demo, feel free to bash away on the pads. 8. Press PLAY, and you'll hear a Preset Pattern. (In case the Performance Pad has already - Alesis Performance Pad | Reference Manual - Page 12
BEAT 001 PATTERN A USER PLAYING PRESS PLAY TEMPO PERFORM 9. Try the following: • Enter a two-digit number between 00-49 using the number keys, then press PLAY. • Press the INC (up arrow) button to select the next higher-numbered Preset Pattern. It will play at the - Alesis Performance Pad | Reference Manual - Page 13
Several parameters are often adjusted prior to recording a Pattern, such as metronome, Pattern length, etc. General instructions are: 1. Press the RECORD SETUP button. 2. Use the PAGE (up and down) buttons to select different "pages" of functions; the display's lower right window shows the page - Alesis Performance Pad | Reference Manual - Page 14
16th note. Quantization is most effective when used sparingly. If you're recording a drum part, quantize the kick and snare, but try recording the hi- hand claps often sound too mechanical when quantized-when humans clap hands, you end up with a bunch of different sounds happening within a few - Alesis Performance Pad | Reference Manual - Page 15
2.2 PAGE 2: SELECT THE SWING VALUE (SWING SELECT) The display shows SWING SELECT; the Swing window shows the swing value. SWING SELECT SETUP RECORD SWINGOFF PAGE Enter the desired swing percentage with the INC/DEC or number buttons (1 = 54%, 2 = 58%, 3 = 62%, 4-0 = Swing Off). Swing shifts - Alesis Performance Pad | Reference Manual - Page 16
CLICK (METRONOME) AND SET RHYTHM (CLICK SELECT) The display shows CLICK SELECT; the Click window shows the click's rhythmic value. CLICK SELECT SETUP RECORD PAGE CLICK Enter the click value with the INC/DEC or number buttons (1 = quarter note, 2 = quarter note triplet, 3 = 8th note, 4 = 8th - Alesis Performance Pad | Reference Manual - Page 17
after, recording. Shortening a Pattern's end point erases any drum events that fall outside the remaining part of the Pattern; Performance Pad will store the new Pattern length. The display shows CHANGED LENGTH for as long as PLAY is pressed. Background Odd time signatures are not a problem - Alesis Performance Pad | Reference Manual - Page 18
, or after, recording. Shortening a Pattern's start point erases any drum events that fall outside the remaining part of the Pattern; lengthening a the Performance Pad. To apply the same amount of offset to additional pads, press the next pad then press PLAY. Notes: The display counter resets after - Alesis Performance Pad | Reference Manual - Page 19
through the steps at VOL 8 DRUM the current quantization rate, use the PAGE UP button to move forward or PAGE DOWN to move backward. If a drum exists QUANTIZE STEP EDIT SWING OFF between those beats that fall on the current quantization value, the drum will sound as you go past it, but - Alesis Performance Pad | Reference Manual - Page 20
summarize the step edit options. 2.8A Add a New Drum to a Step Use the PAGE buttons to select the step where the drum is to be added. Press the pad that corresponds to the sound you want to add. That drum, along with its volume (how hard the pad was struck), will be recorded into the displayed step - Alesis Performance Pad | Reference Manual - Page 21
as described in the Introduction, the FILL button can also be used while recording to create a series of notes at the desired quantization rate, as described in section 3.1K. 3.1B Perform/Compose Modes The Performance Pad doesn't have a record button. Instead, press PLAY to start the Pattern - Alesis Performance Pad | Reference Manual - Page 22
tapping the STOP button. These techniques work only if the Performance Pad is stopped. • Use the TEMPO/PAGE up and down buttons. Press once to is changed again (either manually, or by selecting a different Song). 3.1D Select Individual Patterns 1. Make sure the Performance Pad is in Pattern mode. - Alesis Performance Pad | Reference Manual - Page 23
some explanation. Remember that Fills are always the same length, and use the same Drum Set, as the associated Main Pattern. This lets you "drop in B Main is playing and you press Fill, after B Fill has played, the Performance Pad will transition to the A Main Pattern. You can select the Fill at any - Alesis Performance Pad | Reference Manual - Page 24
mode. Note: When sending MIDI data into the drums when the Performance Pad is not recording (i.e., the Performance Pad serves as a drum sound expander module), the drum sounds respond to 127 different levels of dynamics. However, if MIDI is used as a trigger during the recording process, the Pattern - Alesis Performance Pad | Reference Manual - Page 25
is inactive) and swing value. This allows playing a series of drum hits without having to repeatedly press the pads, and is typically used to create steady 16th note hi-hat parts, quarter note kick drum parts, snare rolls, etc. 1. The Performance Pad should be in Compose mode and recording. 2. Press - Alesis Performance Pad | Reference Manual - Page 26
quantization and swing values; turn quantization off to erase a drum wherever it occurs. 1. The Performance Pad should be in Compose mode and recording. 2. Press and hold ERASE. 3. While holding down ERASE, press the pad corresponding to the sound to be erased just before the first event to be - Alesis Performance Pad | Reference Manual - Page 27
Patterns must have the same length. This is useful if you want the Fill to contain variations 3A Copy, Append, and Double Patterns 1. The Performance Pad should be in Pattern mode and stopped. 2. the length. • The Drum Set assignment and Pattern name are copied along with the drum data only if the - Alesis Performance Pad | Reference Manual - Page 28
will be copied and any drum sound assigned to the destination drum pad will play the exact same pattern as the source drum pad. This technique lets you stack multiple drum sounds together to create monster composite sounds. See section 8.3: Sound Stacking. 1. The Performance Pad should be in Pattern - Alesis Performance Pad | Reference Manual - Page 29
you edit a Drum Set, any Pattern using that Drum Set will be affected. Most Performance Pad aficionados keep a one-to-one correspondance between Drum Sets and Patterns by assigning Set 00 to Pattern 00, Set 01 to Pattern 01, Set 02 to Pattern 02, etc. General instructions for Drum Set construction - Alesis Performance Pad | Reference Manual - Page 30
to that pad. FATSNARE 001 DRUM DRUM SET PAGE You can assign any of the Performance Pad's sounds to any of the pads, or to more than one pad. Each individual Drum Set can have its own drum sound assignment. To assign a sound to a pad: 1. Hit the pad. 2. Enter the desired drum sound number with - Alesis Performance Pad | Reference Manual - Page 31
the drum sound.) PANNING DRUM DRUM SET PAGE To change the pan position associated with a given pad: 1. Press the pad (the display will show the pad number). 2. Enter the desired pan position, from full left to full right, using either the number or INC/DEC buttons. The seven available pan - Alesis Performance Pad | Reference Manual - Page 32
ask the Performance Pad to play another one, the sound that's closest to finishing its decay cycle will be "stolen" so that the most recent sound can be played. In practice, it's difficult (and usually not artistically desirable!) to create drum parts so complex that voice-stealing becomes a problem - Alesis Performance Pad | Reference Manual - Page 33
, you can tell the Performance Pad to ignore these stored assignments, and retain the currently selected Drum Set regardless of whether or not you change Patterns. This is useful if you want to hear how a Pattern would sound with a different Drum Set (just set one up manually) as opposed to the - Alesis Performance Pad | Reference Manual - Page 34
Performance Pad plays in Song Mode (with Compose mode selected), it will remember the Patterns and Fills you select. • Manually. Select Song mode and program a list the STOP button. These techniques work only if the Performance Pad is stopped. 2. Use the TEMPO/PAGE up and down buttons. Press once - Alesis Performance Pad | Reference Manual - Page 35
Perform mode. 2. Press RECORD SETUP. If the Song has been named, the name will show on the top line. If the Song has not been named, the display says NO NAME. 3. Enter the name using are available. You can also enter numbers with the number buttons. 5.1G Change Song Tempo as the Performance Pad Plays - Alesis Performance Pad | Reference Manual - Page 36
7. In addition to selecting different Patterns, you can press FILL at any time. The Performance Pad will remember where you pressed FILL. As in Pattern mode, pressing FILL will automatically transition to the downbeat doesn't make any difference; the Patterns used in Song steps are not altered. 32 - Alesis Performance Pad | Reference Manual - Page 37
5.3 MANUAL SONG CREATION 5.3A Enter a Pattern 1. Select Song mode and the desired press ERASE. 5.3D Insert a New Step Between Two Existing Song Steps 1. The Performance Pad should be in Song and Compose modes. 2. Use the INC/DEC buttons to select the step number that the inserted step should occupy. - Alesis Performance Pad | Reference Manual - Page 38
, or User/Preset options). Since the step is replaced, no renumbering of subsequent steps occurs. 5.3G Erase an Entire Song 1. The Performance Pad should be in Song and Perform modes. 2. Use the number buttons to select the Song to be erased. 3. Press and hold the ERASE button. The display says SONG - Alesis Performance Pad | Reference Manual - Page 39
of Another Song If That Song is Not Empty) 1. The Performance Pad should be in Song and Perform modes. 2. Select the Song to be copied with the number enter the destination Song number to which the source Song should be copied using the number or INC/DEC buttons. 5. While you continue to hold the - Alesis Performance Pad | Reference Manual - Page 40
Song, use the INC/DEC buttons to select ON. Select OFF if you don't want the Performance Pad to transmit pattern data. Background Select ON to send Pattern data into a sequencer for recording, or drive other drum sound expander modules. If the Performance Pad is acting as a drum machine and provides - Alesis Performance Pad | Reference Manual - Page 41
the transfer is complete, the Performance Pad display reverts to either Song or Pattern mode (whichever had been selected prior to saving). Note that the iED04 does not have a MIDI IN port, but the data can be read by an Alesis SR16 drum machine. 7.3 PAGE 2: CHECK AVAILABLE MEMORY (FREE MEM) When - Alesis Performance Pad | Reference Manual - Page 42
clocks, but to accept external MIDI Clock and Start/Stop data. Refer to each device's manual to find out how to do this. Enable the slave's Song Position Pointer if it is available. 3. Press PLAY on the Performance Pad. The slave units should start at the same time, and progress at the same tempo - Alesis Performance Pad | Reference Manual - Page 43
differences to add variety or serve different musical purposes. To save time, use the Copy function to copy the main Pattern to the Fill, then add when mixing odd time signatures within the same piece. If some Patterns use a time signature based on quarter notes and others on eighth notes, - Alesis Performance Pad | Reference Manual - Page 44
(also called bars), and each measure is divided into beats. In the Performance Pad, each beat is further sub-divided into 96 sub-beats. Rhythmic Values quarter note by three results in eighth-note triplets. The reason why we use the term eighth-note triplets is because the eighth note is closest to - Alesis Performance Pad | Reference Manual - Page 45
Pos Song Sel Tune System Realtime Clock Commands Aux Messages Notes: Local On/Off Active Sense Reset GM On Transmitted Recognized 1-16 X 1-16 X Remarks 0-127 X 0-127 X 1-127 X 0 X X X X X X X 0-127 X O X 0 X 0 X X X X X X X X X X X X X X X MIDI out only - Alesis Performance Pad | Reference Manual - Page 46
SOUND LIST 1 Honst Kik 2 Honst A 3 Stab Kik 4 Stab A 5 Lo Honst 6 Lo Honst 7 Lo Stab 8 Lo Stab A 9 Dynam Kik 10 Old Wood 11 Low Wood 12 Ambi Kik - Alesis Performance Pad | Reference Manual - Page 47
PRESET PATTERN TEMPOS 00 120 (110-130) 01 95 (80-90) 02 130 (125-135) 03 105 (100-110) 04 140 (135-145) 05 95 (90-95) 06 130 (125-135) 07 140 (135-150) 08 120 (115-125) 09 115 (110-120) 10 105 (100-115) 11 125 (120-130) 12 110 (100-120) 13 110 (105-115) 14 - Alesis Performance Pad | Reference Manual - Page 48
50 User drum kits with 233 sounds assignable to any pad „ Built-in rhythm patterns to complement your playing „ Large LCD display with easy-to-navigate interface „ Dynamic Articulation stereo samples with reverb and ambience for realistic playing „ 2 inputs for external kick and hi-hat pedals (sold - Alesis Performance Pad | Reference Manual - Page 49
- Alesis Performance Pad | Reference Manual - Page 50
- Alesis Performance Pad | Reference Manual - Page 51
- Alesis Performance Pad | Reference Manual - Page 52
www.alesis.com
-
 1
1 -
 2
2 -
 3
3 -
 4
4 -
 5
5 -
 6
6 -
 7
7 -
8
-
9
-
10
-
11
-
12
-
13
-
14
-
15
-
16
-
17
-
18
-
19
-
20
-
21
-
22
-
23
-
24
-
25
-
26
-
27
-
28
-
29
-
30
-
31
-
32
-
33
-
34
-
35
-
36
-
37
-
38
-
39
-
40
-
41
-
42
-
43
-
44
-
45
-
46
-
47
-
48
-
49
-
50
-
51
-
52
 |
 |

REFERENCE MANUAL