Alpine KTX-M38 Owners Manual - Page 2
Remark, Harness Connection, Retracing Vehicle Parts, Removing Vehicle Parts, Bracket Assembly
 |
View all Alpine KTX-M38 manuals
Add to My Manuals
Save this manual to your list of manuals |
Page 2 highlights
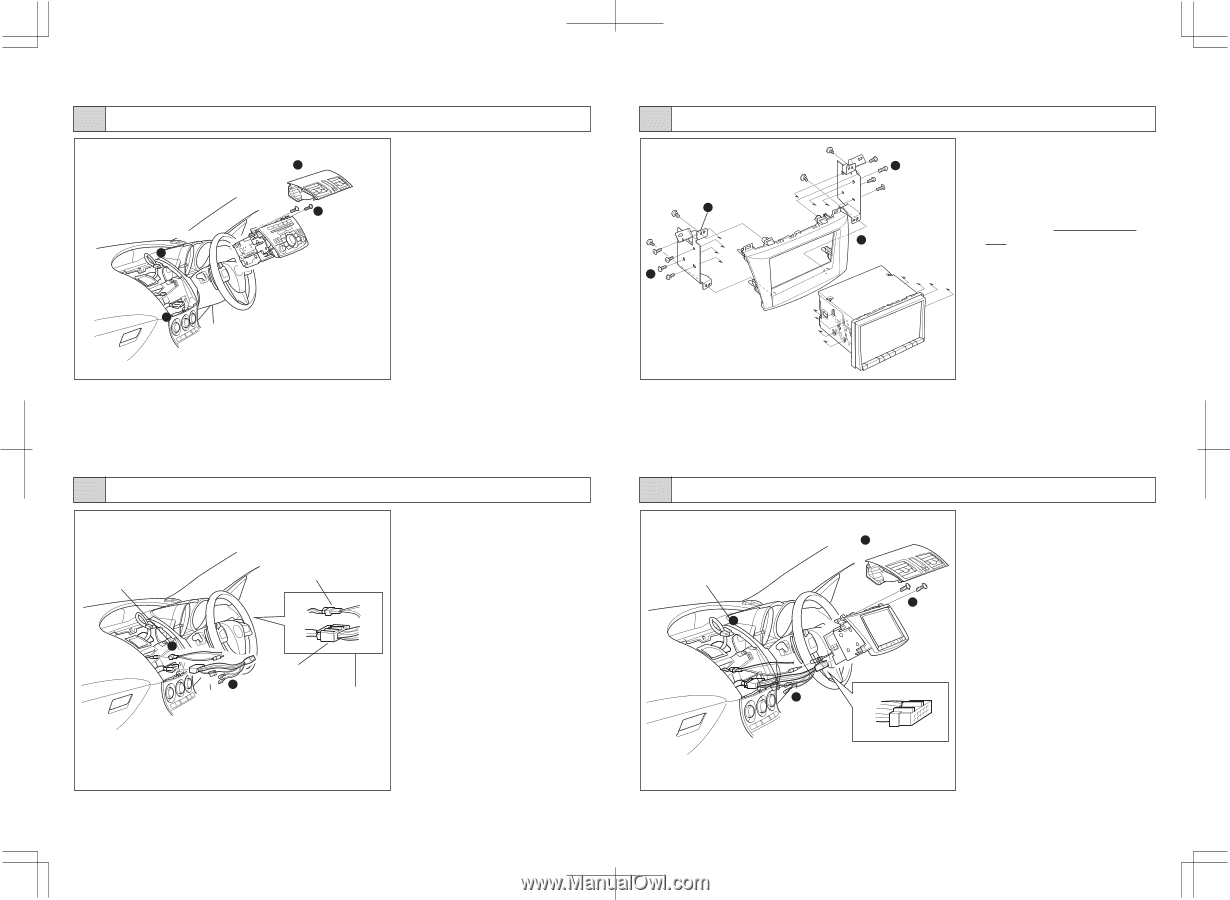
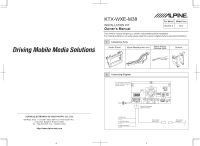
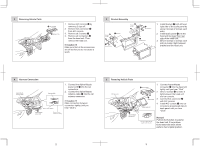
3 Removing Vehicle Parts A/C Connector 2 4 1 A/C Console 3 Screw 2 Pcs. 1. Remove A/C console 1 by removing 2 clips off. 2. Remove A/C connector 2 from A/C console. 3. Remove all 2 screws 3. 4. Remove all connectors 4 from the head unit. Then, remove the head unit. !!! Caution !!! Make sure that all the accessories are off so that you do not cause a spark. 5 Bracket Assembly Screw 2 Pcs. Screw 2 Pcs. 1 Bracket 3 Screw 4 Pcs. 3 Screw 4 Pcs. 2 Audio Panel 1. Install bracket 1 both left and right side of the audio panel by using 4 screws (2 screws each side). 2. Install audio panel 2 into the head unit by insert from rear side of the head unit. 3. Drive 8 screws (4 screws each side) to make it tight between bracket and the head unit. 4 Harness Connection Alpine-Mazda antenna cable 2 Antenna cable 1. Connect the Alpine-Mazda power cord 1 into the car connectors. 2. Connect the Alpine-Mazda antenna cable 2 into the car antenna connector. Power cable (24Pin) 1 Alpine-Mazda power cord Connect these connectors firmly !!! Caution !!! Make connection between connectors tightly (until you hear "Click".) 6 Retracing Vehicle Parts A/C Connector 3 1 Alpine-Mazda power cord 1. Connect Alpine-Mazda 4 A/C Console connector 1 into the head unit tightly until you hear "Click". 2. Drive 2 screws 2 to make it tight between the head unit and car console. 2 Screw 2 Pcs. 3. Connect A/C connector 3 with A/C console. 4. Install A/C console 4 into car Audio head unit console by pressing all clips to dash panel until you hear "Click". Connect Alpine-Mazda power cord into unit Remark Perform full function checks for the head unit. If no problem found assemble back all the parts to their original position. 2 3
-
 1
1 -
 2
2
 |
 |