Alpine X009-WRA Owner's Manual (english) - Page 63
Automatic Connection setting, Setting the Passcode, Changing the Character Code of the Phone Book
 |
View all Alpine X009-WRA manuals
Add to My Manuals
Save this manual to your list of manuals |
Page 63 highlights
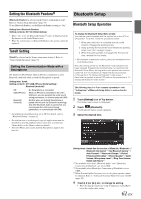
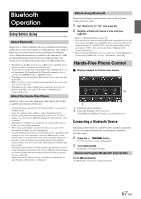
Automatic Connection setting [Auto Connect] is selected on the Bluetooth setup menu in step 3. Refer to "Bluetooth Setup Operation" (page 61). If the Automatic Connecting setting is "On", automatic connection is performed for the audio device registered in the Paired Device list. Setting item: Auto Connect Setting contents: Off / On (Initial setting) Setting the Passcode [Passcode Change] is selected on the Bluetooth setup menu in step 3. Refer to "Bluetooth Setup Operation" (page 61). You can set the code for connecting with a Bluetooth compatible device. Setting item: Passcode Change 1 Touch [Passcode Change]. A numeric keypad screen is displayed. 2 Enter a 4-digit passcode, and then touch [Enter]. • The initial number is 0000. • For details on how to input the numeric keypad, refer to "Numeric Keypad Input Operations" (page 38). Changing the Character Code of the Phone Book [Default Phonebook Encoding] is selected on the Bluetooth setup menu in step 3. Refer to "Bluetooth Setup Operation" (page 61). You can select the character code that is used when transferring the phone book or history from a mobile phone. If unreadable characters appear in the transferred data, select the correct character code. Setting item: Default Phonebook Encoding Setting contents: Latin-1 / Latin-9 (Initial setting) / Russian / Chinese / Thai / Arabic / Unicode UTF-8 / Unicode UTF-16LE / Unicode UTF-16BE 1 Touch [Default Phonebook Encoding]. The Character code list screen is displayed. 2 Touch the desired character code. Latin-1: ISO 8859-1 Latin-9: ISO 8859-15 Russian: ISO 8859-5 Chinese: GB18030 Thai: CP874 Arabic: CP1256 Unicode UTF-8 Unicode UTF-16LE Unicode UTF-16BE 3 Touch [OK]. Selecting the Output Speaker [Phone Speaker] is selected on the Bluetooth setup menu in step 3. Refer to "Bluetooth Setup Operation" (page 61). You can select which speaker in the car will output the audio from the phone. Setting item: Phone Speaker Setting contents: All (Initial setting) / Front L / Front R / Front LR All: Front L: Front R: Front LR: The sound is output from all speakers in car. The sound is only output from the front left speaker. The sound is only output from the front right speaker. The sound is output from the front left and front right speakers. • The setting cannot be adjusted during a phone call. Adjust the setting before placing a call. • This option is not available when External Audio Processor is set to On. Adjusting the Caller Volume [Caller Volume] is selected on the Bluetooth setup menu in step 3. Refer to "Bluetooth Setup Operation" (page 61). You can adjust the volume of the incoming call. Setting item: Caller Volume Setting contents: 1 to 11 (Initial setting: 5) Adjusting the Microphone Level [Microphone Level] is selected on the Bluetooth setup menu in step 3. Refer to "Bluetooth Setup Operation" (page 61). You can adjust the transmit volume, during the call. Setting item: Microphone Level Setting contents: 1 to 11 (Initial setting: 5) Adjusting the Ring Tone Volume [Ring Tone Volume] is selected on the Bluetooth setup menu in step 3. Refer to "Bluetooth Setup Operation" (page 61). You can adjust the receive volume, during the call. Setting item: Ring Tone Volume Setting contents: 1 to 11 (Initial setting: 5) Deleting All the Histories [Delete Call History] is selected on the Bluetooth setup menu in step 3. Refer to "Bluetooth Setup Operation" (page 61). Dialed/Received/Missed Incoming histories are all deleted. Setting item: Delete Call History 1 Touch [Delete Call History] The confirmation screen is displayed. • When there is no history, this option is not available. 2 Touch [OK]. All the histories are deleted. 63-EN
-
 1
1 -
2
-
3
-
4
-
5
-
6
-
7
-
8
-
9
-
10
-
11
-
12
-
13
-
14
-
15
-
16
-
17
-
18
-
19
-
20
-
21
-
22
-
23
-
24
-
25
-
26
-
27
-
28
-
29
-
30
-
31
-
32
-
33
-
34
-
35
-
36
-
37
-
38
-
39
-
40
-
41
-
42
-
43
-
44
-
45
-
46
-
47
-
48
-
49
-
50
-
51
-
52
-
53
-
54
-
55
-
56
-
57
-
 58
58 -
 59
59 -
 60
60 -
 61
61 -
 62
62 -
 63
63 -
 64
64 -
 65
65 -
 66
66 -
 67
67 -
 68
68 -
69
-
70
-
71
-
72
-
73
-
74
-
75
-
76
-
77
-
78
-
79
-
80
-
81
-
82
-
83
-
84
-
85
-
86
-
87
-
88
-
89
-
90
-
91
-
92
-
93
-
94
-
95
-
96
-
97
-
98
-
99
-
100
-
101
-
102
-
103
-
104
-
105
-
106
-
107
-
108
-
109
-
110
-
111
-
112
-
113
-
114
-
115
-
116
-
117
-
118
-
119
-
120
-
121
 |
 |
