Amana AGG200AAW Installation Instruction - Page 11
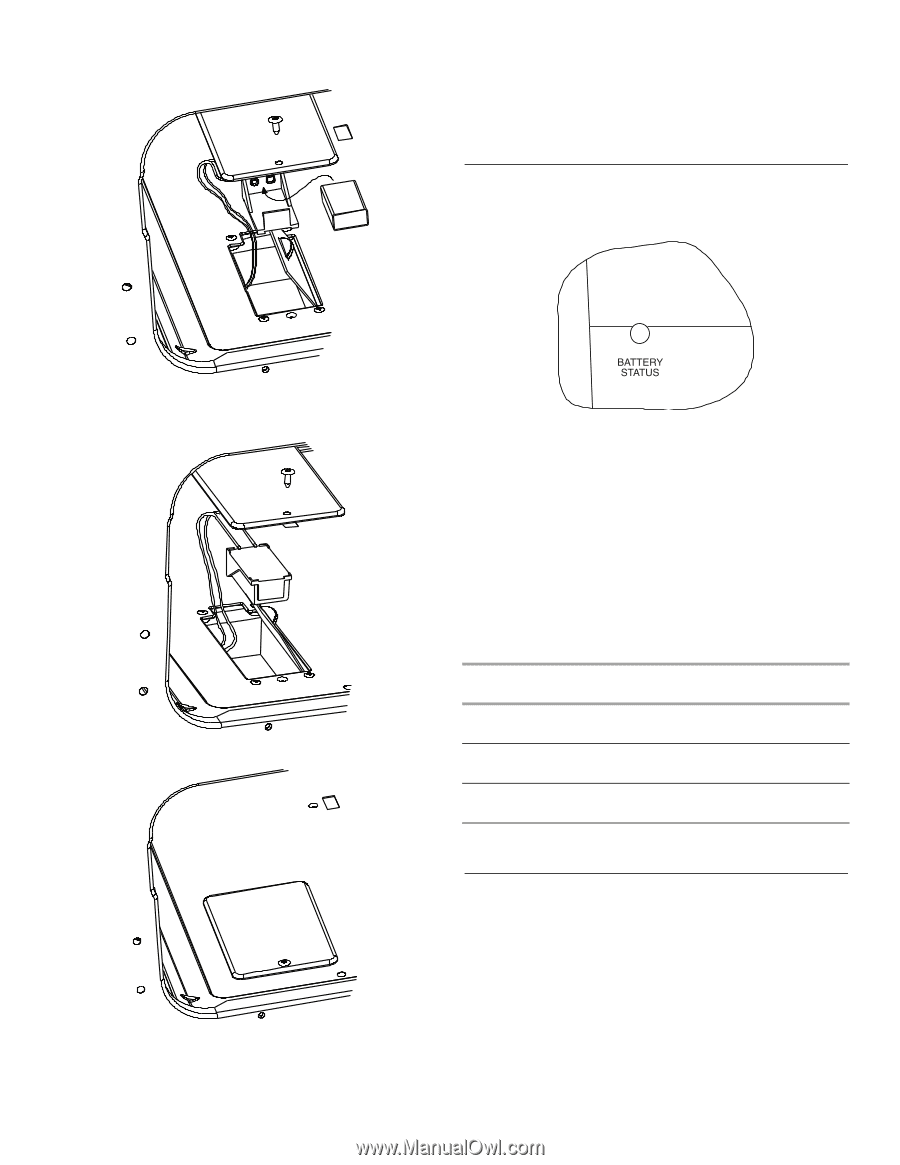
Battery Status Indicator, Electronic Ignition System
 |
View all Amana AGG200AAW manuals
Add to My Manuals
Save this manual to your list of manuals |
Page 11 highlights
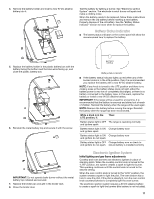
4. Remove the battery holder and insert a new 9V DC alkaline battery into it. BATTERY Test the battery by lighting a burner. See "Electronic Ignition System" section. The electrode in each burner will spark and make a clicking noise. When the battery needs to be replaced, follow these instructions and remove the old battery before inserting a new battery. Properly dispose of the old battery. See the "Battery Status Indicator" section to know when to replace the battery. Battery Status Indicator ■ The battery status indicator on the control panel will show the recommended time to replace the battery. 5. Replace the battery holder in the plastic battery box with the battery facing the bottom and the blue wires facing up, and close the plastic battery box. 6. Reinstall the metal battery top and secure it with the screw. Battery status indicator ■ If the battery status indicator lights up red when any of the burner knobs is in the LITE position, then it is recommended you replace the battery with a new 9V DC alkaline battery. NOTE: If any knob is turned to the LITE position and there is no clicking noise or the battery status does not light, either the battery power is very low or completely discharged, or there is no battery connected to the battery case. In this event, replace the battery or install a new 9V DC alkaline battery. IMPORTANT: If the range will be unused for a long time, it is recommended that the battery is removed and stored out of reach of children. Reinstall the battery when the range will be used again. NOTE: Remove the battery before moving the range. Reinstall the battery after the range has been reconnected. While a knob is in the LITE position, if: Then: Battery status light is OFF The range is operating normally and igniters spark Battery status light is ON Change battery soon and igniters spark Battery status light is ON Change battery now and igniters do not spark Battery status light is OFF Change battery now or check to and igniters do not spark ensure battery is installed correctly IMPORTANT: Do not operate bake burner without the metal battery top installed and secured. 7. Replace the broiler pan and grill in the broiler rack. 8. Close the broiler door. Electronic Ignition System Initial lighting and gas flame adjustments Cooktop and oven burners use electronic igniters in place of standing pilots. When the cooktop control knob is turned to the "LITE" position, the system creates a spark to light the burner. This sparking continues until the control knob is turned to the desired setting. When the oven control knob is turned to the "LITE" position, the system creates a spark to light the pilot. The oven bottom has a hole to view the pilot. If the pilot is already lit, turn the oven control knob counterclockwise to completely light the oven burner. The electronic ignition system requires a 9V DC alkaline battery to create a spark to light the burners (this battery is not included). 11
-
 1
1 -
2
-
3
-
4
-
5
-
 6
6 -
 7
7 -
 8
8 -
 9
9 -
 10
10 -
 11
11 -
 12
12 -
 13
13 -
 14
14 -
 15
15 -
 16
16 -
17
-
18
-
19
-
20
 |
 |