American Standard 3120.019.021 Installation Instructions - Page 2
Con't., For Cadet Toilets, For Yorkville Toilets
 |
UPC - 033056306833
View all American Standard 3120.019.021 manuals
Add to My Manuals
Save this manual to your list of manuals |
Page 2 highlights
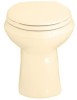
con't. FOR CADET TOILETS: 4-1 INSTALL WAX SEAL Invert toilet on floor (cushion to prevent damage), and install wax ring evenly around waste flange (horn), with tapered end of ring facing toilet. Apply a thin bead of sealant around base flange. SEALANT WAX RING 5-1 con't. FOR YORKVILLE TOILETS: 4-2 INSTALL NEOPRENE OR GRAPHITE FELT SEAL* Install seal evenly around waste flange (horn). Apply a thin bead of sealant around base flange. * Note: Wax seal not recommended for this application. NEOPRENE SEAL SEALANT 5-2 FLANGE FLANGE BOLTS NUT TAPERED WASHER CLOSET BOLT FLANGE INSTALL TOILET ON FLANGE a. Unplug floor waste opening and install toilet on closet flange so bolts project through mounting holes. b. Loosely install retainer washers and nuts. Side of washers marked "THIS SIDE UP" must face up! 6-1 TAPERED WASHERS LAG BOLT INSTALL TOILET ON FLANGE a. Unplug floor waste opening and install toilet on closet flange so bolts project through mounting holes. b. Loosely install retainer washers and nuts. Side of washers marked "THIS SIDE UP" must face up! 6-2 BOLT CAP BOLT CAP CLOSET BOLT CLOSET FLANGE WASHER NUT INSTALL TOILET a. Position toilet squarely to wall and, with a rocking motion, press bowl down fully on wax ring and flange. Alternately tighten nuts until toilet is firmly seated on floor. ! CAUTION: DO NOT OVERTIGHTEN NUTS OR BASE MAY BE DAMAGED! b. Install caps on washers. (If necessary, cut bolt height to size before installing caps.) c. Smooth off the bead of sealant around base. Remove excess sealant. NUT & WASHER BOLT CAP BOLT WASHER HEAD INSTALL TOILET a. Position toilet squarely to wall and, with a rocking motion, push bowl against ring and flange. Alternately tighten nuts until toilet is firmly anchored. ! CAUTION: DO NOT OVERTIGHTEN NUTS OR BASE MAY BE DAMAGED! b. Insert the tapered washers (supplied in the kit) into the lag bolts (not supplied). Insert bolts through mounting holes and tighten into pre-drilled floor openings. c. Install the four bolt caps on tapered washers. (If necessary, cut wall bolt length to size before installing caps.) d. Smooth off the bead of sealant around base. Remove excess sealant. - 2 - 7301312-100
-
 1
1 -
 2
2 -
 3
3 -
 4
4
 |
 |
