Apple MC066LL/A User Guide - Page 31
To add items to or remove items from a playlist on iPod nano, To reset iTunes to sync music, video
 |
UPC - 885909310289
View all Apple MC066LL/A manuals
Add to My Manuals
Save this manual to your list of manuals |
Page 31 highlights
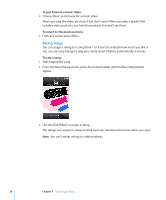
To set iTunes to manage content on iPod nano manually: 1 In iTunes, select iPod nano in the device list and click the Summary tab. 2 In the Options section, select "Manually manage music and video." 3 Click Apply. When you manually manage content on iPod nano, you must always eject iPod nano from iTunes before you disconnect it. When you connect a manually-managed iPod nano to a computer, it appears in the device list on the left side of the iTunes window. To add a song, video, or other item to iPod nano: 1 In iTunes, click Music or another item below Library on the left side of the iTunes window. 2 Drag a song or other item to iPod nano in the device list. To remove a song, video, or other item from iPod nano: 1 In iTunes, select iPod nano in the device list. 2 Select a song or other item on iPod nano, and then press the Delete or Backspace key on your keyboard. If you remove a song or other item from iPod nano, it isn't deleted from your iTunes library. To create a new playlist on iPod nano: 1 In iTunes, select iPod nano in the device list, and then click the Add (+) button or choose File > New Playlist. 2 Type a name for the playlist. 3 Click an item, such as Music, in the Library list, and then drag songs or other items to the playlist. To add items to or remove items from a playlist on iPod nano: m Drag an item to a playlist on iPod nano to add the item. Select an item in a playlist and press the Delete key on your keyboard to delete the item. To reset iTunes to sync music, video, and podcasts automatically: 1 In iTunes, select iPod nano in the device list and click the Summary tab. 2 Deselect "Manually manage music and videos." 3 Select the Music, Movies, TV Shows, and Podcasts tabs, and select your sync options. 4 Click Apply. The update begins automatically. Chapter 2 Setting Up iPod nano 31
-
 1
1 -
2
-
3
-
4
-
5
-
6
-
7
-
8
-
9
-
10
-
11
-
12
-
13
-
14
-
15
-
16
-
17
-
18
-
19
-
20
-
21
-
22
-
23
-
24
-
25
-
 26
26 -
 27
27 -
 28
28 -
 29
29 -
 30
30 -
 31
31 -
 32
32 -
 33
33 -
 34
34 -
 35
35 -
 36
36 -
37
-
38
-
39
-
40
-
41
-
42
-
43
-
44
-
45
-
46
-
47
-
48
-
49
-
50
-
51
-
52
-
53
-
54
-
55
-
56
-
57
-
58
-
59
-
60
-
61
-
62
-
63
-
64
-
65
-
66
-
67
-
68
-
69
-
70
-
71
-
72
-
73
-
74
-
75
-
76
-
77
-
78
-
79
-
80
-
81
-
82
-
83
-
84
-
85
-
86
-
87
-
88
-
89
-
90
-
91
-
92
-
93
-
94
-
95
-
96
-
97
-
98
-
99
-
100
-
101
-
102
-
103
-
104
 |
 |