Archos 500705 User Manual - Page 2
Where is the recording saved?
 |
UPC - 690590507050
View all Archos 500705 manuals
Add to My Manuals
Save this manual to your list of manuals |
Page 2 highlights
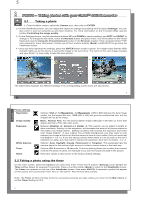
3 Video recording settings Resolution Options: VGA or Optimal. Optimal (448 x 336) will give the smoothest image quality, with the smallest file size. VGA (640 x 480) will give sharper images, which are less smooth during fast moving scenes. However, the file size is larger. Bitrate Options: Low, Medium or High. This setting determines the level of compression of the recorded video file. A higher bitrate will result in a smoother-looking video, but will also require more storage space. The default Medium will be appropriate for most situations. Exposure Between Brighter +2, Normal and Darker -2. This permits you to adjust to bright or dark conditions. Setting it in the negatives, will decrease the amount of picture exposure and make your image darker. Setting it positive will increase the exposure and make your image brighter. If your subject has a bright background, you may want to over expose your image a little bit so that the person's face is more visible, thus you would set it to Brighter +1 or +2. If you are recording a video where there is a lot of snow or the sun's reflection on water, you may want to reduce the exposure, thus set it to Darker -1 or -2. White balance Options: Auto, Daylight, Cloudy, Fluorescent or Tungsten. This parameter lets the camera adjust to the ambient light source in order to record colors in the best way. Source Options: Microphone or Line-in. The default audio source for a video recording is the built-in microphone. You can use a line level audio source for special recording situations and enter the source audio through the multiconnect adaptor line-in jack. Sampling Options: 32 kHz or 48 kHz. The sampling rate refers to the audio track of your recording. A higher sampling rate makes the audio sound better, but will result in a larger file size. 1.2 Where is the recording saved? The default location for video recordings is the folder called Video. If you click on the Video icon in the main menu, you will go to this folder. Notice that the right Function button in the Video Browser screen is labeled Record. Each time you use this button to record a video instead of going through the VideoCorder icon on the main menu, you set the recording default location to the current folder. For example, let's say you have a folder called /Video/ Holiday. If you go to this folder and then make a recording using the right Function button Record, you will set the default record location to this folder. Now, each time you use the VideoCorder icon to start a recording, your 3 4 recording will be saved in the folder /Video/Holiday. When pressing the ESC/STOP button from the pre-recording screen, you will be taken to the current default recording folder so you can directly view your recording. English 4
-
 1
1 -
 2
2 -
 3
3 -
 4
4
 |
 |