Asus A7000-X/T/32M English edition VGA card software installation guide, versi - Page 16
Browse, Drives, Folders, WIN9xME, File name, Update Driver Warning, Finish, Standard Display Adapter
 |
View all Asus A7000-X/T/32M manuals
Add to My Manuals
Save this manual to your list of manuals |
Page 16 highlights
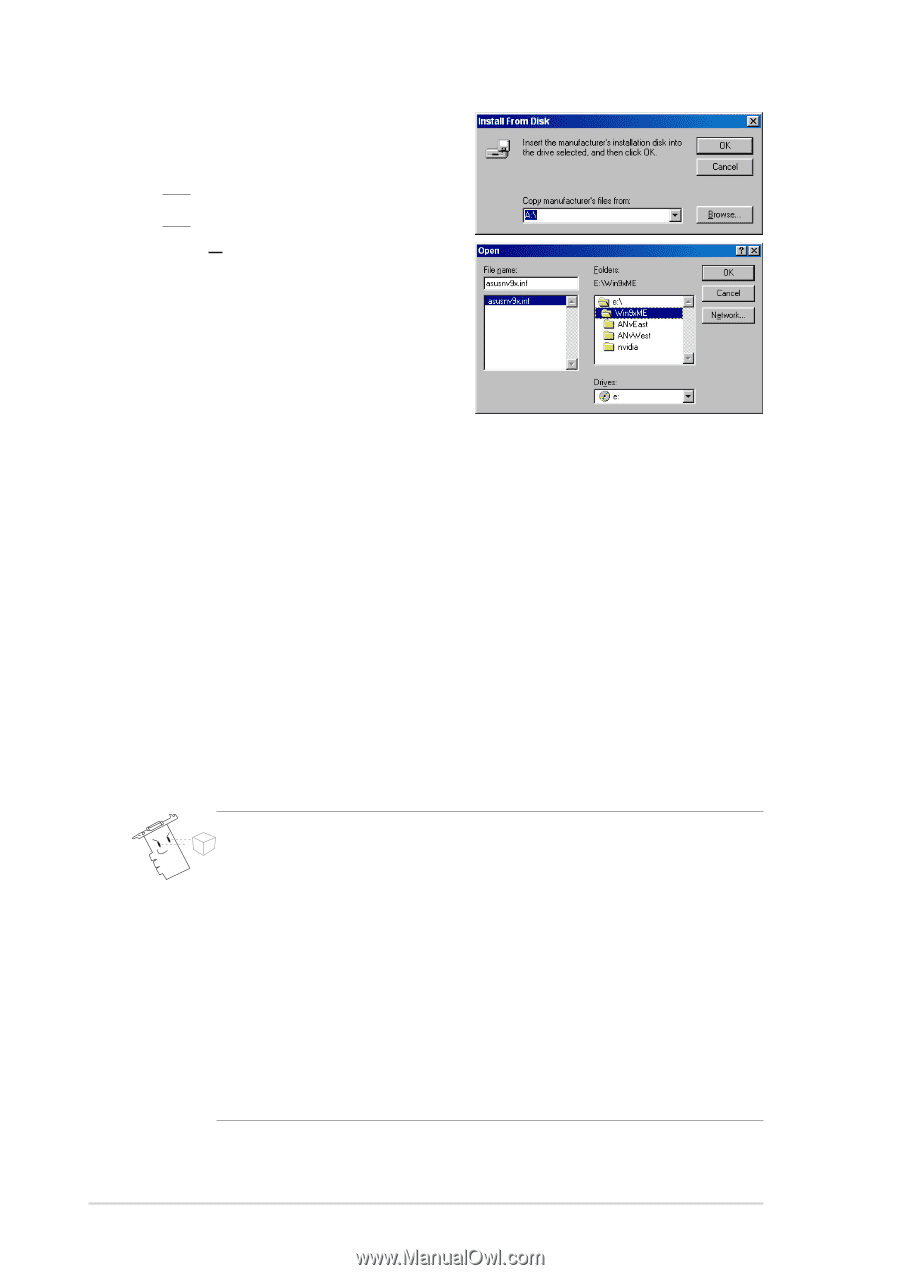
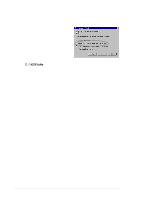
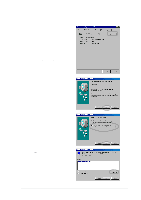
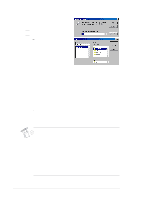
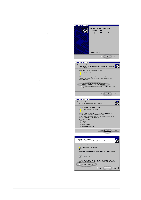
7. Type the location of the ASUSNV9X.INF file (WIN9X folder) in the text box then click OK. OR Click Browse to search in the available drives. 7.a From the Open dialog box click the Drives box to display a list of available drives, select your CD-ROM drive. 7.b From the Folders box, double-click the WIN9xME folder and select ASUSNV9X.INF in the File name box. 8. From the Update Driver Warning box, click Yes to confirm the setting up of the ASUS enhanced display drivers. 9. Follow the succeeding screen instructions. 10. When Setup has finished installing all the necessary files to your computer, click Finish. 11. When you are returned to the Standard Display Adapter (VGA) Properties dialog box, click Close. 12. In the Display Properties box, click Close. 13. When Setup has finished installing all the necessary files to your computer, it prompts you to restart your computer. Click OK. • The quick setup program works only when the primary display detected is an ASUS graphics card. • For optimum performance: - Make sure the DMA mode is enabled when using IDE DMA 33/ 66/100/133 hard disk drives. To set parameters, click on Start-> Control Panel->System->Device Manager->Disk Drives-> Properties->Settings->Options->DMA. - Run the Disk Defragmenter (defrag.exe), especially when the hard disk is almost full. • Make sure that the system power supply can provide the power requirement of the graphics card. 8
-
 1
1 -
2
-
3
-
4
-
5
-
6
-
7
-
8
-
9
-
10
-
 11
11 -
 12
12 -
 13
13 -
 14
14 -
 15
15 -
 16
16 -
 17
17 -
 18
18 -
 19
19 -
 20
20 -
 21
21 -
22
-
23
-
24
-
25
-
26
-
27
-
28
-
29
-
30
-
31
-
32
-
33
-
34
 |
 |