Asus A7V600 SE Motherboard DIY Troubleshooting Guide - Page 41
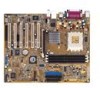
ASUS A7V600 SE Motherboard
 |
View all Asus A7V600 SE manuals
Add to My Manuals
Save this manual to your list of manuals |
Page 41 highlights
5. At the prompt, "Please Enter File Name for NEW BIOS: _", type in the BIOS file name that you downloaded from the ASUS website, then press . EZ Flash will automatically access drive A to look for the file name that you typed. When found, the following message appears on screen. If you accidentally typed in a wrong BIOS file name, the error message, "WARNING! File not found." appears. Press to remove the message, then type in the correct file name. Press . 6. At the query prompt, type Y to continue with the update process. Pressing N exits the EZ Flash screen and reboots the system without updating the BIOS. The following prompts appear if you typed Y. [BIOS Information in File] BIOS Version: A7V600 SE Boot Block WARNING! Continue to update the BIOS (Y/N)? _ 7. Press Y for both items to completely update the main BIOS area and the boot block area. Flash Memory: SST 49LF004 1. Update Main BIOS area 2. Update Boot Block area (Y/N)? _ (Y/N)? _ DO NOT shutdown or reset the system while updating the BIOS boot block area! Doing so may cause system boot failure. 8. When the update process is done, the message, "Press a key to reboot" appears. Press any key to reboot the system with the new BIOS. The BIOS information in the above screen is for reference only. What you see on your screen may not be exactly the same as shown. ASUS A7V600 SE Motherboard 2-3
-
 1
1 -
2
-
3
-
4
-
5
-
6
-
7
-
8
-
9
-
10
-
11
-
12
-
13
-
14
-
15
-
16
-
17
-
18
-
19
-
20
-
21
-
22
-
23
-
24
-
25
-
26
-
27
-
28
-
29
-
30
-
31
-
32
-
33
-
34
-
35
-
 36
36 -
 37
37 -
 38
38 -
 39
39 -
 40
40 -
 41
41 -
 42
42 -
 43
43 -
 44
44 -
 45
45 -
 46
46 -
47
-
48
-
49
-
50
-
51
-
52
-
53
-
54
-
55
-
56
-
57
-
58
-
59
-
60
-
61
-
62
-
63
-
64
-
65
-
66
-
67
-
68
-
69
-
70
-
71
-
72
-
73
-
74
-
75
-
76
-
77
-
78
-
79
-
80
-
81
-
82
-
83
-
84
 |
 |
