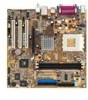
Asus A7V8X-MX SE A7V8X-MX SE User's Manual - Page 34
CrashFree BIOS feature
 |
View all Asus A7V8X-MX SE manuals
Add to My Manuals
Save this manual to your list of manuals |
Page 34 highlights
Updating the BIOS using a bootable floppy disk 1. Boot from the floppy disk. 2. At the "A:\" prompt, type "C:\" and then press . 3. At the "C:\" prompt, type "AWDFLASH/ BIOSFILENAME" and then . For example: "AWDFLASH/ aw0702.bin" The AWDFLASH screen appears. 4. Follow steps 5 to 7 in "2.1.2 Using the Award BIOS Flash Utility." 2.1.3 CrashFree BIOS feature The CrashFree BIOS feature allows you to boot the computer from a floppy disk and update the BIOS in case the original BIOS fails or gets corrupted. 1. You must have a bootable floppy disk ready before updating the BIOS. 2. The bootable floppy disk could be the one that you created following the procedure in section 2.1.1, and should contain the AWDFLASH.EXE utility. 3. If the BIOS fails (ROM data or codes are corrupted), a message appears during POST to indicate the failure. To update the BIOS: 1. Turn on the computer, and when prompted, place the bootable floppy disk to the floppy drive. 2. Follow the BIOS update procedure in section "2.1.2 Using the Award BIOS Flash Utility." To use the CrashFree BIOS feature on this motherboard, install a VGA card into one of the expansion slots before rebooting the computer. On motherboards with onboard VGA, such as the A7V8X-MX SE, you will not see the screen display when the BIOS crashes even if you reboot the computer. 2-4 Chapter 2: BIOS information
-
 1
1 -
2
-
3
-
4
-
5
-
6
-
7
-
8
-
9
-
10
-
11
-
12
-
13
-
14
-
15
-
16
-
17
-
18
-
19
-
20
-
21
-
22
-
23
-
24
-
25
-
26
-
27
-
28
-
 29
29 -
 30
30 -
 31
31 -
 32
32 -
 33
33 -
 34
34 -
 35
35 -
 36
36 -
 37
37 -
 38
38 -
 39
39 -
40
-
41
-
42
-
43
-
44
-
45
-
46
-
47
-
48
-
49
-
50
-
51
-
52
-
53
-
54
-
55
-
56
-
57
-
58
-
59
-
60
-
61
-
62
-
63
-
64
 |
 |
