Asus ASUSPRO E520 E520 Users Manual English - Page 9
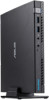
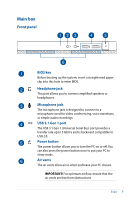
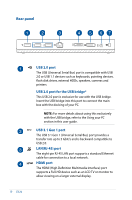
Main box, Front panel
 |
View all Asus ASUSPRO E520 manuals
Add to My Manuals
Save this manual to your list of manuals |
Page 9 highlights
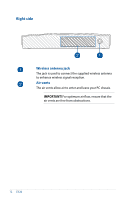
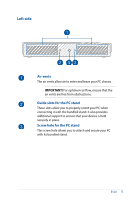
Main box Front panel BIOS key Before booting up the system, insert a straightened paper clip into this hole to enter BIOS. Headphone jack This port allows you to connect amplified speakers or headphones. Microphone jack The microphone jack is designed to connect to a microphone used for video conferencing, voice narrations, or simple audio recordings. USB 3.1 Gen 1 port The USB 3.1 Gen 1 (Universal Serial Bus) port provides a transfer rate up to 5 Gbit/s and is backward compatible to USB 2.0. Power button The power button allows you to turn the PC on or off. You can also press the power button once to put your PC to sleep mode. Air vents The air vents allow air to enter and leave your PC chassis. IMPORTANT! For optimum air flow, ensure that the air vents are free from obstructions. E520 9
-
 1
1 -
2
-
3
-
 4
4 -
 5
5 -
 6
6 -
 7
7 -
 8
8 -
 9
9 -
 10
10 -
 11
11 -
 12
12 -
 13
13 -
 14
14 -
15
-
16
-
17
-
18
-
19
-
20
-
21
-
22
-
23
-
24
-
25
-
26
-
27
-
28
-
29
-
30
-
31
-
32
-
33
-
34
-
35
-
36
-
37
-
38
-
39
-
40
-
41
-
42
-
43
-
44
-
45
-
46
-
47
-
48
-
49
-
50
 |
 |
