Asus CAX21 Series User Guide - Page 1
Asus CAX21 Manual
 |
View all Asus CAX21 manuals
Add to My Manuals
Save this manual to your list of manuals |
Page 1 highlights
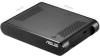
CAX21 User Guide Copyright © 2015 ASUSTeK COMPUTER INC. All Rights Reserved. First Edition February 2015 Copyright © 2015 ASUSTeK COMPUTER INC. All Rights Reserved. No part of this manual, including the products and software described in it, may be reproduced, transmitted, transcribed, stored in a retrieval system, or translated into any language in any form or by any means, except documentation kept by the purchaser for backup purposes, without the express written permission of ASUSTeK COMPUTER INC. ("ASUS"). Product warranty or service will not be extended if: (1) the product is repaired, modified or altered, unless such repair, modification of alteration is authorized in writing by ASUS; or (2) the serial number of the product is defaced or missing. ASUS PROVIDES THIS MANUAL "AS IS" WITHOUT WARRANTY OF ANY KIND, EITHER EXPRESS OR IMPLIED, INCLUDING BUT NOT LIMITED TO THE IMPLIED WARRANTIES OR CONDITIONS OF MERCHANTABILITY OR FITNESS FOR A PARTICULAR PURPOSE. IN NO EVENT SHALL ASUS, ITS DIRECTORS, OFFICERS, EMPLOYEES OR AGENTS BE LIABLE FOR ANY INDIRECT, SPECIAL, INCIDENTAL, OR CONSEQUENTIAL DAMAGES (INCLUDING DAMAGES FOR LOSS OF PROFITS, LOSS OF BUSINESS, LOSS OF USE OR DATA, INTERRUPTION OF BUSINESS AND THE LIKE), EVEN IF ASUS HAS BEEN ADVISED OF THE POSSIBILITY OF SUCH DAMAGES ARISING FROM ANY DEFECT OR ERROR IN THIS MANUAL OR PRODUCT. SPECIFICATIONS AND INFORMATION CONTAINED IN THIS MANUAL ARE FURNISHED FOR INFORMATIONAL USE ONLY, AND ARE SUBJECT TO CHANGE AT ANY TIME WITHOUT NOTICE, AND SHOULD NOT BE CONSTRUED AS A COMMITMENT BY ASUS. ASUS ASSUMES NO RESPONSIBILITY OR LIABILITY FOR ANY ERRORS OR INACCURACIES THAT MAY APPEAR IN THIS MANUAL, INCLUDING THE PRODUCTS AND SOFTWARE DESCRIBED IN IT. Products and corporate names appearing in this manual may or may not be registered trademarks or copyrights of their respective companies, and are used only for identification or explanation and to the owners' benefit, without intent to infringe. Safety Information ● Before setting up the client box, carefully read all the documentation that came with the package. ● To prevent fire or shock hazard, never expose the monitor to rain or moisture. ● Never try to open the box cabinet. The dangerous high voltages inside the box may result in serious physical injury. ● If the power supply is broken, do not try to fix it by yourself. Contact a qualified service technician or your retailer. ● Before using the product, make sure all cables are correctly connected and the power cables are not damaged. If you detect any damage, contact your dealer immediately. ● Slots and openings on the back or top of the cabinet are provided for ventilation. Do not block these slots. Never place this product near or over a radiator or heat source unless proper ventilation is provided. ● The client box should be operated only from the type of power source indicated on the label. If you are not sure of the type of power supply to your home, consult your dealer or local power company. ● Use the appropriate power plug which complies with your local power standard. ● Do not overload power strips and extention cords. Overloading can result in fire or electric shock. ● Avoid dust, humidity, and temperature extremes. Do not place the box in any area where it may become wet. Place the box on a stable surface. ● Unplug the unit during a lightning storm or if it will not be used for a long period of time. This will protect the box from damage due to power surges. ● Never push objects or spill liquid of any kind into the slots on the box cabinet. ● The socket-outlet shall be installed near the equipment and shall be easily accessible. ● If you encounter technical problems with the client box, contact a qualified service technician or your retailer. Client Box introduction Front of the box Side of the box Power key Micro SD slot Kensington lock Microphone input Earphone-out VGA HDMI RJ45 Power-in jack USB connector Client Box introduction Rear of the box Wall mount bracket (Optional) Hanging hole Wall mount 100x100mm Wall mount 75x75mm Cleats Remote Control 1. Power button - Press and hold the button to turns the box on/off. - Press the button once to put the box in sleep mode. 2. OK button - Confirms the selection. - Enters the submenu. 3. Home button Goes back to the main page. 4. Volume Up Increases the volume level. 5. Volume Down 6. Setting button 7. Back button Decreases the volume level. Turns the setting page on/off. Goes back to the previous Page. 8. Four Directional - Selects a menu item select - Adjusts the setting 9. Mute button Mutes the audio. Press it again to disable the mute Function. Installing remote control battery 1. Open the battery compartment cover. 2. Remove the insulator and insert the battery with the positive(+) symbol facing up. 3. Refit the battery compartment cover. The incorrect use of batteries can result in leaks or bursting. Be sure to follow the instruction.
-
 1
1 -
 2
2
 |
 |
