Asus CUSL2-C BP CUSL2-C BP User Manual - Page 82
Personalized Boot Logo
 |
View all Asus CUSL2-C BP manuals
Add to My Manuals
Save this manual to your list of manuals |
Page 82 highlights
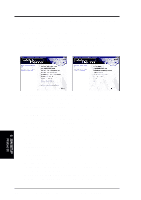
5. SOFTWARE SETUP 5.4 Personalized Boot Logo The CUSL2-C Black Pearl comes with an exciting feature to help you customize your new personal computer: LOGO.EXE. This DOS software helps you create a selection of colorful, personalized boot screens. ASUS supplies you with the executable software, LOGO.EXE, along with a sample image library of boot screens in bitmap (BMP) format. (See the Readme file in the Logo folder on the Support CD for a list of file names.) NOTE: It is advisable, but not necessary, to back up your system BIOS to a bootable floppy disk before using LOGO to modify your boot screen; (See section 4.1 in BIOS Setup.) Also, ensure that the Full Screen Logo is Enabled in the BIOS Boot Menu; (See section 4.6 in BIOS Setup.) 1. To set up a new Personalized Boot Logo, browse the Support CD and copy these three components to the windows directory: LOGO.EXE; AFLASH.EXE; one or more BMP files in 640 x 480 pixel, 16-color format. 2. Then go to the Shut Down Menu and select: "Restart in DOS Mode." From DOS, run AFLASH: C:\WINDOWS>AFLASH 3. In AFLASH, select [1] and save the existing system BIOS file with a new name, for example: CSCB1016.AWD. Exit AFLASH to DOS. 4. To set up a new boot screen, run LOGO from DOS. Both the BIOS file name and the BMP file name must follow in the command line: C:\WINDOWS>LOGO CSCB1016.AWD SEA2.BMP 5. Press to save the image with the BIOS file. 6. Run AFLASH again. Select [2] and flash the updated BIOS file, in this case, CSCB1016.AWD, to the ROM. 7. Reboot your computer: press . The new boot screen that you selected will now appear. 8. If you wish to select a new BMP file, rerun the process beginning at Step # 4 above. BMP files must be in the same directory as LOGO.EXE. Of course, you may wish to create an original boot image. Use your favorite photo editor to save an image as a 640 x 480 pixel, 16-color BMP file. Choose a file name for the image with eight digits and characters recognizable in the DOS environment. 5. S/W SETUP Windows 98 82 ASUS CUSL2-C Black PearlUser's Manual
-
 1
1 -
2
-
3
-
4
-
5
-
6
-
7
-
8
-
9
-
10
-
11
-
12
-
13
-
14
-
15
-
16
-
17
-
18
-
19
-
20
-
21
-
22
-
23
-
24
-
25
-
26
-
27
-
28
-
29
-
30
-
31
-
32
-
33
-
34
-
35
-
36
-
37
-
38
-
39
-
40
-
41
-
42
-
43
-
44
-
45
-
46
-
47
-
48
-
49
-
50
-
51
-
52
-
53
-
54
-
55
-
56
-
57
-
58
-
59
-
60
-
61
-
62
-
63
-
64
-
65
-
66
-
67
-
68
-
69
-
70
-
71
-
72
-
73
-
74
-
75
-
76
-
 77
77 -
 78
78 -
 79
79 -
 80
80 -
 81
81 -
 82
82 -
 83
83 -
 84
84 -
 85
85 -
 86
86 -
 87
87 -
88
-
89
-
90
-
91
-
92
-
93
-
94
-
95
-
96
-
97
-
98
-
99
-
100
-
101
-
102
-
103
-
104
-
105
-
106
 |
 |
