Asus E3-PRO V5 Windows RAID Setup Guide for C232 series.English
Asus E3-PRO V5 Manual
 |
View all Asus E3-PRO V5 manuals
Add to My Manuals
Save this manual to your list of manuals |
Asus E3-PRO V5 manual content summary:
- Asus E3-PRO V5 | Windows RAID Setup Guide for C232 series.English - Page 1
2016 Windows® RAID Setup Guide for C232 Series platform Configuring RAID in Windows® 7 • Before you proceed, ensure that you create a Windows® 7 bootable USB storage device via EZ Installer V1.02.01. • You can get EZ Installer V1.02.01 from the support DVD or from the ASUS Support site at: http - Asus E3-PRO V5 | Windows RAID Setup Guide for C232 series.English - Page 2
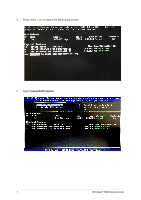
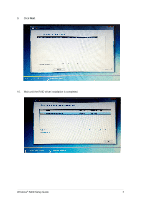
3. Press + to launch the RAID setup screen. 4. Select Create RAID Volume. 2 Windows® RAID Setup Guide - Asus E3-PRO V5 | Windows RAID Setup Guide for C232 series.English - Page 3
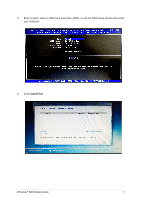
5. Enter a name, select a RAID level and press to exit the RAID setup screen and restart your computer. 6. Click Load Driver. Windows® RAID Setup Guide 3 - Asus E3-PRO V5 | Windows RAID Setup Guide for C232 series.English - Page 4
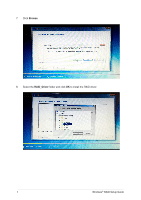
7. Click Browse. 8. Select the RAID_Driver folder and click OK to install the RAID driver. 4 Windows® RAID Setup Guide - Asus E3-PRO V5 | Windows RAID Setup Guide for C232 series.English - Page 5
9. Click Next. 10. Wait until the RAID driver installation is completed. Windows® RAID Setup Guide 5 - Asus E3-PRO V5 | Windows RAID Setup Guide for C232 series.English - Page 6
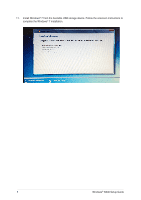
11. Install Windows® 7 from the bootable USB storage device. Follow the onscreen instructions to complete the Windows® 7 installation. 6 Windows® RAID Setup Guide
-
 1
1 -
 2
2 -
 3
3 -
 4
4 -
 5
5 -
 6
6
 |
 |
Windows
®
RAID Setup Guide
1
Windows
®
RAID Setup Guide for C232 Series platform
Configuring RAID in Windows
®
7
•
Before you proceed, ensure that you create a Windows
®
7 bootable USB storage
device via EZ Installer V1.02.01.
•
You can get EZ Installer V1.02.01 from the support DVD or from the ASUS
Support site at: http://www.asus.com.
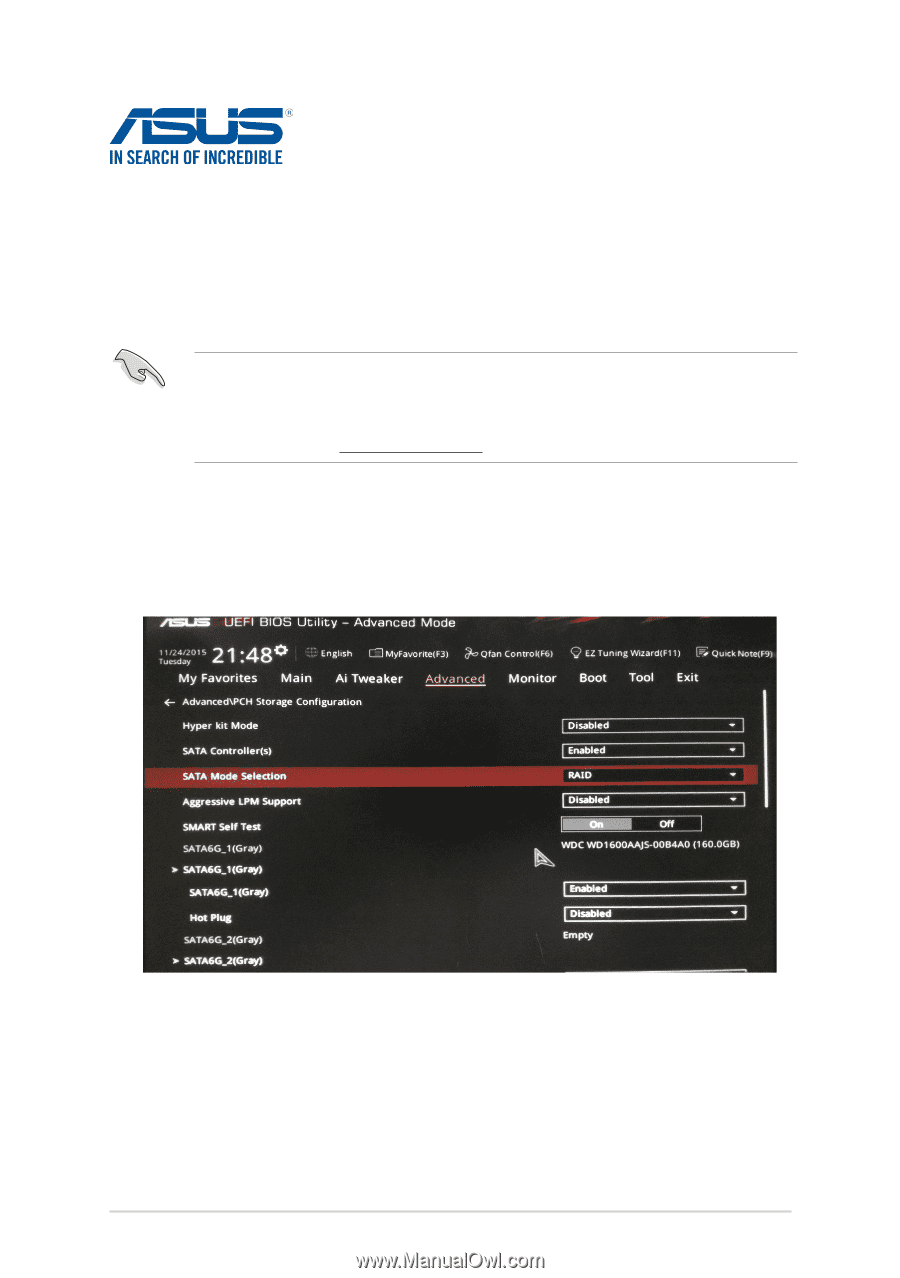
1.
Connect the Windows
®
7 bootable USB storage device to the USB port.
2.
Press <Delete> or <F2> to enter BIOS during POST. Press <F7> to go to
Advanced Mode
>
Advanced
>
PCH Storage Configuration
>
SATA Mode Selection
. Select
RAID
and press
<F10> to save changes and restart your computer.
DE168
First Edition
January 2016