Asus EB1033 User's Manual for English Edition - Page 20
Place your PC onto the VESA mount noting the correct, alignment
 |
View all Asus EB1033 manuals
Add to My Manuals
Save this manual to your list of manuals |
Page 20 highlights
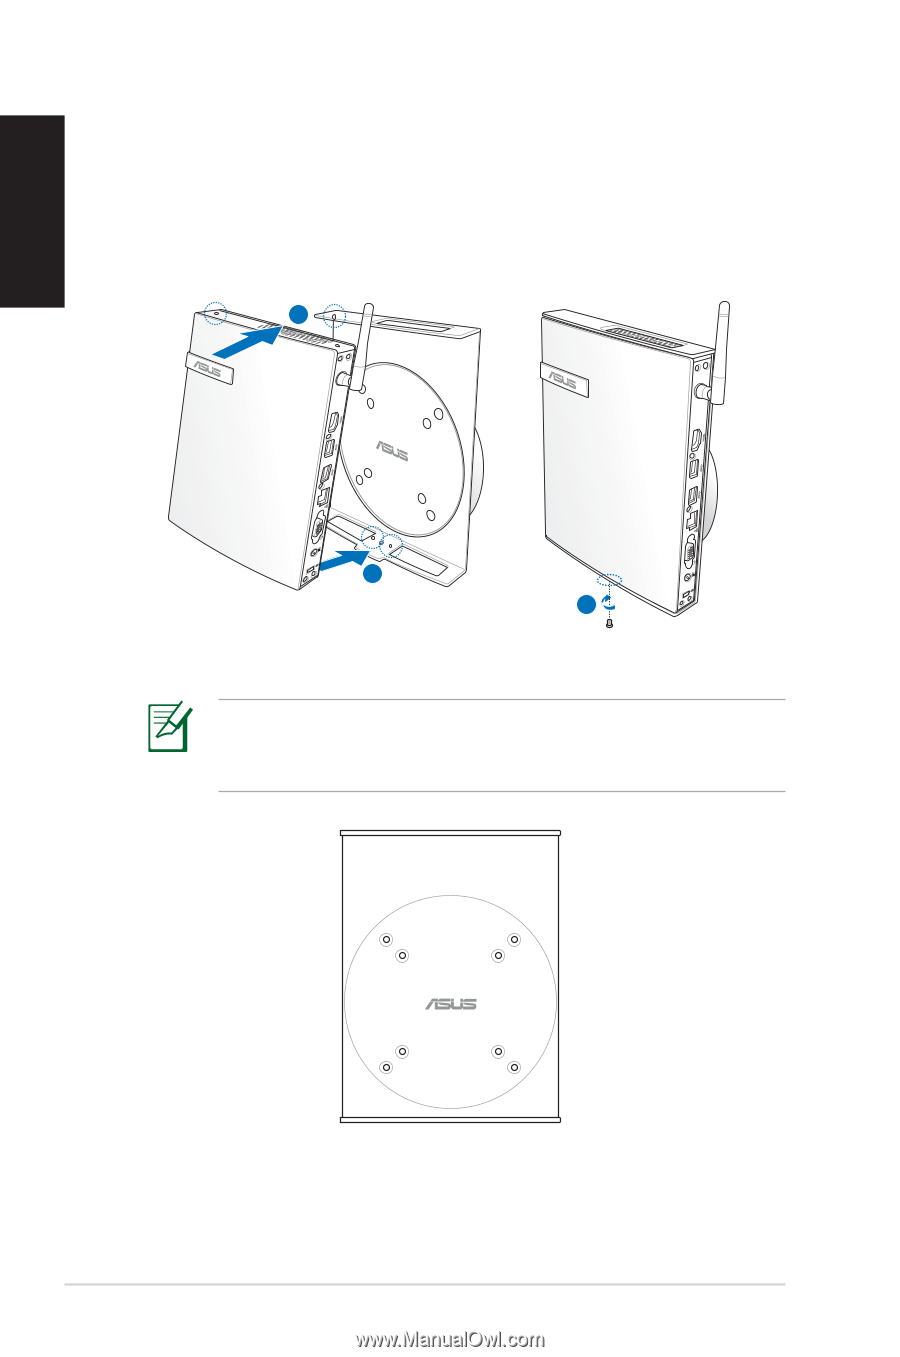
English 2. Place your PC onto the VESA mount noting the correct alignment, and then secure the PC to the VESA mount from below with the stand screw. 1 2 3 Make sure that the ASUS trademark on the rotation wheel of the VESA mount is set to its customary position when putting in the PC so that the machine can rotate properly. 1 2 20 EB1030/ EB1031/ EB1033
-
 1
1 -
2
-
3
-
4
-
5
-
6
-
7
-
8
-
9
-
10
-
11
-
12
-
13
-
14
-
 15
15 -
 16
16 -
 17
17 -
 18
18 -
 19
19 -
 20
20 -
 21
21 -
 22
22 -
 23
23 -
 24
24 -
 25
25 -
26
-
27
-
28
-
29
-
30
-
31
-
32
-
33
-
34
 |
 |
20
EB1030/ EB1031/ EB1033
English
2.
Place your PC onto the VESA mount noting the correct
alignment, and then secure the PC to the VESA mount from
below with the stand screw.
2
1
3
Make sure that the ASUS trademark on the rotation wheel of
the VESA mount is set to its customary position when putting
in the PC so that the machine can rotate properly.