Asus K8V K8V User Manual - Page 83
Promise, RAID configurations - driver windows 7
 |
View all Asus K8V manuals
Add to My Manuals
Save this manual to your list of manuals |
Page 83 highlights
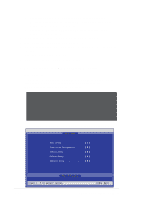
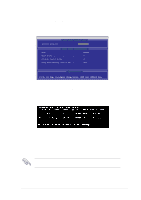
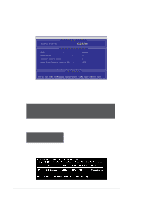
3.5 Promise® RAID configurations The motherboard includes the Promise® PDC20376 controller chipset to support Redundant Array of Independent Disks (RAID) configurations. Using two Serial ATA hard disks on the PRI_SATA / SEC_SATA interfaces, and two ATA133 hard disks on the PRI_RAID interface, you may set up RAID0, RAID1, RAID0+1, and Multi-RAID configurations. Use the MBFastTrak376™ BIOS and the FastBuild™ utility to configure a disk array. RAID 0 (called data striping) optimizes two identical hard disk drives to read and write data in parallel, interleaved stacks. Two hard disks perform the same work as a single drive but at a sustained data transfer rate, double that of a single disk alone, thus improving data access and storage. RAID 1 (called data mirroring) copies and maintains an identical image of data from one drive to a second drive. If one drive fails, the disk array management software directs all applications to the surviving drive as it contains a complete copy of the data in the other drive. This RAID configuration provides data protection and increases fault tolerance to the entire system. • If you use either Windows® XP/2000 operating system (OS), copy first the Promise FastTrak 376 Driver from the support CD to a floppy disk before creating RAID configurations. • The chipset supports RAID 0 (striping) or RAID 1 (mirroring) for master drives only. • The Promise PDC20376 chipset only supports one Master HDD on the Primary RAID connector. HDDs set to Slave mode and ATAPI devices such as CD-ROMs, DVD-ROMs, etc. are not supported. • Refer to the FastTrak 376 Quick Start Guide and SATA Quick Start Guide in the support CD for detailed information on RAID configurations under different operating systems. 3.5.1 Install the hard disks The PDC20376 chipset supports Ultra ATA/133/100/66 hard disk drives. For optimal performance, install identical drives of the same model and capacity when creating a disk array. • If you are creating a RAID 0 (striping) array for perfomance, use two new drives. • If you are creating a RAID 1 (mirroring) array for protection, you can use two new drives or use an existing drive and a new drive (the new drive must be of the same size or larger than the existing drive). Follow these steps to install the hard disks for RAID configuration. 1. Set the jumpers of each hard disk as Master/Slave. 2. Install the hard disks into the drive bays. 3. Connect the HDD cables. These connection options are available for creating a RAID 0 or RAID 1 array: ASUS K8V motherboard 3-13
-
 1
1 -
2
-
3
-
4
-
5
-
6
-
7
-
8
-
9
-
10
-
11
-
12
-
13
-
14
-
15
-
16
-
17
-
18
-
19
-
20
-
21
-
22
-
23
-
24
-
25
-
26
-
27
-
28
-
29
-
30
-
31
-
32
-
33
-
34
-
35
-
36
-
37
-
38
-
39
-
40
-
41
-
42
-
43
-
44
-
45
-
46
-
47
-
48
-
49
-
50
-
51
-
52
-
53
-
54
-
55
-
56
-
57
-
58
-
59
-
60
-
61
-
62
-
63
-
64
-
65
-
66
-
67
-
68
-
69
-
70
-
71
-
72
-
73
-
74
-
75
-
76
-
77
-
 78
78 -
 79
79 -
 80
80 -
 81
81 -
 82
82 -
 83
83 -
 84
84 -
 85
85 -
 86
86 -
 87
87 -
 88
88 -
89
-
90
-
91
-
92
 |
 |
