Asus MAXIMUS IV EXTREME User Manual - Page 101
Vcore MOS volt. Control [Auto], Load-Line Calibration [Auto], VCore Switching Freq [Auto] - specs
 |
View all Asus MAXIMUS IV EXTREME manuals
Add to My Manuals
Save this manual to your list of manuals |
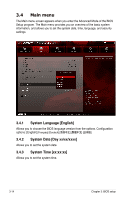
Page 101 highlights
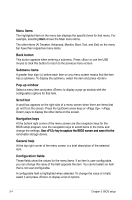
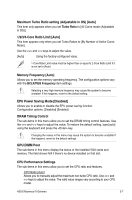
Vcore MOS volt. Control [Auto] Use the and keys to adjust the value. Configuration options: [Auto] [6V] [6.5V] [7V] [7.5V] [8V] [8.5V] [9V] [9.5V] [10V] [10.5V] Load-Line Calibration [Auto] Load-line is defined by Intel VRM spec and affects CPU voltage. The CPU working voltage will decrease proportionally to CPU loading. Higher load-line calibration would get higher voltage and better overclocking performance, but increase the CPU and VRM thermal. From the Regular to Extreme mode allows you to adjust the voltage range from 0% to 100% to boost the system performance. Configuration options: [Auto] [0%] [25% (Suitable for 3.6G-4.2G)] [High] [50% (Suitable for 4.2G-4.8G)] [75% (Suitable for 4.8G-5.2G)] [100% (Suitable for 5.2G-6.0G)] The actual performance boost may vary depending on your CPU specification. VCore Switching Freq [Auto] Switching frequency will affect the VRM transient response and component thermal. Setting a higher frequency gets faster transient response. [Auto] Allows you to enable or disable the Spread Spectrum item. [Manual] Allows you to manually set the frequency with a 10KHz interval. VRM Fixed Frequency Mode [xxx] This item appears only when you set the VCore Switching Freq item to [Manual] and allows you to set a fixed VRM frequency. Use the and keys to adjust the value. The values range from 250KHz to 1100KHz with a 50KHz interval. Phase Control [Optimized] Phase number is the number of working VRM phase. Increasing phase number under heavy system loading to get more transient and better thermal performance. Reducing phase number under light system loading to increase VRM efficiency [Standard] [Optimized] [Extreme] [Manual Adjustment] Proceeds phase control depending on the CPU loading. Loads the ASUS optimized phase tuning profile. Proceeds the full phase mode. Allows manual adjustment. When this item is set to [Extreme], the CPU Voltage is set to [Manual] and the voltage is set to [1.2V] automatically. ASUS Maximus IV Extreme 3-9
-
 1
1 -
2
-
3
-
4
-
5
-
6
-
7
-
8
-
9
-
10
-
11
-
12
-
13
-
14
-
15
-
16
-
17
-
18
-
19
-
20
-
21
-
22
-
23
-
24
-
25
-
26
-
27
-
28
-
29
-
30
-
31
-
32
-
33
-
34
-
35
-
36
-
37
-
38
-
39
-
40
-
41
-
42
-
43
-
44
-
45
-
46
-
47
-
48
-
49
-
50
-
51
-
52
-
53
-
54
-
55
-
56
-
57
-
58
-
59
-
60
-
61
-
62
-
63
-
64
-
65
-
66
-
67
-
68
-
69
-
70
-
71
-
72
-
73
-
74
-
75
-
76
-
77
-
78
-
79
-
80
-
81
-
82
-
83
-
84
-
85
-
86
-
87
-
88
-
89
-
90
-
91
-
92
-
93
-
94
-
95
-
 96
96 -
 97
97 -
 98
98 -
 99
99 -
 100
100 -
 101
101 -
 102
102 -
 103
103 -
 104
104 -
 105
105 -
 106
106 -
107
-
108
-
109
-
110
-
111
-
112
-
113
-
114
-
115
-
116
-
117
-
118
-
119
-
120
-
121
-
122
-
123
-
124
-
125
-
126
-
127
-
128
-
129
-
130
-
131
-
132
-
133
-
134
-
135
-
136
-
137
-
138
-
139
-
140
-
141
-
142
-
143
-
144
-
145
-
146
-
147
-
148
-
149
-
150
-
151
-
152
-
153
-
154
-
155
-
156
-
157
-
158
-
159
-
160
-
161
-
162
-
163
-
164
-
165
-
166
-
167
-
168
-
169
-
170
-
171
-
172
-
173
-
174
-
175
-
176
-
177
-
178
-
179
-
180
-
181
-
182
-
183
-
184
-
185
-
186
 |
 |
