Asus N10J User Manual - Page 44
Inserting an optical disc cont., Emergency eject, Removing an optical disc
 |
UPC - 884840316978
View all Asus N10J manuals
Add to My Manuals
Save this manual to your list of manuals |
Page 44 highlights
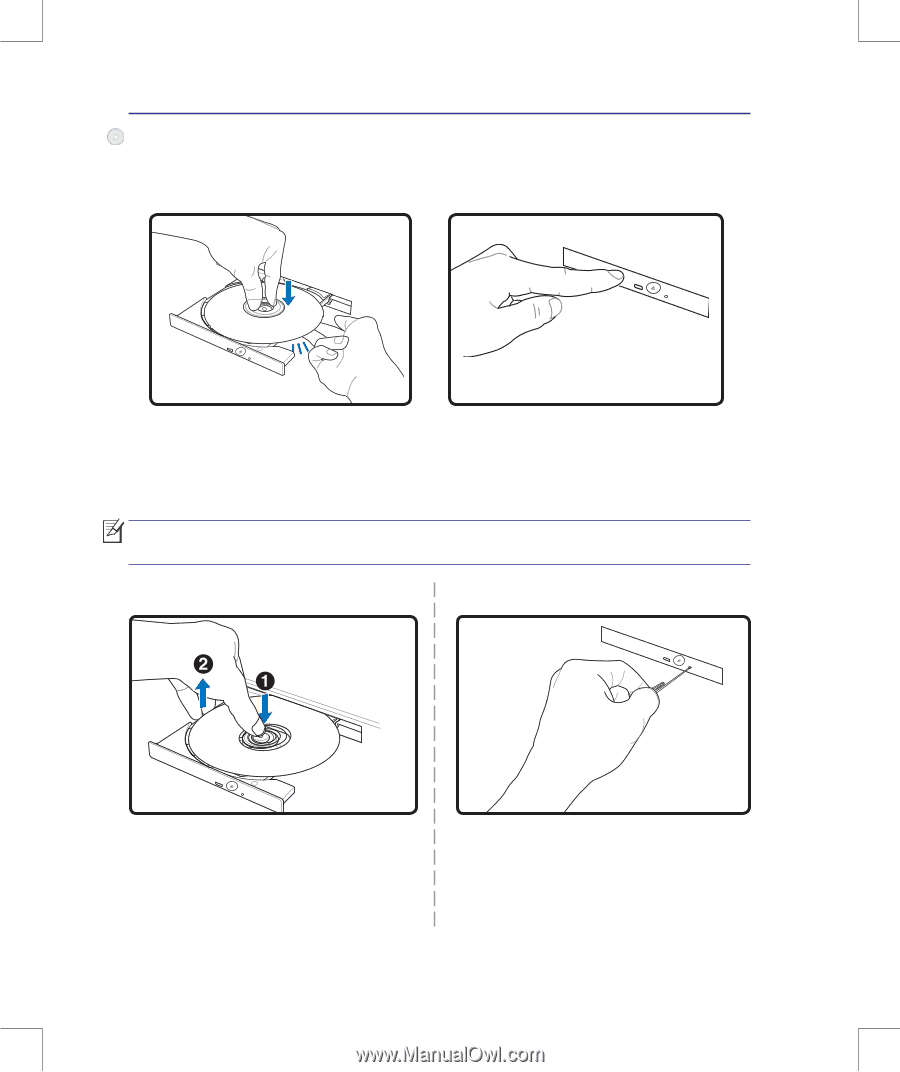
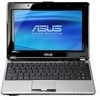
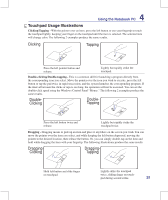
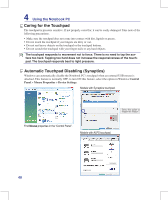
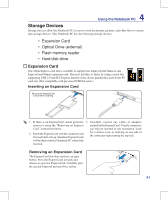
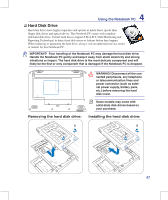
4 Using the Notebook PC Optical Drive (external) Inserting an optical disc (cont.) 3. Hold the disc by the edge and face the disc's printed side up. Push down on both sides of the disc's center until the disc snaps onto the hub. The hub should be higher than the disc when correctly mounted. 4. Slowly push the drive's tray back in. The drive will begin reading the table of contents (TOC) on the disc. When the drive stops, the disc is ready to be used. It is normal to hear as well as feel the CD spinning with great intensity in the CD drive while data is read. Removing an optical disc Emergency eject Actual location will vary by model. Eject the tray and gently pry the edge of the disc upwards at an angle to remove the disc from the hub. 44 The emergency eject is located in a hole on the optical drive and is used to eject the optical drive tray in case the electronic eject does not work. Do not use the emergency eject in place of the electronic eject. Note: Make sure not to stab the activity indicator located in the same area.
-
 1
1 -
2
-
3
-
4
-
5
-
6
-
7
-
8
-
9
-
10
-
11
-
12
-
13
-
14
-
15
-
16
-
17
-
18
-
19
-
20
-
21
-
22
-
23
-
24
-
25
-
26
-
27
-
28
-
29
-
30
-
31
-
32
-
33
-
34
-
35
-
36
-
37
-
38
-
 39
39 -
 40
40 -
 41
41 -
 42
42 -
 43
43 -
 44
44 -
 45
45 -
 46
46 -
 47
47 -
 48
48 -
 49
49 -
50
-
51
-
52
-
53
-
54
-
55
-
56
-
57
-
58
-
59
-
60
-
61
-
62
-
63
-
64
-
65
-
66
-
67
-
68
-
69
-
70
-
71
-
72
-
73
-
74
-
75
-
76
-
77
-
78
-
79
-
80
-
81
-
82
-
83
-
84
-
85
-
86
-
87
-
88
-
89
-
90
-
91
 |
 |