Asus P5GDC-V Deluxe User Manual - Page 31
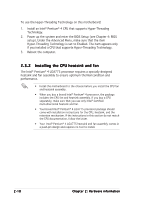
Place the heatsink on top of
 |
View all Asus P5GDC-V Deluxe manuals
Add to My Manuals
Save this manual to your list of manuals |
Page 31 highlights
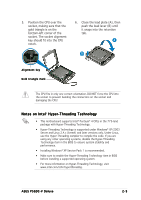
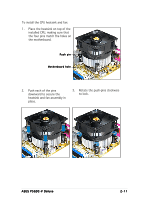
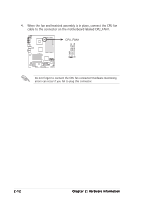
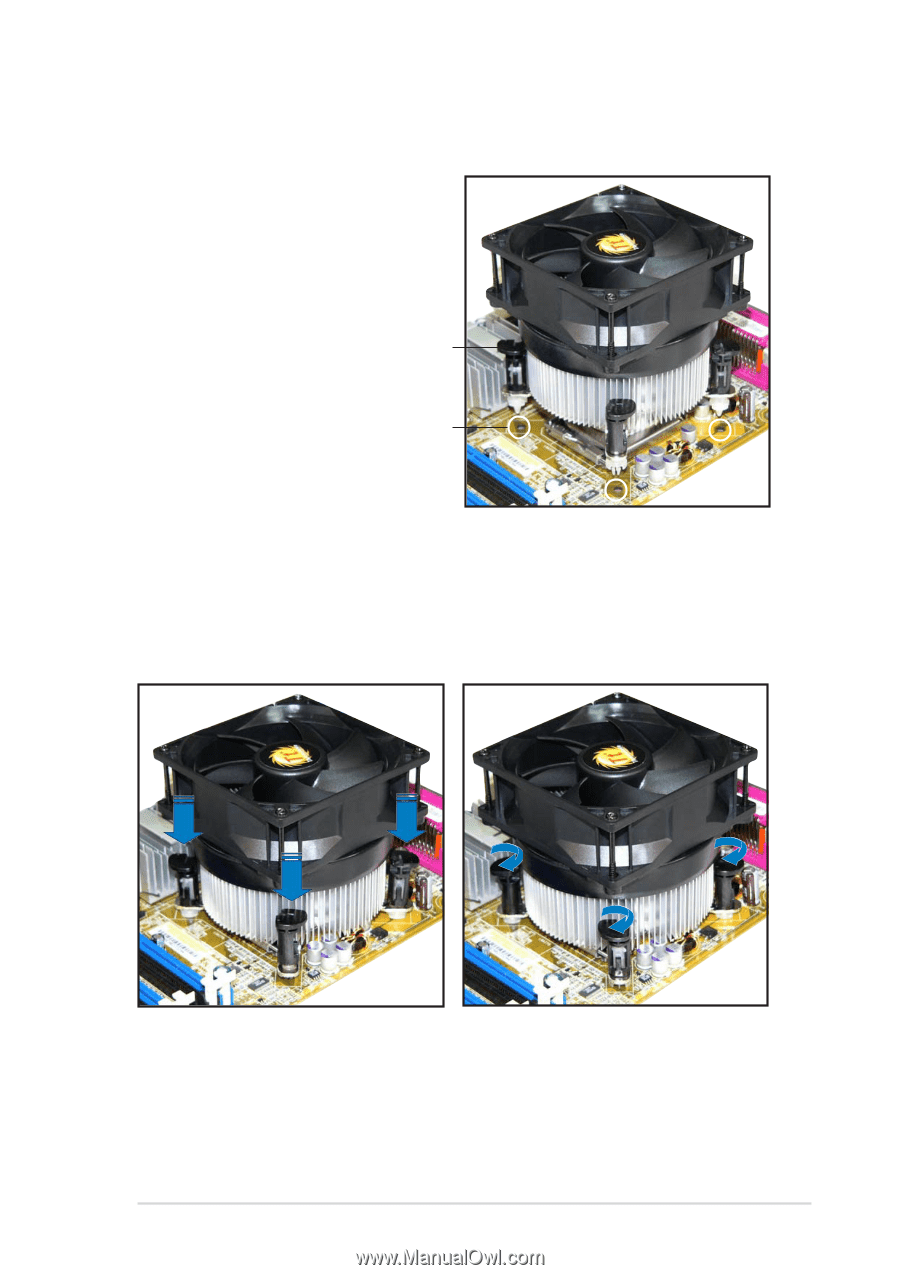
To install the CPU heatsink and fan: 1. Place the heatsink on top of the installed CPU, making sure that the four pins match the holes on the motherboard. Push pin Motherboard hole 2. Push each of the pins downward to secure the heatsink and fan assembly in place. 3. Rotate the push-pins clockwise to lock. ASUS P5GDC-V Deluxe 2-11
-
 1
1 -
2
-
3
-
4
-
5
-
6
-
7
-
8
-
9
-
10
-
11
-
12
-
13
-
14
-
15
-
16
-
17
-
18
-
19
-
20
-
21
-
22
-
23
-
24
-
25
-
 26
26 -
 27
27 -
 28
28 -
 29
29 -
 30
30 -
 31
31 -
 32
32 -
 33
33 -
 34
34 -
 35
35 -
 36
36 -
37
-
38
-
39
-
40
-
41
-
42
-
43
-
44
-
45
-
46
-
47
-
48
-
49
-
50
-
51
-
52
-
53
-
54
-
55
-
56
-
57
-
58
-
59
-
60
-
61
-
62
-
63
-
64
-
65
-
66
-
67
-
68
-
69
-
70
-
71
-
72
-
73
-
74
-
75
-
76
-
77
-
78
-
79
-
80
-
81
-
82
-
83
-
84
-
85
-
86
-
87
-
88
-
89
-
90
-
91
-
92
-
93
-
94
-
95
-
96
-
97
-
98
-
99
-
100
-
101
-
102
-
103
-
104
-
105
-
106
-
107
-
108
-
109
-
110
-
111
-
112
-
113
-
114
-
115
-
116
-
117
-
118
-
119
-
120
-
121
-
122
-
123
-
124
-
125
-
126
-
127
-
128
-
129
-
130
-
131
-
132
-
133
-
134
-
135
-
136
 |
 |
ASUS P5GDC-V Deluxe
ASUS P5GDC-V Deluxe
ASUS P5GDC-V Deluxe
ASUS P5GDC-V Deluxe
ASUS P5GDC-V Deluxe
2-11
2-11
2-11
2-11
2-11
2.
Push each of the pins
downward to secure the
heatsink and fan assembly in
place.
3.
Rotate the push-pins clockwise
to lock.
To install the CPU heatsink and fan:
1.
Place the heatsink on top of the
installed CPU, making sure that
the four pins match the holes on
the motherboard.
Push pin
Push pin
Push pin
Push pin
Push pin
Motherboard hole
Motherboard hole
Motherboard hole
Motherboard hole
Motherboard hole