Asus P5QPL-VM EPU User Manual
Asus P5QPL-VM EPU Manual
 |
View all Asus P5QPL-VM EPU manuals
Add to My Manuals
Save this manual to your list of manuals |
Asus P5QPL-VM EPU manual content summary:
- Asus P5QPL-VM EPU | User Manual - Page 1
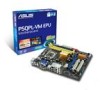
Motherboard P5QPL-VM EPU - Asus P5QPL-VM EPU | User Manual - Page 2
No part of this manual, including the products and software described in it, Inc. ("ASUS"). Product warranty or service will not ASUS HAS BEEN ADVISED OF THE POSSIBILITY OF SUCH DAMAGES ARISING FROM ANY DEFECT OR ERROR IN THIS MANUAL OR PRODUCT. SPECIFICATIONS AND INFORMATION CONTAINED IN THIS MANUAL - Asus P5QPL-VM EPU | User Manual - Page 3
information vii About this guide vii P5QPL-VM EPU specifications summary ix Chapter 1: Product introduction 1.1 Welcome 1-1 1.2 Package contents 1-1 1.3 Special features 1-1 1.3.1 Product highlights 1-1 1.3.2 Innovative ASUS features 1-3 1.4 Before you proceed 1-4 1.5 Motherboard overview - Asus P5QPL-VM EPU | User Manual - Page 4
Software support 1-31 1.11.1 Installing an operating system 1-31 1.11.2 Support DVD information 1-31 Chapter 2: BIOS information 2.1 Managing and updating your BIOS 2-1 2.1.1 ASUS Update utility 2-1 2.1.2 ASUS EZ Flash 2 utility 2-3 2.1.3 ASUS CrashFree BIOS 3 utility 2-4 2.2 BIOS CPU - Asus P5QPL-VM EPU | User Manual - Page 5
Contents 2.5.3 ACPI APIC Support 2-16 2.5.4 APM Configuration 2-16 2.5.5 Hardware Monitor 2-17 2.6 Boot menu 2-18 2.6.1 Boot Device Priority 2-18 2.6.2 Boot Settings Configuration 2-18 2.6.3 Security 2-19 2.7 Tools menu 2-20 2.7.1 ASUS EZ Flash 2 2-20 2.7.2 Express Gate 2-21 2.7.3 AI NET 2 - Asus P5QPL-VM EPU | User Manual - Page 6
, if not installed and used in accordance with manufacturer's instructions, may cause harmful interference to radio communications. However, there ASUS REACH website at http://green.asus.com/ english/REACH.htm. DO NOT throw the motherboard in municipal waste. This product has been designed to enable - Asus P5QPL-VM EPU | User Manual - Page 7
. • If you encounter technical problems with the product, contact a qualified service technician or your retailer. About this guide This user guide contains the information you need when installing and configuring the motherboard. How this guide is organized This manual contains the following parts - Asus P5QPL-VM EPU | User Manual - Page 8
software updates. 1. ASUS websites The ASUS website provides updated information on ASUS hardware and software products. Refer to the ASUS used in this guide To make sure that you perform certain tasks properly, take note of the following symbols used throughout this manual. DANGER/WARNING: - Asus P5QPL-VM EPU | User Manual - Page 9
P5QPL-VM EPU specifications summary CPU Chipset Front side bus Memory Expansion slots Storage LAN Audio USB ASUS overclocking features LGA775 socket for Intel® Core™2 Quad / Core™2 Extreme / Core™2 Duo / Celeron® E1000 Series and 400 Series processors Supports Intel® 45nm multi-core CPU Supports - Asus P5QPL-VM EPU | User Manual - Page 10
P5QPL-VM EPU specifications summary ASUS special features Back panel ports Internal connectors BIOS Manageability Support DVD Accessories Form factor ASUS CrashFree BIOS3 ASUS Q-Fan ASUS EZ Flash2 ASUS MyLogo2 ASUS AI NET2 ASUS Express Gate ASUS EPU-4 Engine ASUS Turbo Key 1 x PS/2 keyboard port 1 - Asus P5QPL-VM EPU | User Manual - Page 11
. 1.2 Package contents Check your motherboard package for the following items. Motherboard Cables Accessories Application DVD Documentations ASUS P5QPL-VM EPU motherboard 1 x Serial ATA cable 1 x Ultra DMA 100/66 cable 1 x I/O shield ASUS motherboard Support DVD User Manual If any of the above - Asus P5QPL-VM EPU | User Manual - Page 12
Media Acceleratior 4500. The Intel® G41 Express Chipset delivers optimized 3D graphics performance and supports Microsoft DirectX10, Shader Model 4.0 DVD, Blu-Ray Disc and other protected content. HDMI/DVI/RGB support This motherboard supports digital HDMI/DVI and analog D-Sub standards. DVI (Digital - Asus P5QPL-VM EPU | User Manual - Page 13
back up to 100 meters at 1 meter accuracy. ASUS Turbo Key ASUS Turbo Key allows you to turn the PC power button into an overclocking button. After the easy setup, Turbo Key boosts performances without interrupting ongoing work or games, simply through pressing the button. ASUS P5QPL-VM EPU 1-3 - Asus P5QPL-VM EPU | User Manual - Page 14
the system hangs due to overclocking failure. C.P.R. eliminates the need to open the system chassis and clear the RTC data. Simply shut down and reboot the system, and the BIOS automatically restores the CPU parameters to their default settings. Green ASUS This motherboard and its packaging comply - Asus P5QPL-VM EPU | User Manual - Page 15
of the chassis as indicated in the image below. 1.5.2 Screw holes Place six screws into the holes indicated by circles to secure the motherboard to the chassis. DO NOT overtighten the screws! Doing so can damage the motherboard. Place this side towards the rear of the chassis ASUS P5QPL-VM EPU 1-5 - Asus P5QPL-VM EPU | User Manual - Page 16
Motherboard layout (SB_PWR) 1-4 (4-pin CPU_FAN, 3-pin PWR_FAN, and 3-pin CHA_FAN) 5. LGA775 CPU socket 1-7 14. Serial port connector (10-1 pin COM1) 1-24 6. audio connector (4-1 pin SPDIF_OUT) 1-28 9. Clear RTC RAM (3-pin CLRTC) 1-20 18. PCIe x16 / PCIe x1 / PCI slots 1- - Asus P5QPL-VM EPU | User Manual - Page 17
Hyper-Threading Technology and Enhanced Intel SpeedStep® Technology (EIST). 1.6.1 Installing the CPU To install a CPU: 1. Locate the CPU socket on the motherboard. Before installing the CPU, ensure that the socket box is facing towards you and the load lever is on your left. ASUS P5QPL-VM EPU 1-7 - Asus P5QPL-VM EPU | User Manual - Page 18
to the socket pins, DO NOT remove the PnP cap unless you are installing a CPU. Retention tab A B Load lever 3. Lift the load lever in the direction of the PnP cap from the load plate window to remove (4B). PnP cap Load plate 4B 4A 3 5. Position the CPU over the socket, ensuring that the gold - Asus P5QPL-VM EPU | User Manual - Page 19
6. Apply some Thermal Interface Material to the exposed area of the CPU that the heatsink will be in contact with, ensuring that it is spread in an even thin directly. 7. Close the load plate (A), then push the load lever (B) until it snaps into the A retention tab. B ASUS P5QPL-VM EPU 1-9 - Asus P5QPL-VM EPU | User Manual - Page 20
CPU fan and heatsink assembly. If you buy a CPU separately, ensure that you use only Intel®‑certified multi‑directional heatsink and fan. • Your Intel® LGA775 place, connect the CPU fan cable to the connector on the motherboard labeled CPU_FAN. DO NOT forget to connect the CPU fan connector! Hardware - Asus P5QPL-VM EPU | User Manual - Page 21
when reinstalling. 1.7 System memory 1.7.1 Overview This motherboard comes with two Double Data Rate 2 (DDR2) Dual Inline Memory Modules (DIMM) sockets. The figure illustrates the location of the DDR2 DIMM sockets: Channel Channel A Channel B ASUS P5QPL-VM EPU Sockets DIMM_A1 DIMM_B1 1-11 - Asus P5QPL-VM EPU | User Manual - Page 22
® OS if you want to install 4GB or more memory on the motherboard. • This motherboard does not support DIMMs made up of 256 megabits (Mb) chips or less. • This motherboard supports up to 8GB memory modules on Windows® XP Professional x64 and Vista x64 editions. You may install a maximum of - Asus P5QPL-VM EPU | User Manual - Page 23
P5QPL-VM EPU Motherboard Qualified Vendors Lists (QVL) DDR2-1066MHz capability Vendor Part No. Size SS/ Chip DS Brand Chip NO. CL x 1024MB) DS N/A Heat-Sink Package 5-5-5-15 Mushkin 996619 4096MB(2 x 2048MB) DS N/A Heat-Sink Package 5-5-5-15 DIMM support A* B ASUS P5QPL-VM EPU 1-13 - Asus P5QPL-VM EPU | User Manual - Page 24
-JFS-25A KLDD48F-B8KB5 KKB8FFBXF-CFA-25U E5108AJBG-8E-E 6 Heat-Sink Package 4-4-4-12 D1288TEFCGL25U 5 Heat-Sink Package 4-4-4-12 D6408TR4CGL25USL362406PECXA 5 E510BAJBG-8E-E 6 E5108AJBG-8E-E 6 DIMM support A* B (continued on the next page) 1-14 Chapter 1: Product introduction - Asus P5QPL-VM EPU | User Manual - Page 25
18D 51280D-2.50726F 18D 51280D-2.50726E MS18T 51280-2.5P0710 MS18T 51280-2.5P0716 U2S12D30TP-8E U2S24D30TP-8E CL 5-5-5-15 5 5 5 6 6 6 4-5-5-15 4-4-4-15 4-4-4-15 5-6-6-18 5-5-5-15 5-4-4-18 5 5 5 5 5 6 6 6 6 4 5 5 5 5 5 5 5 5 5 5 5 5 5 5 5 5 DIMM support A* B ASUS P5QPL-VM EPU 1-15 - Asus P5QPL-VM EPU | User Manual - Page 26
5 AET03F30DB 0730 5 DDRII6408-6E DDRII1208-6E 8115 HY5PS12821AFP-Y5 NT5TU64M8AE-3C NT5TU64M8AE-3C M2TU 51280AE-3C717095R28F 5 N2TU 51280BE-3C639009W1CF 5 EPD264082200-4 EPD264082200-4 DIMM support A* B •• • • (continued on the next page) 1-16 Chapter 1: Product introduction - Asus P5QPL-VM EPU | User Manual - Page 27
: • A*: Supports one module inserted into either slot as single-channel memory configuration. • B*: Supports one pair of modules inserted into both the slots as one pair of dual-channel memory configuration. Visit the ASUS website at www.asus.com for the latest QVL. ASUS P5QPL-VM EPU 1-17 - Asus P5QPL-VM EPU | User Manual - Page 28
system components. Failure to do so can cause severe damage to both the motherboard and the components. 1. Press the retaining clips outward to unlock a DDR2 press the retaining clips outward to unlock the DIMM. 2 Support the DIMM lightly with your fingers when pressing the retaining 1 - Asus P5QPL-VM EPU | User Manual - Page 29
slot This motherboard supports PCI Express x1 network cards, SCSI cards, and other cards that comply with the PCI Express specifications. 1.8.5 PCI Express x16 slot This motherboard supports a PCI Express x16 graphics card that complies with the PCI Express specifications. ASUS P5QPL-VM EPU 1-19 - Asus P5QPL-VM EPU | User Manual - Page 30
key during the boot process and enter BIOS setup to reenter data. Except when clearing the RTC RAM, never remove the cap on CLRTC jumper default overclocking. For system failure due to overclocking, use the CPU Parameter Recall (C.P.R) feature. Shut down and reboot the system so the BIOS - Asus P5QPL-VM EPU | User Manual - Page 31
S3 and S4 sleep modes (no power to CPU, DRAM in slow refresh, power supply in reduced power mode). 3. Keyboard power (3-pin KBPWR) This jumper allows you to enable or disable the keyboard wake-up feature. When 1A on the +5VSB lead, and a corresponding setting in the BIOS. ASUS P5QPL-VM EPU 1-21 - Asus P5QPL-VM EPU | User Manual - Page 32
1.10 1.10.1 Connectors Rear panel connectors 1. PS/2 mouse port (green). This port is for a PS/2 mouse. 2. Optical S/PDIF_OUT port. This port connects to an external audio output device via an optical S/PDIF cable. 3. D-Sub port. This 15-pin port is for a VGA monitor or other VGA-compatible - Asus P5QPL-VM EPU | User Manual - Page 33
outputs DVI + D-Sub DVI + HDMI HDMI + D-Sub Supported • • • Not supported • During POST, only the monitor connected to the D-Sub port has display. The dual display function works only under Windows®. 15. PS/2 keyboard port (purple). This port is for a PS/2 keyboard. ASUS P5QPL-VM EPU 1-23 - Asus P5QPL-VM EPU | User Manual - Page 34
of the system chassis. The serial port module (COM1) is purchased separately. 2. LPT connector (26-1 pin LPT) The LPT (Line Printing Terminal) connector supports devices such as a printer. LPT is standardized as IEEE 1284, which is the parallel port interface on IBM PC-compatible computers. 1-24 - Asus P5QPL-VM EPU | User Manual - Page 35
Ultra DMA 100/66 signal cable: blue, black, and gray. Connect the blue connector to the motherboard's IDE connector, then select one of the following modes to configure your device. Single device Two -Select," ensure that all other device jumpers have the same setting. ASUS P5QPL-VM EPU 1-25 - Asus P5QPL-VM EPU | User Manual - Page 36
the back of the system chassis. These USB connectors comply with USB 2.0 specification that supports up to 480Mbps connection speed. Never connect a 1394 cable to the USB connectors. Doing so will damage the motherboard! The USB module is purchased separately. 1-26 Chapter 1: Product introduction - Asus P5QPL-VM EPU | User Manual - Page 37
connector. DO NOT forget to connect the fan cables to the fan connectors. Insufficient air flow inside the system may damage the motherboard components. These are not jumpers! DO NOT place jumper caps on the fan connectors! Only the CPU fan supports the ASUS Q-Fan feature. ASUS P5QPL-VM EPU 1-27 - Asus P5QPL-VM EPU | User Manual - Page 38
is for a chassis-mounted front panel audio I/O module that supports either HD Audio or legacy AC'97 audio standard. • We recommend that you connect a high-definition front panel audio module to this connector to avail of the motherboard's high-definition audio capability. • If you want to connect - Asus P5QPL-VM EPU | User Manual - Page 39
a fully configured system, we recommend that you use a power supply unit (PSU) that complies with ATX 12V Specification 2.0 (or later version) and provides a minimum power of 400W. • DO NOT forget to connect the 4- unstable or may not boot up if the power is inadequate. ASUS P5QPL-VM EPU 1-29 - Asus P5QPL-VM EPU | User Manual - Page 40
System panel connector (20-8 pin PANEL) This connector supports several chassis-mounted functions. • System power LED (2- turns the system on or puts the system in sleep or soft-off mode depending on the BIOS settings. Pressing the power switch for more than four seconds while the system is ON turns - Asus P5QPL-VM EPU | User Manual - Page 41
. Click an icon to display Support DVD/ motherboard information Click an item to install If Autorun is NOT enabled on your computer, browse the contents of the Support DVD to locate the file ASSETUP.EXE from the BIN folder. Double-click the ASSETUP.EXE to run the DVD. ASUS P5QPL-VM EPU 1-31 - Asus P5QPL-VM EPU | User Manual - Page 42
1-32 Chapter 1: Product introduction - Asus P5QPL-VM EPU | User Manual - Page 43
Update: 1. Place the support DVD into the optical drive. The Drivers menu appears. 2. Click the Utilities tab, then click ASUS Update. 3. Follow the onscreen instructions to complete the installation. Quit all Windows® applications before you update the BIOS using this utility. ASUS P5QPL-VM EPU - Asus P5QPL-VM EPU | User Manual - Page 44
want to download then click Next. The ASUS Update utility is capable of updating itself through the Internet. Always update the utility to avail all its features. Updating from a BIOS file a. Select Update BIOS from a file, then click Next. b. Locate the BIOS file from the Open window, then click - Asus P5QPL-VM EPU | User Manual - Page 45
Flash 2 performs the BIOS updating process and automatically reboots the system when done. • This function supports USB flash disks with FAT 32/16 format and single partition only. • DO NOT shut down or reset the system while updating the BIOS to prevent system boot failure! ASUS P5QPL-VM EPU 2-3 - Asus P5QPL-VM EPU | User Manual - Page 46
supports ASUS CrashFree BIOS 3. The device size should be smaller than 8GB. • DO NOT shut down or reset the system while updating the BIOS! Doing so can cause system boot failure! The recovered BIOS may not be the latest BIOS version for this motherboard. Download the latest BIOS file from the ASUS - Asus P5QPL-VM EPU | User Manual - Page 47
item under the Exit menu. See section 2.8 Exit Menu. • The BIOS setup screens in this chapter are for reference only. They may not exactly match what you see on your screen. • Visit the ASUS website at www.asus.com to download the latest BIOS file for this motherboard. ASUS P5QPL-VM EPU 2-5 - Asus P5QPL-VM EPU | User Manual - Page 48
menu screen Menu items Menu bar Configuration fields Main Advanced BIOS SETUP UTILITY Power Boot Tools Exit Main Settings System Time [19:34:30] System Date [Tue 11/ menu and change the settings. Some of the navigation keys differ from one screen to another. 2-6 Chapter 2: BIOS setup - Asus P5QPL-VM EPU | User Manual - Page 49
may differ. Select Screen Select Item F1 General Help F10 Save and Exit ESC Exit v02.61 (C)Copyright 1985-2008, American Megatrends, Inc. Pop-up window Scroll bar 2.2.9 General help At the top right corner of the menu screen is a brief description of the selected item. ASUS P5QPL-VM EPU 2-7 - Asus P5QPL-VM EPU | User Manual - Page 50
then press to display the IDE/SATA device information. The BIOS automatically detects the values opposite the dimmed items (Device, Vendor, Size of the appropriate IDE device type. Select [CDROM] if you are specifically configuring a CD-ROM drive. Select [ARMD] (ATAPI Removable Media Device - Asus P5QPL-VM EPU | User Manual - Page 51
overview of the general system specifications. The BIOS automatically detects the items in this menu. Bios information Displays the auto-detected BIOS information. Processor Displays the auto-detected CPU specification. System Memory Displays the auto-detected system memory. ASUS P5QPL-VM EPU 2-9 - Asus P5QPL-VM EPU | User Manual - Page 52
appear only when you set the AI Overclocking item to [MANUAL]. CPU Frequency [XXX] Displays the frequency sent by the clock generator to the system bus and PCI bus. The value of this item is auto-detected by the BIOS. Use the and keys to adjust the CPU frequency. You can also key in the - Asus P5QPL-VM EPU | User Manual - Page 53
: [Auto] [+50mv] [+100mv] [+150mv] Auto PSI [Enabled] Enables or disables auto PSI. When you set this item to [Disabled], power runs in the fixed 4 phase mode. When you set this item to [Enabled], power runs in the auto mode. Configuration options: [Enabled] [Disabled] ASUS P5QPL-VM EPU 2-11 - Asus P5QPL-VM EPU | User Manual - Page 54
and malicious buffer overflow attacks when working with its supporting software and system. Configuration options: [Disabled] [Enabled] The following item appears only when you installed an Intel® Pentium® 4 or later CPU that supports the Enhanced Intel SpeedStep® Technology (EIST). Intel® SpeedStep - Asus P5QPL-VM EPU | User Manual - Page 55
the amount of system memory used by the IGD graphics device. Configuration options: [Disabled] [Enabled, 32MB] [Enabled, 64MB] [Enabled, 128MB] DVMT Memory [256MB] Allows you to select the DVMT memory. Configuration options: (96MB reserved during boot) PAVP Lite Yes Yes No ASUS P5QPL-VM EPU 2-13 - Asus P5QPL-VM EPU | User Manual - Page 56
Audio Controller [Enabled] Enables or disables the audio controller. Configuration options: [Enabled] [Disabled] Front Panel Type [HD Audio] Allows you to select the front panel support type. If Allows you to select parallel port IRQ. Configuration options: [IRQ5] [IRQ7] 2-14 Chapter 2: BIOS setup - Asus P5QPL-VM EPU | User Manual - Page 57
this item is set to [No], BIOS configures all the devices in the system. When this item is set to [Yes] and if you install a Plug and Play operating system, the operating system configures the Plug and Play devices not required for boot. Configuration options: [No] [Yes] ASUS P5QPL-VM EPU 2-15 - Asus P5QPL-VM EPU | User Manual - Page 58
Configuration and Power Interface (ACPI) 2.0 specifications. Configuration options: [Disabled] [Enabled] 2.5.3 ACPI APIC Support [Enabled] Allows you to enable or disable the Advanced Configuration and Power Interface (ACPI) support in the Application-Specific Integrated Circuit (ASIC). When this - Asus P5QPL-VM EPU | User Manual - Page 59
chassis/power, the specific field shows N/A. Select [Ignored] if you do not want to display the detected speed. VCORE Voltage, 3.3V Voltage, 5V Voltage, 12V Voltage The onboard hardware monitor automatically detects the voltage output through the onboard voltage regulators. ASUS P5QPL-VM EPU 2-17 - Asus P5QPL-VM EPU | User Manual - Page 60
to [Disabled], BIOS performs all the POST items. Configuration options: [Disabled] [Enabled] Full Screen Logo [Enabled] This allows you to enable or disable the full screen logo display feature. Configuration options: [Disabled] [Enabled] Set this item to [Enabled] to use the ASUS MyLogo2™ feature - Asus P5QPL-VM EPU | User Manual - Page 61
message Press DEL to run Setup during POST. Configuration options: [Disabled] [Enabled] 2.6.3 Security The Security menu items BIOS password, you can clear it by erasing the CMOS Real Time Clock (RTC) RAM. See section 1.9 Jumpers for information on how to erase the RTC RAM . ASUS P5QPL-VM EPU 2-19 - Asus P5QPL-VM EPU | User Manual - Page 62
> to display the submenu. Main Advanced BIOS SETUP UTILITY Power Boot Tools Exit ASUS EZ Flash 2 Express Gate Enter OS Timer Reset User Data AI NET 2 [Auto] [10 Seconds] [No] Press ENTER to run the utility to select and update BIOS. This utility supports 1.FAT 12/16/32 (r/w) 2.NTFS (read - Asus P5QPL-VM EPU | User Manual - Page 63
When setting this item to [Reset], ensure to save the setting to the BIOS so that the user data will be cleared the next time you enter the Enables or disables checking of the Atheros LAN cable during the Power-On Self‑Test (POST). Configuration options: [Disabled] [Enabled] ASUS P5QPL-VM EPU - Asus P5QPL-VM EPU | User Manual - Page 64
failsafe default values for the BIOS items, and save or discard your changes to the BIOS items. Main Advanced BIOS SETUP UTILITY Power Boot RAM. An onboard backup battery sustains the CMOS RAM so it stays on even when the PC is turned off. When you select this option, a confirmation window
-
 1
1 -
 2
2 -
 3
3 -
 4
4 -
 5
5 -
 6
6 -
 7
7 -
8
-
9
-
10
-
11
-
12
-
13
-
14
-
15
-
16
-
17
-
18
-
19
-
20
-
21
-
22
-
23
-
24
-
25
-
26
-
27
-
28
-
29
-
30
-
31
-
32
-
33
-
34
-
35
-
36
-
37
-
38
-
39
-
40
-
41
-
42
-
43
-
44
-
45
-
46
-
47
-
48
-
49
-
50
-
51
-
52
-
53
-
54
-
55
-
56
-
57
-
58
-
59
-
60
-
61
-
62
-
63
-
64
 |
 |

Motherboard
P5QPL-VM EPU