Asus PhysX P1 ASUS PhysX Installation Guide English Version E2498 - Page 8
Driver installation
 |
View all Asus PhysX P1 manuals
Add to My Manuals
Save this manual to your list of manuals |
Page 8 highlights
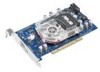
3 9. Put back the chassis cover. 10. Reconnect all cables. 11. Plug the power cord to the computer and to a wall socket & power strip. 12. Power ON the computer. 1.3 Driver installation After installing the PhysX card on your computer, you need to install the device driver that enables the PhysX card to work with Windows operating system. (Note: The version and content of the driver CD are subject to change without notice.) If you have already installed the ASUS PhysX card, the Found New Hardware Wizard window may pop up before or during driver installation. See figure below. To install the device driver: 1. Click Cancel from the Found New Hardware wizard window. 2. Insert the ASUS PhysX support CD into your optical drive. If autorun is enabled, the ASUS PhysX Card Driver screen appears automatically. Go to step 5. If Autorun is not enabled in your computer, perform step 3. 3. Click My Computer on your desktop. ASUS PhysXTM Installation Guide
-
 1
1 -
2
-
 3
3 -
 4
4 -
 5
5 -
 6
6 -
 7
7 -
 8
8 -
 9
9 -
 10
10 -
 11
11 -
 12
12 -
 13
13 -
14
-
15
-
16
-
17
-
18
 |
 |
