Asus ROG MAXIMUS X HERO WI-FI AC User Guide - Page 57

Motherboard rear and audio connections, 2.3.1 Rear I/O connection
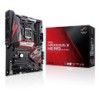
Page 57 highlights

2.3 Motherboard rear and audio connections 2.3.1 Rear I/O connection Chapter 2 Rear panel connectors 1. Clear CMOS button (CLR_CMOS). Press this button to clear the BIOS setup information only when the systems hangs due to overclocking. 2. Wi-Fi 802.11 a/b/g/n/ac, Bluetooth V4.2 3. DisplayPort 4. Intel® USB 2.0 ports 7, and 8. Upper port supports the KeyBot II feature, and lower port supports USB BIOS Flashback function. 5. Intel® USB 3.1 Gen 1 ports 3, 4, 5, and 6 6. LAN (RJ-45) port* 7. USB BIOS Flashback button 8. HDMI port 9. USB 3.1 Gen 2 Type-A port EA1 10. USB 3.1 Gen 2 Type-C™ port EC2 11. Optical S/PDIF OUT port 12. Audio I/O ports** * and ** : Refer to the tables on the next page for LAN port LEDs, and audio port definitions. • USB 3.1 Gen 1/Gen 2 devices can only be used as data storage only. • We strongly recommend that you connect your devices to ports with matching data transfer rate. Please connect your USB 3.1 Gen 1 devices to USB 3.1 Gen 1 ports and your USB 3.1 Gen 2 devices to USB 3.1 Gen 2 ports for faster and better performance for your devices. • Due to the design of the Intel chipset, all USB devices connected to the USB 3.1 Gen 1 ports are controlled by the xHCI controller. Some legacy USB devices must update their firmware for better compatibility. • When KeyBot II is activated, USB hot plug function of the KeyBot port (USB 3.1 Gen 1 port 7) will be temporarily disabled. ROG MAXIMUS X HERO (WI-FI AC) 2-15

  • 1
  • 2
  • 3
  • 4
  • 5
  • 6
  • 7
  • 8
  • 9
  • 10
  • 11
  • 12
  • 13
  • 14
  • 15
  • 16
  • 17
  • 18
  • 19
  • 20
  • 21
  • 22
  • 23
  • 24
  • 25
  • 26
  • 27
  • 28
  • 29
  • 30
  • 31
  • 32
  • 33
  • 34
  • 35
  • 36
  • 37
  • 38
  • 39
  • 40
  • 41
  • 42
  • 43
  • 44
  • 45
  • 46
  • 47
  • 48
  • 49
  • 50
  • 51
  • 52
  • 53
  • 54
  • 55
  • 56
  • 57
  • 58
  • 59
  • 60
  • 61
  • 62
  • 63
  • 64
  • 65
  • 66
  • 67
  • 68
  • 69
  • 70
  • 71
  • 72
  • 73
  • 74
  • 75
  • 76
  • 77
  • 78
  • 79
  • 80
  • 81
  • 82
  • 83
  • 84
  • 85
  • 86
  • 87
  • 88
  • 89
  • 90
  • 91
  • 92
  • 93
  • 94
  • 95
  • 96
  • 97
  • 98
  • 99
  • 100
  • 101
  • 102
  • 103
  • 104
  • 105
  • 106
  • 107
  • 108
  • 109
  • 110
  • 111
  • 112
  • 113
  • 114
  • 115
  • 116

ROG MAXIMUS X HERO (WI-FI AC)
2-15
Chapter 2
2.3
Motherboard rear and audio connections
2.3.1
Rear I/O connection
* and ** : Refer to the tables on the next page for LAN port LEDs, and audio port definitions.
Rear panel connectors
1.
Clear CMOS button (CLR_CMOS). Press this button to clear the BIOS setup
information only when the systems hangs due to overclocking.
2.
Wi-Fi 802.11 a/b/g/n/ac, Bluetooth V4.2
3.
DisplayPort
4.
Intel
®
USB 2.0 ports 7, and 8. Upper port supports the KeyBot II feature, and lower
port supports USB BIOS Flashback function.
5.
Intel
®
USB 3.1 Gen 1 ports 3, 4, 5, and 6
6.
LAN (RJ-45) port*
7.
USB BIOS Flashback button
8.
HDMI port
9.
USB 3.1 Gen 2 Type-A port EA1
10.
USB 3.1 Gen 2 Type-C™ port EC2
11.
Optical S/PDIF OUT port
12.
Audio I/O ports**
USB 3.1 Gen 1/Gen 2 devices can only be used as data storage only.
We strongly recommend that you connect your devices to ports with matching data
transfer rate. Please connect your USB 3.1 Gen 1 devices to USB 3.1 Gen 1 ports and
your USB 3.1 Gen 2 devices to USB 3.1 Gen 2 ports for faster and better performance
for your devices.
Due to the design of the Intel chipset, all USB devices connected to the USB 3.1 Gen
1 ports are controlled by the xHCI controller. Some legacy USB devices must update
their firmware for better compatibility.
When KeyBot II is activated, USB hot plug function of the KeyBot port (USB 3.1 Gen 1
port 7) will be temporarily disabled.