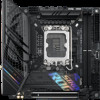
Asus ROG STRIX B760-I GAMING WIFI Users Manual English - Page 18
Header, Max. Current, Max. Power, Default Speed, Shared Control, Fan and Pump headers
 |
View all Asus ROG STRIX B760-I GAMING WIFI manuals
Add to My Manuals
Save this manual to your list of manuals |
Page 18 highlights
Chapter 1 4. Fan and Pump headers The Fan and Pump headers allow you to connect fans or pumps to cool the system. A BC A CHA_FAN B CPU_FAN C AIO_PUMP FAN PWM FAN IN FAN PWR GND • DO NOT forget to connect the fan cables to the fan headers. Insufficient air flow inside the system may damage the motherboard components. These are not jumpers! Do not place jumper caps on the fan headers! • Ensure the cable is fully inserted into the header. For water cooling kits, connect the pump connector to the AIO_PUMP header. Header CPU_FAN CHA_FAN AIO_PUMP Max. Current 1A 1A 1A Max. Power 12W 12W 12W Default Speed Q-Fan Controlled Q-Fan Controlled Full Speed Shared Control - 1-8 Chapter 1: Product Introduction

1-8
Chapter 1: Product Introduction
Chapter 1
4.
Fan and Pump headers
The Fan and Pump headers allow you to connect fans or pumps to cool the system.
FAN PWM
FAN IN
FAN PWR
GND
CHA_FAN
AIO_PUMP
CPU_FAN
A
A
B
C
B
C
•
DO NOT forget to connect the fan cables to the fan headers. Insufficient air flow
inside the system may damage the motherboard components. These are not
jumpers! Do not place jumper caps on the fan headers!
•
Ensure the cable is fully inserted into the header.
For water cooling kits, connect the pump connector to the
AIO_PUMP
header.
Header
Max. Current
Max. Power
Default Speed
Shared Control
CPU_FAN
1A
12W
Q-Fan Controlled
-
CHA_FAN
1A
12W
Q-Fan Controlled
-
AIO_PUMP
1A
12W
Full Speed
-


