Asus ROG SWIFT PG349Q PG349Q Series User Guide - Page 17
OSD On-Screen Display menu
 |
View all Asus ROG SWIFT PG349Q manuals
Add to My Manuals
Save this manual to your list of manuals |
Page 17 highlights
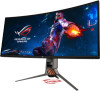
3.1 3.1.1 OSD (On-Screen Display) menu How to reconfigure Over Clocking ON Blue Light Filter Color Image Input Select System Setup Normal Mode DisplayPort 3440x1440@ 60Hz Racing Mode Aura Static ROG Swift PG349Q MOVE/ENTER BACK EXIT 1. Press the Central of 5-way button to display the OSD menu. 2. Press the Up and Down keys to switch the options in the menu. When you move from one icon to another, the option name is highlighted. 3. To select a highlighted item from the menu, press the Right key or the Central button. 4. Press the Up and Down keys to select the desired parameters. 5. Press the Right key or the Central button to enter the slide bar, and then use the Up or Down keys (depending on the indicators in the menu) to make changes. 6. Press the Left key to return to the previous menu. ASUS LCD Monitor PG Series 3-1
-
 1
1 -
2
-
3
-
4
-
5
-
6
-
7
-
8
-
9
-
10
-
11
-
 12
12 -
 13
13 -
 14
14 -
 15
15 -
 16
16 -
 17
17 -
 18
18 -
 19
19 -
 20
20 -
 21
21 -
 22
22 -
23
-
24
-
25
-
26
-
27
-
28
-
29
-
30
-
31
 |
 |
