Asus RS300-E8-PS4 User Guide - Page 47
Repeat step 3 to 5 to attach the rack rail
 |
View all Asus RS300-E8-PS4 manuals
Add to My Manuals
Save this manual to your list of manuals |
Page 47 highlights
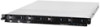
2. Select a 1U space on the rack where you want to install the rack rail. A 1U space consists of three square mounting holes with two thin lips on the top and the bottom, as shown in the right figure. 3. Adjust the rack rail to fit the depth of the rack. 4. From inside the rack, place the rear rail hook on the bottom thin lip of the rear mounting hole, and then place the front rail hook on the bottom thin lip of the front mounting hole, as shown in the right figure. 5. Secure the front and rear ends of the rail with two rack screws and washers. 6. Repeat step 3 to 5 to attach the rack rail on the other side of the rack. ASUS RS300-E8 Series 3-3
-
 1
1 -
2
-
3
-
4
-
5
-
6
-
7
-
8
-
9
-
10
-
11
-
12
-
13
-
14
-
15
-
16
-
17
-
18
-
19
-
20
-
21
-
22
-
23
-
24
-
25
-
26
-
27
-
28
-
29
-
30
-
31
-
32
-
33
-
34
-
35
-
36
-
37
-
38
-
39
-
40
-
41
-
 42
42 -
 43
43 -
 44
44 -
 45
45 -
 46
46 -
 47
47 -
 48
48 -
 49
49 -
 50
50 -
 51
51 -
 52
52 -
53
-
54
-
55
-
56
-
57
-
58
-
59
-
60
-
61
-
62
-
63
-
64
-
65
-
66
-
67
-
68
-
69
-
70
-
71
-
72
-
73
-
74
-
75
-
76
-
77
-
78
-
79
-
80
-
81
-
82
-
83
-
84
-
85
-
86
-
87
-
88
-
89
-
90
-
91
-
92
-
93
-
94
-
95
-
96
-
97
-
98
-
99
-
100
-
101
-
102
-
103
-
104
-
105
-
106
-
107
-
108
-
109
-
110
-
111
-
112
-
113
-
114
-
115
-
116
-
117
-
118
-
119
-
120
-
121
-
122
-
123
-
124
-
125
-
126
-
127
-
128
-
129
-
130
-
131
-
132
-
133
-
134
-
135
-
136
-
137
-
138
-
139
-
140
-
141
-
142
-
143
-
144
-
145
-
146
-
147
-
148
-
149
-
150
-
151
-
152
-
153
-
154
-
155
-
156
-
157
-
158
 |
 |

3-3
ASUS RS300-E8 Series
2.
Select a 1U space on the rack
where you want to install the
rack rail. A 1U space consists
of three square mounting holes
with two thin lips on the top and
the bottom, as shown in the right
figure.
3.
Adjust the rack rail to fit the depth
of the rack.
5.
Secure the front and rear ends of the
rail with two rack screws and washers.
6.
Repeat step 3 to 5 to attach the rack rail
on the other side of the rack.
4.
From inside the rack, place the rear
rail hook on the bottom thin lip of the
rear mounting hole, and then place the
front rail hook on the bottom thin lip of
the front mounting hole, as shown in
the right figure.