Asus S1B S1A Notebook English User Manual - Page 41
Optical Drive Module Optional
 |
View all Asus S1B manuals
Add to My Manuals
Save this manual to your list of manuals |
Page 41 highlights
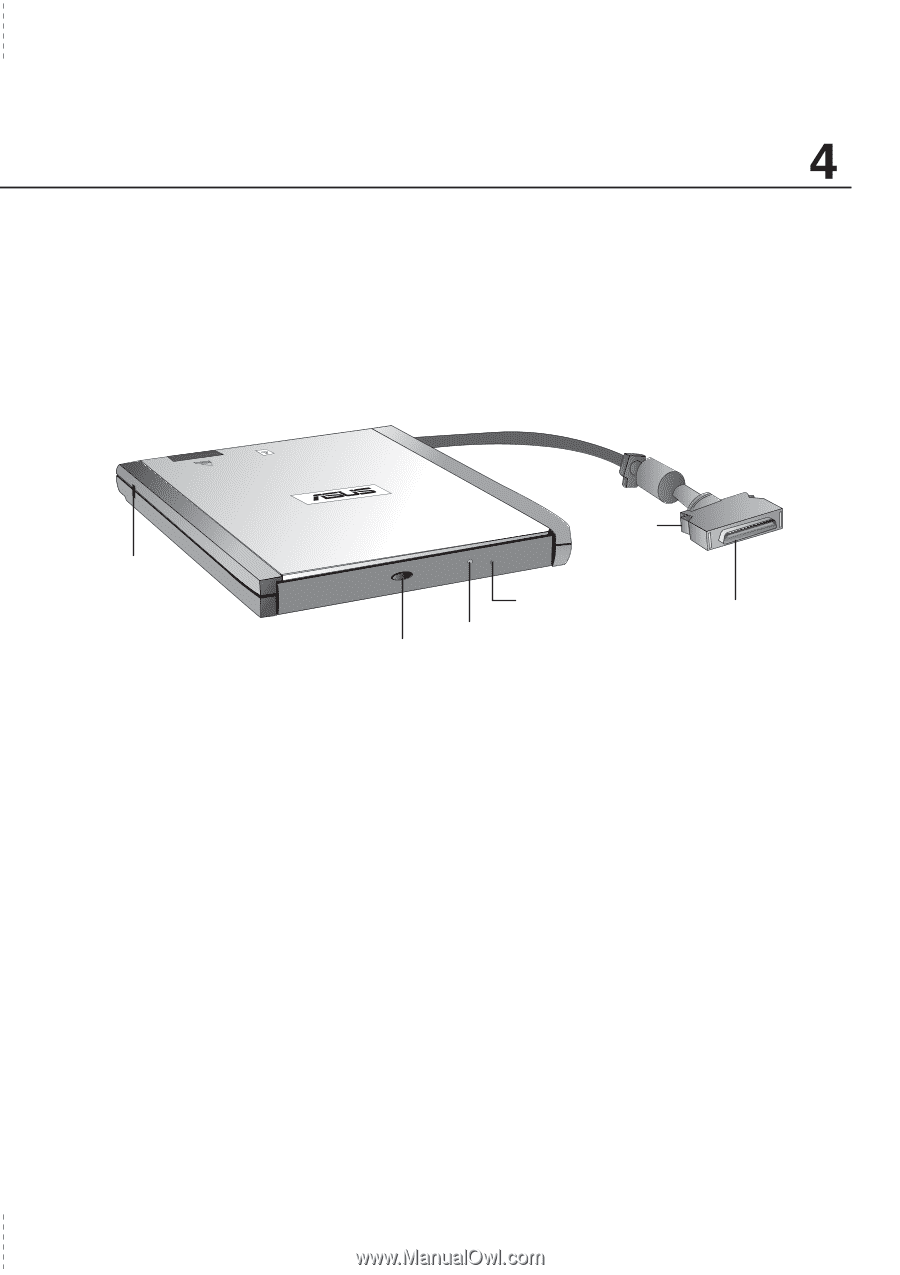
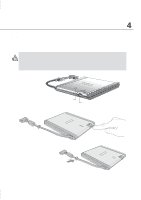
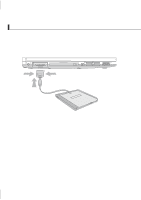
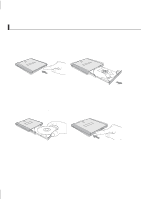
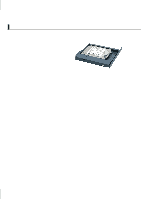
Using the Notebook PC Optical Drive Module (Optional) NOTE: The terms "CD-ROM" or "CD" are mainly used in all documentation because of its wide familiarity, although "CD/DVD" should be more appropriate since this Notebook PC supports CD-ROM, CD-RW, and DVD-ROM optional modules. The CD-ROM (Compact Disc Read Only Memory) drive can support all the popular formats: Audio/ Music CDs; Photo CDs; MS-DOS MSCDEX Mode 1 / Mode 2; CD-ROM/XA; CD-I; and Video CDs. Kensington® Lock Connector Release Tab Eject Button Emergency Eject Proprietary AiBox Connector CD/DVD Activity LED (Connect to the AiBox connector on the rear side of the Notebook PC.) NOTE: Only one CD may be used at one time in this CD drive. The CD drive eject button is electronic and requires that the Notebook PC be powered ON in order to eject the CD drive tray. When the Notebook PC is OFF, press the stop button on the front of the Notebook PC twice to eject the CD tray. Eject and Emergency Eject The eject button is electronic and is used for opening the tray. You can also eject the tray through any software CD/DVD player or by right clicking the CD icon in Windows™ "My Computer." The emergency eject is used to eject the tray in case the electronic eject does not work. Do not use this in place of the electronic eject. Laser Safety This system is classified as a Class 1 laser product. The Notebook PC's CD/DVD-ROM drive uses a laser reader that complies with laser product standards set by government agencies for Class 1 laser products. It does not emit hazardous light; the beam is totally enclosed during all modes of customer operation and maintenance. 41
-
 1
1 -
2
-
3
-
4
-
5
-
6
-
7
-
8
-
9
-
10
-
11
-
12
-
13
-
14
-
15
-
16
-
17
-
18
-
19
-
20
-
21
-
22
-
23
-
24
-
25
-
26
-
27
-
28
-
29
-
30
-
31
-
32
-
33
-
34
-
35
-
 36
36 -
 37
37 -
 38
38 -
 39
39 -
 40
40 -
 41
41 -
 42
42 -
 43
43 -
 44
44 -
 45
45 -
 46
46 -
47
-
48
-
49
-
50
-
51
-
52
-
53
-
54
-
55
-
56
-
57
-
58
-
59
-
60
-
61
-
62
-
63
-
64
-
65
-
66
-
67
-
68
-
69
-
70
-
71
-
72
-
73
-
74
-
75
-
76
-
77
-
78
-
79
-
80
-
81
-
82
-
83
-
84
-
85
-
86
-
87
-
88
-
89
-
90
-
91
-
92
-
93
-
94
 |
 |