Asus T3-M2NC51PV User Guide - Page 34
then secure it with four
 |
UPC - 610839584222
View all Asus T3-M2NC51PV manuals
Add to My Manuals
Save this manual to your list of manuals |
Page 34 highlights
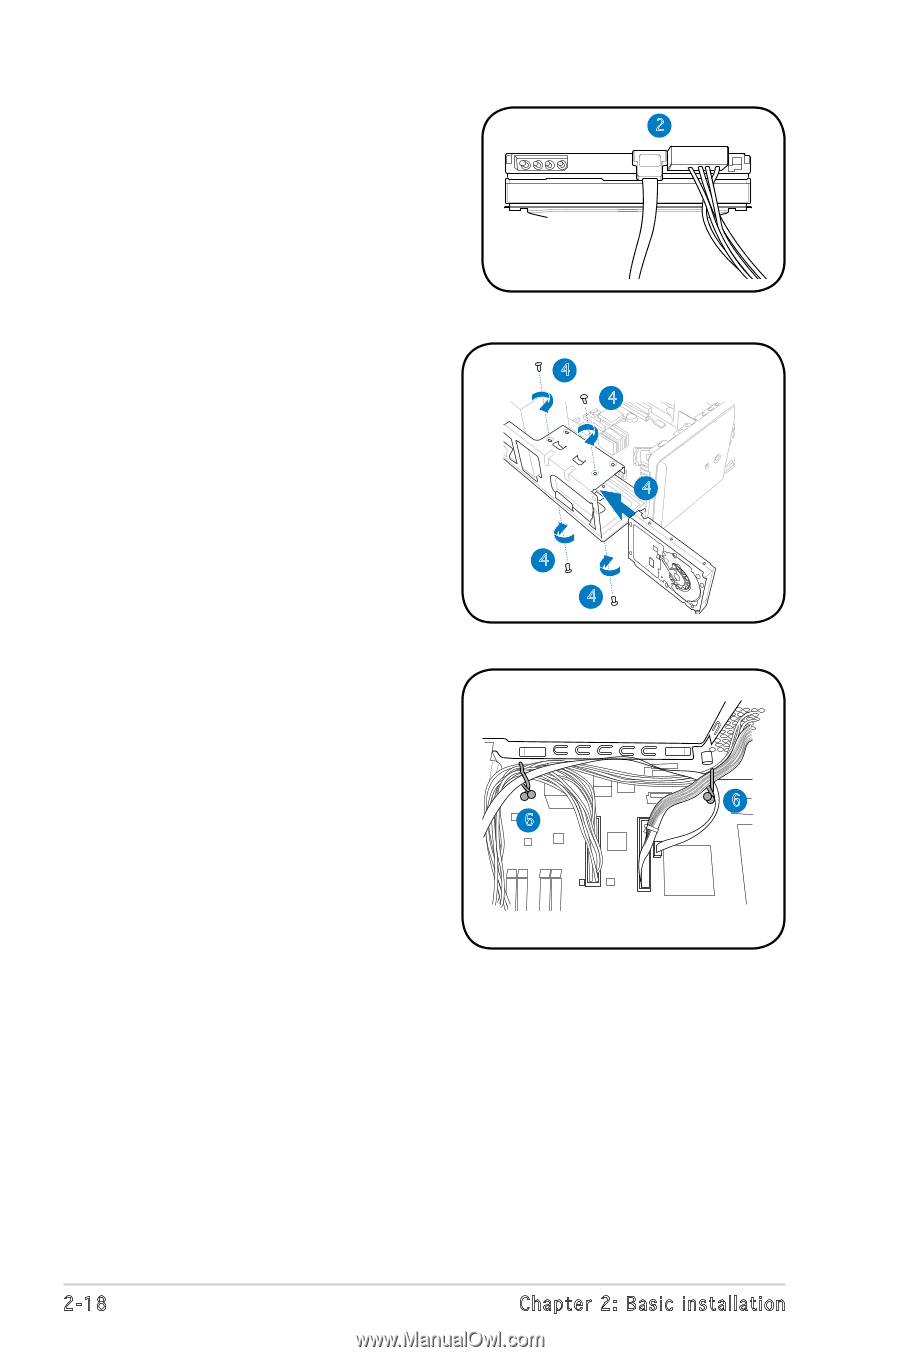
2. Connect the SATA signal 2 cable and the power plugs to the connectors at the back of the drive. 3. Locate the HDD tray. 4. Insert a hard disk drive (with the HDD PCB facing the top of the chassis) to the tray, then secure it with four screws. 5. Connect the SATA signal cable to the SATA connector on the motherboard. 6. Tighten all the cables with the plastic coils. 4 4 4 4 4 6 6 2-18 Chapter 2: Basic installation
-
 1
1 -
2
-
3
-
4
-
5
-
6
-
7
-
8
-
9
-
10
-
11
-
12
-
13
-
14
-
15
-
16
-
17
-
18
-
19
-
20
-
21
-
22
-
23
-
24
-
25
-
26
-
27
-
28
-
 29
29 -
 30
30 -
 31
31 -
 32
32 -
 33
33 -
 34
34 -
 35
35 -
 36
36 -
 37
37 -
 38
38 -
 39
39 -
40
-
41
-
42
-
43
-
44
-
45
-
46
-
47
-
48
-
49
-
50
-
51
-
52
-
53
-
54
-
55
-
56
-
57
-
58
-
59
-
60
-
61
-
62
-
63
-
64
-
65
-
66
-
67
-
68
-
69
-
70
-
71
-
72
-
73
-
74
-
75
-
76
-
77
-
78
-
79
-
80
-
81
-
82
-
83
-
84
-
85
-
86
-
87
-
88
 |
 |
2-18
Chapter 2: Basic installation
2.
Connect the SATA signal
cable and the power plugs to
the connectors at the back
of the drive.
3.
Locate the HDD tray.
4.
Insert a hard disk drive (with
the HDD PCB facing the top
of the chassis) to the tray,
then secure it with four
screws.
2
4
4
4
4
4
5.
Connect the SATA signal
cable to the SATA connector
on the motherboard.
6.
Tighten all the cables with the
plastic coils.
6
6