Asus T3-P5945GC T3-P5945GC user's manual - Page 32
Replacing the power supply unit
 |
UPC - 610839914531
View all Asus T3-P5945GC manuals
Add to My Manuals
Save this manual to your list of manuals |
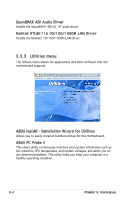
Page 32 highlights
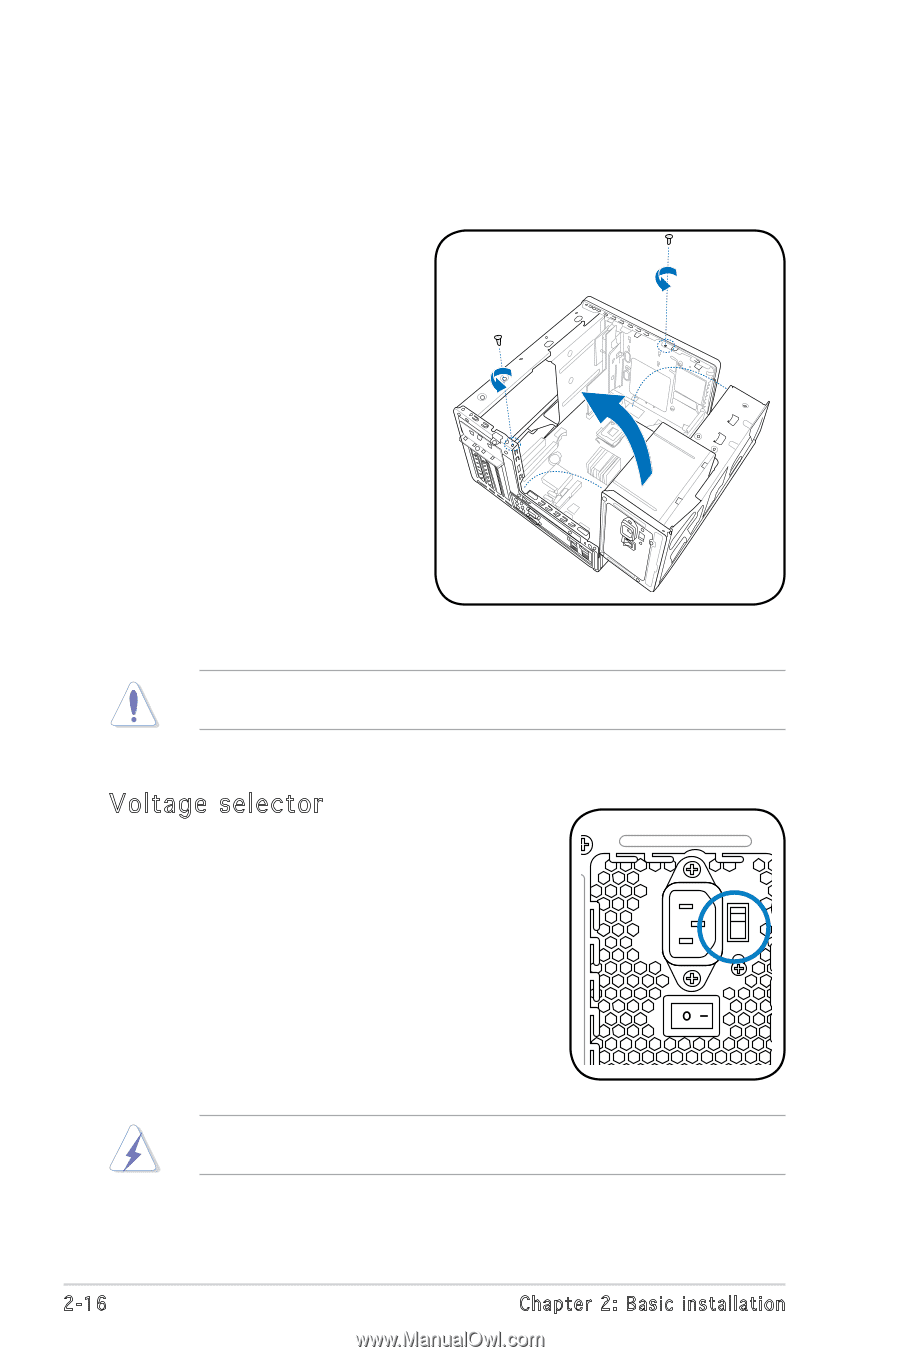
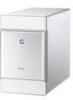
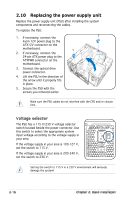
2.10 Replacing the power supply unit Replace the power supply unit (PSU) after installing the system components and reconnecting the cables. To replace the PSU: 1. If necessary, connect the 4-pin 12V power plug to the ATX12V connector on the motherboard. 2. If necessary, connect the 24-pin ATX power plug to the ATXPWR connector on the motherboard. 3. Connect the optical drive power connector. 4. Lift the PSU in the direction of the arrow until it properly fits in place. 5. Secure the PSU with the screws you removed earlier. Make sure the PSU cables do not interfere with the CPU and/or chassis fans. Voltage selector The PSU has a 115 V/230 V voltage selector switch located beside the power connector. Use this switch to select the appropriate system input voltage according to the voltage supply in your area. If the voltage supply in your area is 100‑127 V, set the switch to 115 V. If the voltage supply in your area is 200‑240 V, set the switch to 230 V. Setting the switch to 115 V in a 230 V environment will seriously damage the system! C T R BASS REAR S P K SIDE S P K LINE IN FRONT MIC IN 2-16 Chapter 2: Basic installation
-
 1
1 -
2
-
3
-
4
-
5
-
6
-
7
-
8
-
9
-
10
-
11
-
12
-
13
-
14
-
15
-
16
-
17
-
18
-
19
-
20
-
21
-
22
-
23
-
24
-
25
-
26
-
 27
27 -
 28
28 -
 29
29 -
 30
30 -
 31
31 -
 32
32 -
 33
33 -
 34
34 -
 35
35 -
 36
36 -
 37
37 -
38
-
39
-
40
-
41
-
42
-
43
-
44
-
45
-
46
-
47
-
48
-
49
-
50
-
51
-
52
-
53
-
54
-
55
-
56
-
57
-
58
-
59
-
60
-
61
-
62
-
63
-
64
-
65
-
66
-
67
-
68
-
69
-
70
-
71
-
72
-
73
-
74
-
75
-
76
-
77
-
78
-
79
 |
 |