Asus TS100-E9-PI4 User Guide - Page 29
Front panel cover, 2.4.1 Removing the front panel cover
 |
View all Asus TS100-E9-PI4 manuals
Add to My Manuals
Save this manual to your list of manuals |
Page 29 highlights
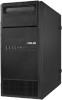
2.4 Front panel cover Before you can install a 5.25-inch drive, you should first remove the front panel cover. Ensure to unplug the power cable before installing or removing any system components. Failure to do so may cause damage to the motherboard and other system components! 2.4.1 Removing the front panel cover To remove the front panel cover: 1. Locate the front panel assembly lock then slide it outward to unlock the latches that secures the front panel cover to the chassis. assembly lock 2. Remove the front panel assembly from the chassis and set it aside. front panel assembly ASUS TS100-E9-PI4 2-11
-
 1
1 -
2
-
3
-
4
-
5
-
6
-
7
-
8
-
9
-
10
-
11
-
12
-
13
-
14
-
15
-
16
-
17
-
18
-
19
-
20
-
21
-
22
-
23
-
 24
24 -
 25
25 -
 26
26 -
 27
27 -
 28
28 -
 29
29 -
 30
30 -
 31
31 -
 32
32 -
 33
33 -
 34
34 -
35
-
36
-
37
-
38
-
39
-
40
-
41
-
42
-
43
-
44
-
45
-
46
-
47
-
48
-
49
-
50
-
51
-
52
-
53
-
54
-
55
-
56
-
57
-
58
-
59
-
60
-
61
-
62
-
63
-
64
-
65
-
66
-
67
-
68
-
69
-
70
-
71
-
72
-
73
-
74
-
75
-
76
-
77
-
78
-
79
-
80
-
81
-
82
-
83
-
84
-
85
-
86
-
87
-
88
-
89
-
90
-
91
-
92
-
93
-
94
-
95
-
96
-
97
-
98
-
99
-
100
-
101
-
102
-
103
-
104
-
105
-
106
-
107
-
108
-
109
-
110
-
111
-
112
-
113
-
114
-
115
-
116
-
117
-
118
-
119
-
120
-
121
-
122
-
123
-
124
-
125
-
126
-
127
-
128
-
129
-
130
-
131
-
132
-
133
-
134
-
135
-
136
-
137
-
138
 |
 |

2-11
ASUS TS100-E9-PI4
2.4
Front panel cover
Before you can install a 5.25-inch drive, you should first remove the front panel cover.
Ensure to unplug the power cable before installing or removing any system components.
Failure to do so may cause damage to the motherboard and other system components!
2.4.1
Removing the front panel cover
To remove the front panel cover:
1.
Locate the front panel assembly lock then slide it outward to unlock the latches that
secures the front panel cover to the chassis.
2.
Remove the front panel assembly from the chassis and set it aside.
assembly lock
front panel assembly