Asus V2-P5945G V2-P5G945 User's Manual for English Edtion - Page 36
If you install two IDE hard disk drives, connect the black interface
 |
View all Asus V2-P5945G manuals
Add to My Manuals
Save this manual to your list of manuals |
Page 36 highlights
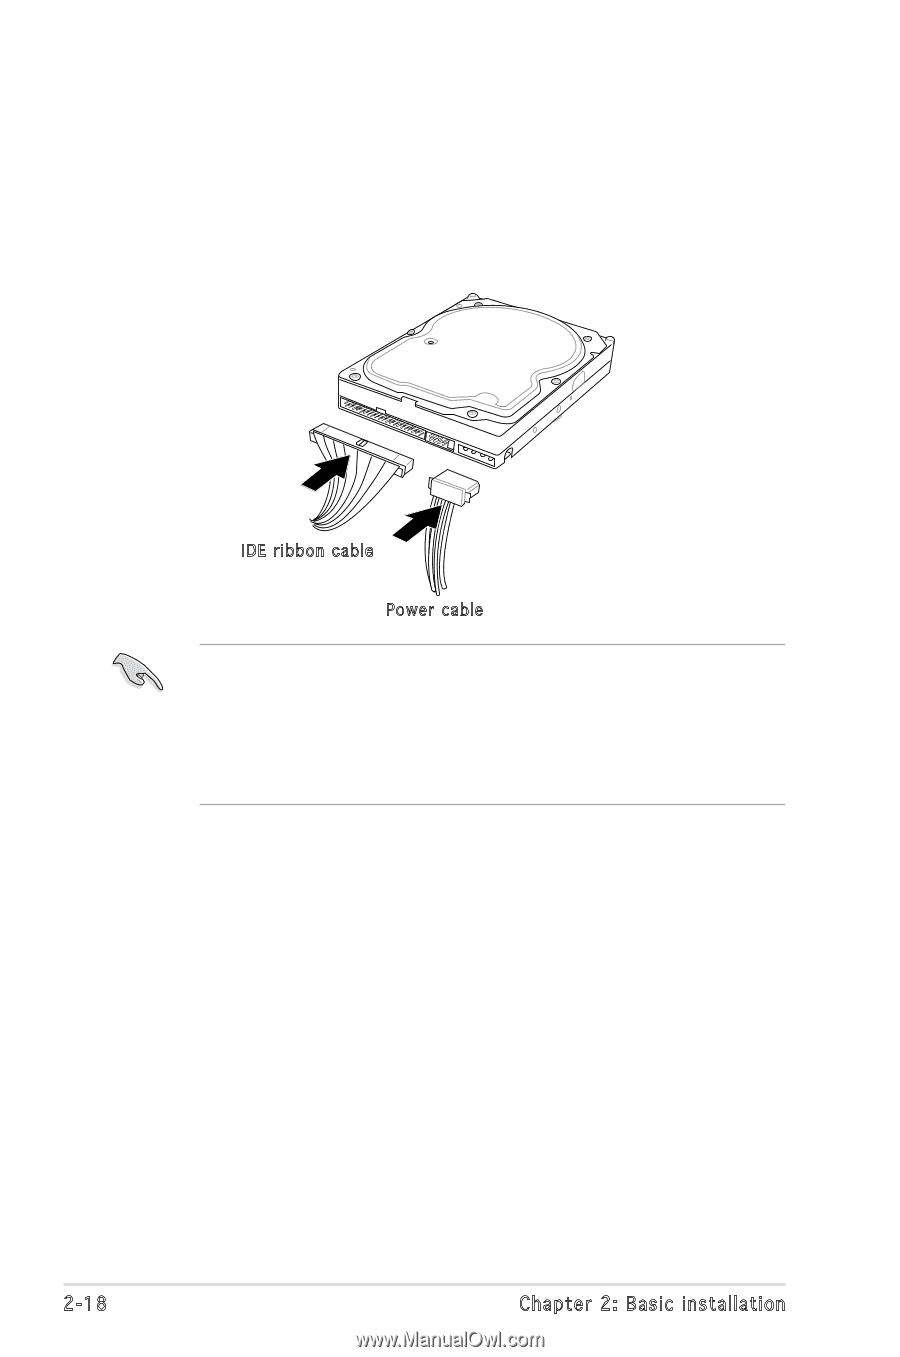
To install an IDE hard disk drive: 1. Follow steps 1-4 of the previous section. 2. Connect the blue interface of the IDE ribbon cable to the primary IDE connector (blue connector labeled PRI_IDE) on the motherboard. See page 4-7 for the location of the connector. IDE ribbon cable Power cable • If you will install only one hard disk drive, make sure to configure your hard disk drive as Master device before connecting the IDE cable and power plug. Refer to the HDD documentation on how to set the drive as a Master device. • If you will install two IDE hard disk drives, configure the other device as Slave. 3. Connect the gray interface of the IDE ribbon cable to the IDE connector on the drive. 4. If you install two IDE hard disk drives, connect the black interface of the IDE ribbon cable to the IDE connector on the second (Slave) IDE hard disk drive. 5. Connect a 4-pin power plug from the power supply unit to the power connector at the back of the drive(s). 2-18 Chapter 2: Basic installation
-
 1
1 -
2
-
3
-
4
-
5
-
6
-
7
-
8
-
9
-
10
-
11
-
12
-
13
-
14
-
15
-
16
-
17
-
18
-
19
-
20
-
21
-
22
-
23
-
24
-
25
-
26
-
27
-
28
-
29
-
30
-
 31
31 -
 32
32 -
 33
33 -
 34
34 -
 35
35 -
 36
36 -
 37
37 -
 38
38 -
 39
39 -
 40
40 -
 41
41 -
42
-
43
-
44
-
45
-
46
-
47
-
48
-
49
-
50
-
51
-
52
-
53
-
54
-
55
-
56
-
57
-
58
-
59
-
60
-
61
-
62
-
63
-
64
-
65
-
66
-
67
-
68
-
69
-
70
-
71
-
72
-
73
-
74
-
75
-
76
-
77
-
78
-
79
-
80
-
81
-
82
-
83
-
84
-
85
-
86
-
87
-
88
-
89
-
90
-
91
-
92
-
93
-
94
-
95
-
96
-
97
-
98
-
99
-
100
-
101
-
102
-
103
 |
 |