Asus W1J W1J User's Manual for English Edtion(E2543) - Page 42
Optical Drive - slot type on selected models, Optical Drive Cont.
 |
View all Asus W1J manuals
Add to My Manuals
Save this manual to your list of manuals |
Page 42 highlights
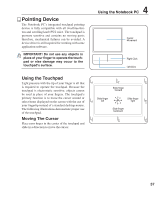
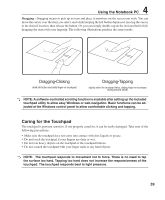
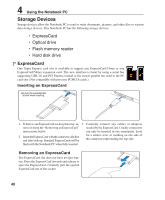
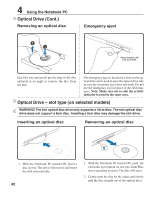
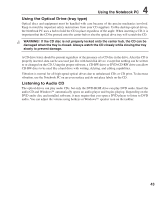
4 Using the Notebook PC Optical Drive (Cont.) Removing an optical disc Emergency eject Actual location will vary by model. Eject the tray and gently pry the edge of the disc upwards at an angle to remove the disc from the hub. The emergency eject is located in a hole on the optical drive and is used to eject the optical drive tray in case the electronic eject does not work. Do not use the emergency eject in place of the electronic eject. Note: Make sure not to stab the activity indicator located in the same area. Optical Drive - slot type (on selected models) WARNING! The slot optical disc drive only supports a 16cm disc. The slot optical disc drive does not support a 8cm disc. Inserting a 8cm disc may damage the slot drive. Inserting an optical disc Removing an optical disc 1. With the Notebook PC turned ON, insert a disc slowly. The drive will receive and insert the disk automatically. 42 1. With the Notebook PC turned ON, push the electronic eject button (or use eject from Windows operating system). The disc will eject. 2. Gently grab the disc by the edges and slowly pull the disc straight out of the optical drive.
-
 1
1 -
2
-
3
-
4
-
5
-
6
-
7
-
8
-
9
-
10
-
11
-
12
-
13
-
14
-
15
-
16
-
17
-
18
-
19
-
20
-
21
-
22
-
23
-
24
-
25
-
26
-
27
-
28
-
29
-
30
-
31
-
32
-
33
-
34
-
35
-
36
-
 37
37 -
 38
38 -
 39
39 -
 40
40 -
 41
41 -
 42
42 -
 43
43 -
 44
44 -
 45
45 -
 46
46 -
 47
47 -
48
-
49
-
50
-
51
-
52
-
53
-
54
-
55
-
56
-
57
-
58
-
59
-
60
-
61
-
62
-
63
-
64
-
65
-
66
-
67
-
68
-
69
-
70
-
71
-
72
-
73
-
74
-
75
-
76
-
77
-
78
-
79
 |
 |
