Asus Z83V A7 Hardware User''''s Manual for English (E2106) - Page 12
Top Side
 |
View all Asus Z83V manuals
Add to My Manuals
Save this manual to your list of manuals |
Page 12 highlights
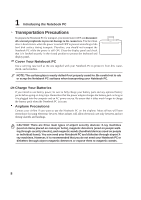
2 Knowing the Parts Top Side Refer to the diagram below to identify the components on this side of the Notebook PC. Details are given starting from the top and going clockwise. Display panel Camera latch (on selected models) Microphone Display Panel (Use a soft cloth without chemical liquids to clean. Use plain water if necessary.) Stereo Speaker Status Indicators Instant Keys (see section 3) Power Switch Keyboard Stereo Speaker PREV NEXT STOP PLAY/PAUSE Touchpad Touchpad buttons CD Player Control Status Indicators CIR Port (on selected models) (see section 3) (see front side) (see section 3) 12
-
 1
1 -
2
-
3
-
4
-
5
-
6
-
 7
7 -
 8
8 -
 9
9 -
 10
10 -
 11
11 -
 12
12 -
 13
13 -
 14
14 -
 15
15 -
 16
16 -
 17
17 -
18
-
19
-
20
-
21
-
22
-
23
-
24
-
25
-
26
-
27
-
28
-
29
-
30
-
31
-
32
-
33
-
34
-
35
-
36
-
37
-
38
-
39
-
40
-
41
-
42
-
43
-
44
-
45
-
46
-
47
-
48
-
49
-
50
-
51
-
52
-
53
-
54
-
55
-
56
-
57
-
58
-
59
-
60
-
61
-
62
-
63
-
64
-
65
-
66
-
67
-
68
-
69
-
70
-
71
-
72
-
73
-
74
 |
 |

12
2
Knowing the Parts
Top Side
Refer to the diagram below to identify the components on this side of the Notebook PC. Details are
given starting from the top and going clockwise.
Display Panel (Use a soft
cloth without chemical liquids
to clean. Use plain water if
necessary.)
Keyboard
Touchpad
PREV
NEXT
STOP
PLAY/PAUSE
CD Player Control
(on selected models)
(see section 3)
Power Switch
Touchpad buttons
Status Indicators
(see section 3)
CIR Port
(see front side)
Microphone
Camera
(on selected models)
Display panel
latch
Status Indicators
Instant Keys (see section 3)
Stereo Speaker
Stereo Speaker