Audiovox ACA200W Installation Manual - Page 9
Connecting the Video Signal - rear view camera
 |
UPC - 044476051593
View all Audiovox ACA200W manuals
Add to My Manuals
Save this manual to your list of manuals |
Page 9 highlights
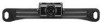
Connecting the Video Signal 1. Connect the included video extension cable to the Yellow RCA jack on the camera harness. 2. Run the extension cable to the monitor and connect to the Video input. Reverse/Normal Image Adjustment The camera comes standard with a reversed image, designed for mounting at the rear of the vehicle. If you need to change to a forward or normal image view, clip the blue jumper wire loop on the wiring cable (labeled "Mirror Selection" below) to change the camera image to normal. Secure the clipped wires with electrical tape. To change back to reverse image view, reconnect the blue wires and secure with electrical tape. Camera Wiring 9
-
 1
1 -
2
-
3
-
 4
4 -
 5
5 -
 6
6 -
 7
7 -
 8
8 -
 9
9 -
 10
10 -
 11
11 -
 12
12 -
 13
13 -
 14
14 -
15
-
16
-
17
-
18
-
19
-
20
 |
 |

9
Connecting the Video Signal
1.
Connect the included video extension cable to the Yellow RCA jack
on the camera harness.
2.
Run the extension cable to the monitor and connect to the Video
input.
Reverse/Normal Image Adjustment
The camera comes standard with a reversed image, designed for mounting
at the rear of the vehicle. If you need to change to a forward or normal
image view, clip the blue jumper wire loop on the wiring cable (labeled
“Mirror Selection” below) to change the camera image to normal. Secure
the clipped wires with electrical tape. To change back to reverse image
view, reconnect the blue wires and secure with electrical tape.
Camera Wiring