Audiovox AW826 Operation Manual - Page 1
Audiovox AW826 Manual
 |
View all Audiovox AW826 manuals
Add to My Manuals
Save this manual to your list of manuals |
Page 1 highlights
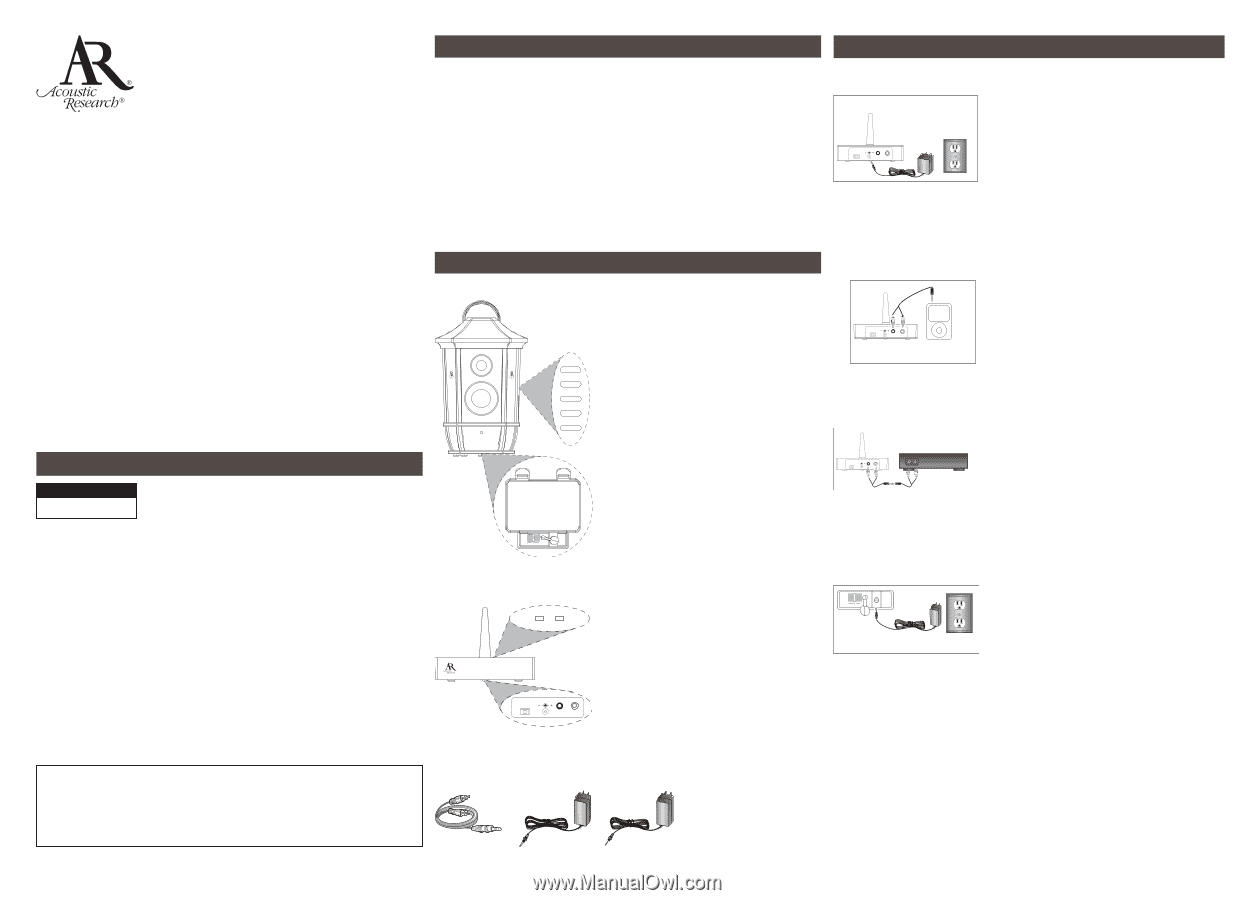
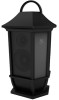
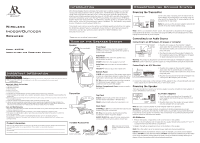
Introduction Connecting the Speaker System Wireless Indoor/Outdoor Speaker Model AW826 Installation and Operation Manual Important Information CAUTION RISK OF ELECTRIC SHOCK. DO NOT OPEN. Caution: To reduce the risk of electric shock, do not remove cover (or back). No user serviceable parts inside. Refer servicing to qualified service personnel. Important Safety Instructions 1. Read these instructions. 2. Keep these instructions. 3. Heed all warnings. 4. Follow all instructions. 5. Clean only with dry cloth. 6. Do not block any ventilation openings. Install in accordance with the manufacturer's instructions. 7. Do not install near any heat sources such as radiators, heat registers, stoves, or other apparatus (including amplifiers) that produce heat. 8. Protect the power cord from being walked on or pinched particularly at plugs, convenience receptacles, and the point where they exit from the apparatus. 9. Unplug this apparatus during lightning storms or when unused for long periods of time. 10. Refer all servicing to qualified service personnel. Servicing is required when the apparatus has been damaged in any way, such as power-supply cord or plug is damaged, liquid has been spilled or objects have fallen into the apparatus, the apparatus has been exposed to rain or moisture, does not operate normally, or has been dropped. Care and Maintenance • Always use a soft cloth to clean the speaker and transmitter. Never use any product containing alcohol or other solvents as they may damage the surface. • Use caution when plugging the power transformers in an AC outlet to avoid the risk of electric shock. • If the speaker are used outside on a deck or patio, make sure you take them indoors in the event of a rainstorm to prevent possible damage. • Do not operate or store the system in extreme temperatures (below 32ºF/0ºC and above 122ºF/50ºC). • To avoid electrical shock, use this product with caution near water sources if powered with the AC adapter. Never submerge in water. Product Information Keep your sales receipt to obtain warranty parts and service and for proof of purchase. Attach it here and record the serial and model numbers in case you need them. These numbers are located on the product. Model No Purchase Date Dealer/Address/Phone AR's Wireless Speaker System eliminates the hardest part of adding speakers to your home- running and hiding hundreds of feet of speaker wire. The AR Wireless Speaker System's RF signal travels with ease through walls, floors, ceilings and other obstacles, delivering highquality sound virtually anywhere inside the house or out. With drift- and static-free reception along with outstanding range-up to 150 feet*-the possibilities for enjoying your AR Wireless Speaker System are nearly unlimited. The AR Wireless Speaker System is compatible with most audio sources, such as A/V receivers/amps, stereos, computers, TVs, DVD players, and portable devices (CD players, cassette players, MP3s etc.). This manual covers various connection options and detailed operating instructions for making the AR Wireless Speaker System a valued part of your lifestyle. If, after having reviewed the instructions, you have any questions, please call toll-free 1-800-732-6866 or visit www.araccessories.com. Powering the Transmitter Transmitter (back panel) CHANNEL 1 2 3 DC IN R AUDIO L IN AC Power Adapter 120V AC wall outlet Connect the small, round plug from the transmitter AC power adapter to the transmitter's DC IN jack. Plug the other end of the transmitter AC power adapter into any standard 120V AC wall outlet. Note: Be sure to use the AC power adapter rated 12V DC 200 mA (it has the smaller diameter plug). Note: There is no transmitter ON/OFF switch. The transmitter is designed to be left plugged in and powered at all times. If you will not be using the AW826 for an extended period of time, unplug the transmitter AC power adapter. *Range may vary according to environment. Tour of the Speaker System Connecting to an Audio Source Connecting to an MP3 player, CD player, or computer Speaker Carrying handle Bass Boost On / Off Auto Scan Volume + Volume - Power DC IN LM R Front Panel Power indicator blinks when the speaker is first powered on; it turns solid blue when the speaker is tuned to the transmitter Side Panel Bass Boost button turns the speaker's bass enhancement on and off On/Off button turns the speaker on and off Auto Scan button rescans for the transmitter's signal Volume +/- buttons adjust the volume level Bottom Panel L/M/R switch determines if the speaker plays sound in mono as a stand-alone speaker, or plays the left or right track in a stereo pair with an additional AW826 DC IN receives the small round end of the included 9V 1200mA AC power adapter; remove the protective cover to insert the adapter Battery Compartment Cover remove to install 6 AA batteries CHANNEL 1 2 3 DC IN R AUDIO L IN Transmitter (back panel) Y-adapter audio cable A Audio source 1. Plug the stereo plugs on the provided Y-adapter audio cable into the AUDIO IN jacks on the back of the transmitter (make sure to match the colors on the plugs and jacks). 2. Plug the mini-plug end of the provided Y-adapter into the headphone output of your MP3 player or CD player (or audio output jack on your computer). Warning: This product is designed to work with line level outputs or headphone outputs only. DO NOT connect it directly to speaker outputs as it will permanently damage the transmitter. Connecting to an A/V Receiver Transmitter (back panel) A/V Receiver CHANNEL 1 2 3 DC IN R AUDIO L IN Y-adapter audio cable A Audio Output Mini-jack to RCA adapter (not included) 1. Plug the stereo plugs on the provided Y-adapter audio cable into the AUDIO IN jacks on the back of the transmitter (make sure to match the colors on the plugs and jacks). 2. Plug the mini-plug end of the provided Y-adapter into a mini-jack to RCA adapter (not included). 3. Connect the stereo plugs on the mini-jack to RCA adapter to the corresponding left and right audio outputs of your A/V receiver, amp, or other audio source. Powering the Speaker There are two options to power your wireless speaker: using the included AC power adapter or using 6 AA batteries (not included). Transmitter Signal Power Wireless audio transmitter CHANNEL 1 2 3 DC IN R AUDIO L IN Included Accessories Top Panel Signal indicator lights green when the audio is present and the transmitter is broadcasting Power indicator lights when the transmitter is on Back Panel CHANNEL 1 2 3 lets you find the best transmission frequency for your environment DC IN jack receives the small round end of the included 12V 200mA AC power adapter AUDIO IN (R / L) connects to your sound source using one of the connection options shown here Note: These power units should be plugged in so that they stay vertical or lie flat. 3.5mm to RCA cable Speaker AC/DC 9V 1200mA adapter Transmitter AC/DC 12V 200mA adapter DC IN LM R Bottom of the speaker AC power 120V AC adapter wall outlet AC Power Adapters 1. Insert the small, round plug from the speaker AC power adapter into the DC IN jack on the bottom of the speaker. 2. Plug the other end of the speaker AC power adapter into any standard 120V AC wall outlet. Note: Be sure to use the speaker AC power adapter rated 9V DC 1200 mA. Warning: This product is water-resistant, not waterproof. Avoid prolonged exposure to wet environments, such as rain, mist, dew, etc. In other words, you can take it out, just don't leave it out. If you plan to use the speaker in a humid or wet environment, we recommend powering it with batteries instead of with the power adapter. AA Batteries 1. Remove the battery compartment cover on the bottom of the speaker. 2. Insert six (6) AA batteries (not included) into the speaker following the polarity ("+" and "-") as diagrammed inside the battery compartment. 3. Replace the battery compartment cover on the bottom of the speaker. Note: Place the rubber cap in the speaker power input jack when using batteries. DO NOT mix batteries with different chemistry types (for example, a zinc battery with an alkaline battery). DO NOT mix new and used batteries. DO NOT leave batteries installed in the product when not in use for long periods. Always remove old, weak or worn-out batteries promptly and recycle or dispose of them in accordance with local and national regulations.
-
 1
1 -
 2
2
 |
 |