Audiovox CE265 Instruction Manual - Page 2
To Receive The FM Broadcast in Stereo - manual
 |
View all Audiovox CE265 manuals
Add to My Manuals
Save this manual to your list of manuals |
Page 2 highlights
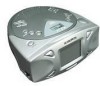
CAUTION The use of optical instruments with this product will increase eye hazard. Information (for the customers in USA) This equipment has been tested and found to comply with the limits for a Class B digital device. Pursuant to part 15 of the FCC Rules. These limits are designed to provide reasonable protection against harmful interference in a residential installation. This equipment generates, uses and can radiate radio frequency energy and, if not installed and used in accordance with the instructions, may cause harmful interference to radio communications. However, there is no guarantee that interference will not occur in a particular installation. If this equipment does cause harmful interference to radio or television reception. Which can be determined by turning the equipment off and on, the user is encouraged to try to correct the interference by one or more of the following measures: • Reorient or relocate the receiving antenna. • Increase the separation between the equipment and receiver. • Connect the equipment into an outlet that is on a circuit different from the one the receiver is connected. • Consult the dealer or an experienced radio / TV technician for help. You are cautioned that any changes or modifications not expressly approved in this manual could void you authority to operate this equipment. For the customers in the United Kingdom and / European countries This compact disc player is classified as a CLASS 1 LASER product. The CLASS LASER PRODUCT label is located on the bottom exterior. For the customers In Canada This apparatus complies with the Class B limits for radio noise emission set out in radio interference regulations. This product contains a low power laser device. CAUTION:INVISIBLE LASER RADIATION WHEN OPEN AND INTERLOCKS DEFEATED. AVOID EXPOSURE TO BEAM. - 1 - PRECAUTIONS On Safety As the laser beam used in this compact disc player could be harmful to the eyes, do not attempt to disassemble the casing. Refer servicing to qualified personnel only. • Do not put any foreign objects in the disc compartment. If you do so, the laser beam interlock may be defeated allowing the laser to remain on when the lid is opened. • Do not put any foreign objects in the DC 9V(external power input) jack. Should any solid objects or liquid fall into the unit, disconnect the power supply and have the unit checked by qualified personnel before any further operation. On Operation Since the CD system offers a wide dynamic range, the peaks of the high level inputs are recorded with high fidelity, and the noise level is very low. Do not turn up the volume while listening to a part of the disc with no audio signals or very low level inputs. If you do so, the speakers may be damaged when the peak level of the sound is played. The lens of the laser should be kept clean. Do not touch the lens or poke at it with your fingers. If you do so, the lens may be damaged and the unit will not operate correctly. On Use Never use the unit where it would be subject to: - Heat sources such as radiators or airducts. - Direct sunlight. - Excessive dust. - Moisture or rain. - Mechanical vibration or shock. - Unleveled surface. • Do not place any heavy object on top of the unit. • When the unit is used with an AC power adaptor, do not wrap the unit in a cloth, blanket, etc. If you do so, the temperature inside - 2 - and outside the unit may rise considerably, resulting in malfunctioning of the unit. • If the unit is brought directly from a cold to a warm location, or is placed in a very damp room, the moisture may condense on the lens inside the unit. Should this occur, the unit will not operate. In this case, remove the disc and leave the unit in a warm place for several hours until the moisture evaporates. • For the unit to operate at its best, it should not be subjected to temperatures below 5°C (41° F) or above 35°C (95° F). POWER SUPPLY AC POWER ADAPTOR Please use a 9V 500mA power adaptor. Plus pole " " to the center pin of the 5.5mm socket. When the unit is not in use, be sure to disconnect the AC power adaptor from the mains supply. To AC outlet Remarks: If AC cord is unplugged, please wait 5 seconds before AC cord is plugged in again. TURNING ON THE UNIT Plug the AC adaptor to AC outlet. This display will light up in standby mode. Press STANDAY button, and press FUNCTION button to select the desired function, the corresponding indicator will light up. ADJUST THE SOUND Rotate the VOLUME to adjust sound level. - 3 - LOCATION OF CONTROLS Top View 1 2 7 3 8 4 9 5 10 6 11 Front View 12 13 14 15 1. STANDBY button 2. SLEEP button 3. MEMORY/SET button 4. HR / TUNING button 5. CD OPEN button 6. MIN / TUNING button 7. DIMMER button 8. FUNCTION button (RADIO/CD) 9. CD STOP/BAND button 10. CD PLAY/PAUSE button 16 17 18 19 11. SNOOZE button 12. PRESET + / REPEAT button 13. PHONE jack 14. PRESET - button 15. COLORS button 16. ALARM 1 button 17. Display window 18. VOLUME control 19. ALARM 2 button - 4 - CLOCK SETTING IN STANDBY MODE Connect the AC power cord to a wall outlet. In Clock Mode 1. Press MEMORY/SET button for about 3 seconds. Normally hour and minute digit will flash. 2. Press button to adjust hour. 3. Press button to adjust minute. 4. Press MEMORY/SET button to confirm. LISTENING TO THE RADIO 1. Press the STANDBY button to turn on the unit. 2. Press the FUNCTION button to TUNER. - 5 - 3. Press BAND button to FM or AM. 4. Press or button to tune to a desired station. Note: LCD display will return to CLOCK mode after about 15 seconds with no further operation. For Better Radio Reception AM Rotate the unit horizontally. FM Extend the external FM antenna wire. CAUTION: DO NOT CONNECT TO OUTSIDE ANTENNA. To Search For a Station Automatically • Press and hold the or button still for 1to 2 seconds, and a station is searched automatically. Search will automatically stop when a station is tuned. Note: • The search may not stop at a station if the broadcast station signal is too weak. To Receive The FM Broadcast in Stereo 1. Press BAND button to FM. 2. When receiving FM broadcast in stereo, the " " indicator will light up. - 6 - Presetting Station Setting The unit can store AM - 10 stations, FM - 10 stations. It can be tuned into by selecting their preset numbers. It is possible to store station of any band in order of your choice. 1. Press BAND to select FM or AM band. 2. Press or button to tune to a desired station. 3. Press MEMORY/SET button until "MEMORY" indicator flash. 4. Press PRESET + or PRESETbutton to select channel number. 5. Press MEMORY/SET button until "MEMORY" indicator lights up to memorize the station. 6. Repeat steps 1 to 5 for the next preset. Tuning Into a Preset Station 1. Press BAND button to select FM or AM band. 2. Press PRESET + or PRESET - button to select a preset number. - 7 - DISPLAY COLOR AND BRIGHTNESS • Press DIMMER button to change the LCD display brightness. • Press COLORS button to repeatedly select the multi-color display changed cyclically as below. SETTING SLEEP FUNCTION When the sleep timer is used, the power will be automatically turned off after the specified time passes. Set in CD or Tuner Mode 1. Press SLEEP button while the power is on. "SLEEP" and " " light up. 2. Press SLEEP button to select the length of remaining time until the unit turns off. It changes the indicator in following way: ' %# $ "# # # ! • To cancel the sleep timer, press SLEEP button until " "show in display. - 8 -
-
 1
1 -
 2
2
 |
 |
