Audiovox D1988 User Manual - Page 6
C. Contents, D. Powering and installation, - dvd player
 |
View all Audiovox D1988 manuals
Add to My Manuals
Save this manual to your list of manuals |
Page 6 highlights
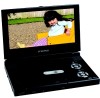
C. Contents 1. 1 x 9'' LCD Monitor and DVD Player 2. 1 x Remote Control with battery (CR2025) 3. 1 x Audio/Video Adapter Cable 4. 1 x AC to DC Adapter 5. 1 x DC Power Adapter 6. 1 x Instruction Manual D. Powering and installation 1. Powering the system indoors (Refer to Figure 1) Plug one end of the AC to DC adapter into the DC input jack on the left side of the main unit, then plug the other end into the 100~240V AC power receptacle. 2. Powering the system in a car Plug one end of the DC Power adapter into the DC input jack on the unit, then plug the other end into the vehicle power outlet. Figure 1 3. Built-in Battery Plug one end of the AC to DC adapter into the DC jack on the side of the player, then plug the other end into the 100~240V AC power outlet. Make sure the player is in the "Power Off" mode. Once fully charged, the LED indicator will turn off. Once the indicator is off, remove the AC to DC adapter wall plug. NOTE: Your new battery must be charged a minimum of 8 hours before the first usage. Each full recharge takes approximately five hours and one full charge can provide power to the player for approximately 2 hours. 6
-
 1
1 -
 2
2 -
 3
3 -
 4
4 -
 5
5 -
 6
6 -
 7
7 -
 8
8 -
 9
9 -
 10
10 -
 11
11 -
 12
12 -
13
-
14
-
15
-
16
-
17
-
18
-
19
-
20
-
21
-
22
-
23
-
24
-
25
-
26
-
27
-
28
-
29
-
30
-
31
-
32
-
33
-
34
 |
 |
