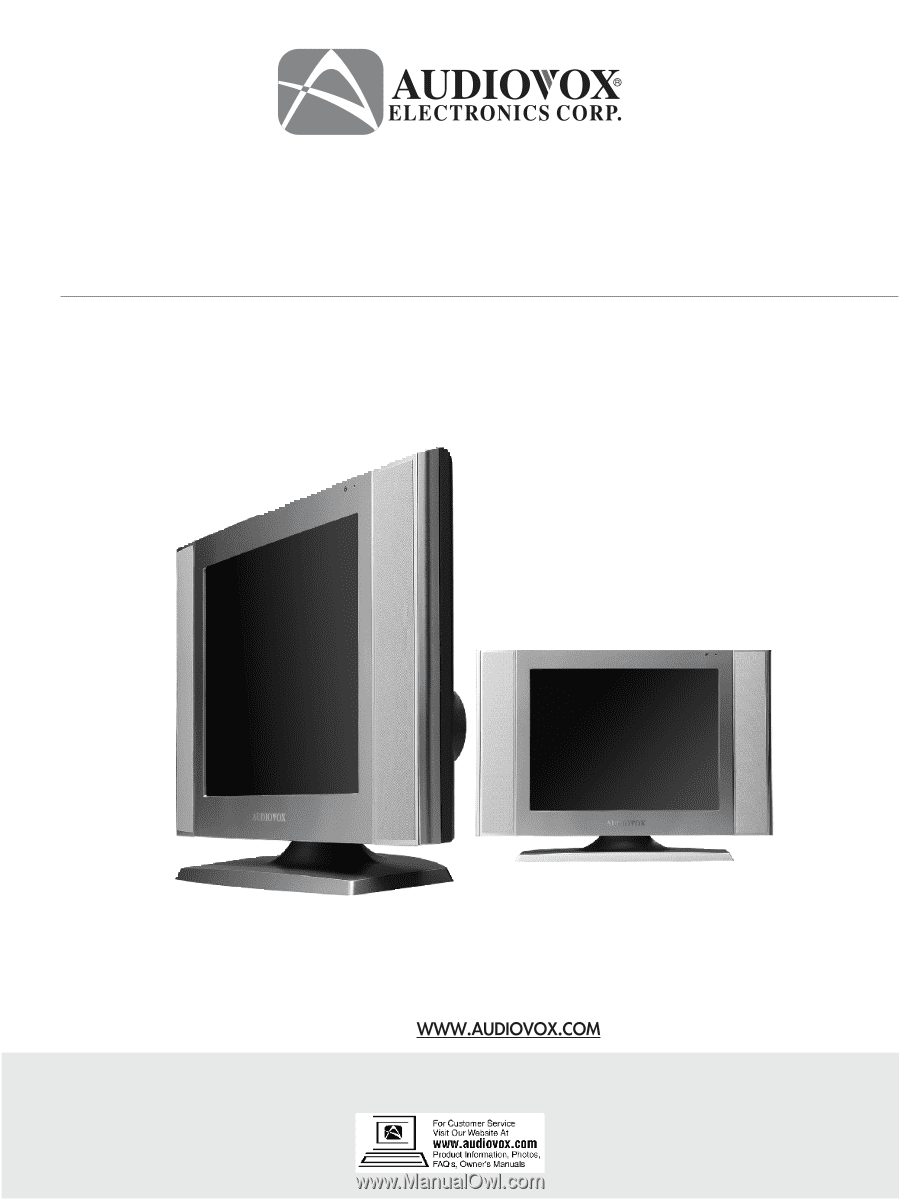
Audiovox FP1500 Operating Instructions
Audiovox FP1500 - 15" LCD Flat Panel TV Manual
 |
UPC - 044476011740
View all Audiovox FP1500 manuals
Add to My Manuals
Save this manual to your list of manuals |
Audiovox FP1500 manual content summary:
- Audiovox FP1500 | Operating Instructions - Page 1
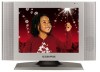
15" LCD TV Operating Instructions Model No. FP1500 For assistance, please call: 1-800-645-4994 Or visit us at Before connecting, operating or adjusting this product, please read these instructions completely. Please keep this manual for future reference 128-6729 - Audiovox FP1500 | Operating Instructions - Page 2
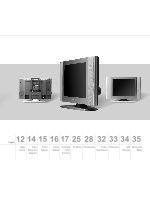
up Recognizing buttons and controls 01 02 04 05 06 07 08 09 10 11 Page# Important Safety Instructions Safety Cautions Accessories Outdoor Antenna Installation Power Connection Remote Control Top / Front Control Panels Rear Panel Input / Output Connections Remote Control Buttons PC/Video - Audiovox FP1500 | Operating Instructions - Page 3
12 14 15 16 17 25 28 32 33 34 35 Page# Basic Control Menu Setting List (Diagram) Picture Settings Volume Settings TV Setting / Other Functions PC Setting Troubleshooting Product Dimensions Specifications Wall Maintenance Mounting / Repair - Audiovox FP1500 | Operating Instructions - Page 4
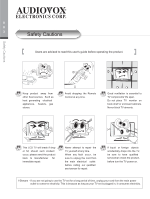
0 0 1 Important Safety Instructions Important Safety Instructions CAUTION RISK OF ELECTRIC SHOCK DO NOT OPEN CAUTION TO REDUCE THE RISK OF ELECTRIC SHOCK, DO NOT REMOVE COVER (OR BCAK) NO USER-DERVICEABLE PARTS INSIDE PEFER SERVICING TO CLIALIFIED SERVICE PERSONNEL The Lightning flash with - Audiovox FP1500 | Operating Instructions - Page 5
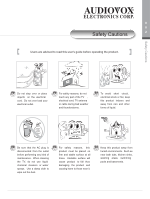
are advised to read this user's guide before operating the product. Safety Cautions Do not step over or place objects on the electrical cord. Do not over load your electrical outlet. For safety reasons, do not touch any part of the TV , electrical cord, TV antenna or cable during bad weather and - Audiovox FP1500 | Operating Instructions - Page 6
cabinets. Never block TV airvents. This LCD TV will break if drop or hit; should such incident occur, please send the product back to manufacturer for immediate repair. Never attempt to repair the TV yourself at any time. When any fault occur , be sure to unplug the cord from the main electrical - Audiovox FP1500 | Operating Instructions - Page 7
Power Adaptor Power Cord User's Manual Batteries Remote Control VGA Cable 0 0 Accessories 4 Accessories - Audiovox FP1500 | Operating Instructions - Page 8
avoiding main roads, neon lights and electrical power stations. Avoid sharing your TV antenna. (i.e. using one antenna on more than one TV set.) Outdoor antenna are subjected to constant weather wear and tear. When poor reception occurs, please consult your dealers or qualified service personnel. - Audiovox FP1500 | Operating Instructions - Page 9
adapter from package. Connect the round end of power adapter to the rear of the LCD TV monitor. Please refer to diagram instructions. 2.Take out the power cord and connect the flat end to the power adapter. 3. Plug the other end of the power cord into the wall outlet and the installation is complete - Audiovox FP1500 | Operating Instructions - Page 10
at LCD TV monitor for clear signal. 2 Remote range is at approx. within 20 feet with angles of approx. 30 degrees. 3 Do not have obstructions between remote and TV reception. 4 Battery life span is between 6 months to one year depending on usage. Once reception is weak, it is about time to replace - Audiovox FP1500 | Operating Instructions - Page 11
123 456 78 9 10 1 Mute 2 TV / Video / PC 3 Menu 4 Channel selection (Previous) 5 Channel selection (Next) 6 Volume control (Decrease) 7 Volume control (Increase) 8 Power 9 Remote Control Sensor 10 Electric power light indicator Light Indicator: Red - TV off Green - TV on Orange - Standby (AV - Audiovox FP1500 | Operating Instructions - Page 12
Recognizing buttons and controls earphone (3.5 ) Input Connectors Input AV1 AV2 AV3 PC TV Output Connectors Output Headphone speakers speakers Video Composite S-Video Y,Cb,Cr VGA(15 Pin D-SUB) Antenna Terminal Speakers Stereo / AUDIO Connector Stereo / AUDIO Connector Stereo / AUDIO Connector - Audiovox FP1500 | Operating Instructions - Page 13
and controls 0 Remote Control Buttons Recognizing buttons and controls 1 1 POWER 2 6 3 7 2 TV 4 8 3 AV 5 9 4 BRIGHTNESS 1 1 5 AUDIO 6 MUTE 7 PC 10 8 MTS 9 SLEEP 10 VOL( +/ - ) 12 13 11 CH( / ) 14 12 CHANNEL SELECT 15 13 DISPLAY 16 14 SKIP ON/OFF 17 15 ZOOM 16 - Audiovox FP1500 | Operating Instructions - Page 14
Rear Output Connectors PC VGA 1 PC Connectors Audio out Video DVD/VCR 2 Video Connectors Home Stereo 3.5 3 Speaker Connectors Note 1. Normal TV sounds broadcast via speaker connectors are more impressive to ears. 2. If your sound system does not have "Auxiliary" input connectors, you may - Audiovox FP1500 | Operating Instructions - Page 15
indicator changes from red to green. TV monitor is now ON. Press power button again, light indicator changes from green to red. TV monitor is now OFF. Changing between TV/AV/PC Settings 1. Make sure all equipment is connected properly. 2. Press your desired setting (TV/AV/PC) and the selected mode - Audiovox FP1500 | Operating Instructions - Page 16
sleep mode Basic Control Switching Channels Use numeric buttons on remote control to select the channel you desire. When selecting Single . Make use of the channel selection buttons to scroll up and down. Aerial antenna selection: Press CH Selection up, channel selection moves from 2 3 ... 68 69 - Audiovox FP1500 | Operating Instructions - Page 17
Other fuction Menu Setting List (Diagram) Picture Setting Volume Seting TV Setting Other fuction Setting To locate the above settings do the following: 1.Press MENU to display the menu setting list 2.Press VOL (-/+) to select the - Audiovox FP1500 | Operating Instructions - Page 18
well lit area and save energy DARK 20% brightness Picture Setting (2) On the remote, press MENU. You may press on CH( / ) button to scroll either decide your desired adjustments such as adjust the contrast, brightness or sharpness of the TV screen. Action 1, Press "MENU" Action 2, Press " CH " ( - Audiovox FP1500 | Operating Instructions - Page 19
Volume Settings 0 1 Volume Settings 6 Volume Setting (1) 1.Press "Audio" on the remote the select 5 different preset levels of volume. 2.Press "Audio "button; the 5 different levels of sounds will appear as shown. - Standard: High and low are equal - - Audiovox FP1500 | Operating Instructions - Page 20
on TV settings describes the TV's present status. E.g. : Present program has two language settings broadcasting under mono-tone. 5.Weak antenna reception do various tasks with the "menu" selection mode. CLOSED CAPTION This TV set is equipped with an internal Closed Caption decoder. The closed - Audiovox FP1500 | Operating Instructions - Page 21
TV Parental Guidelines are restricted by age and contect. Since a TV program may use either the MPAA rating or the TV Guidelines, both should be adjusted for complete control. RATING G PG Age base PG-13 R NC-17 you set PG to BLOCK PG-13, R, NC-17 and X are automatically block. 6.Press MENU to return - Audiovox FP1500 | Operating Instructions - Page 22
INPUT SECRET NO. (0000) will be display. Input the 4 digit secret number by using channel select keys 4. Press CH ( / ) to move the arrow to TV PARENTAL GUIDELINES 5. Press VOL(-/+) to select BLOCK CONTENT 6. Press CH ( / ) to move the arrow to the desired item 7. Press VOL(-/+) to select BLOCK or - Audiovox FP1500 | Operating Instructions - Page 23
to display MENU screen 2. Press VOL (-/+) to CH 3. Press CH ( / ) to move the cursor to CHANNEL INPUT 4. Press VOL (-/+) to select CATV or TV 5. Press MENU to exit CHANNEL AUTO SCAN From MENU, press VOL(-/+), then CH ( / ) to find CHANNEL AUTO SCAN press VOL(-/+), channels will automatically select - Audiovox FP1500 | Operating Instructions - Page 24
you wish. This action will delete the channnel from your TV. The deleted channel lettering will also change color from green to red. Red CHANNEL MEMORY (Enable Channel) If you wish to replace a channel, proceed as follows: 1. From your remote, press "CH"( / ) up or down to locate the channel you - Audiovox FP1500 | Operating Instructions - Page 25
0 2 TV Setting 2 TV Setting Sleep Mode 1. To set sleep mode : Press the "Sleep" button and select the time you wish to activate this function. The selected time (lettering in red) will disappear from your screen, and your power indicator will now change from the color green to that of orange, - Audiovox FP1500 | Operating Instructions - Page 26
signal is not received. Note: When received signals are weak or interferedwith some other signals, the BLUE SCREENfunction may be activated. To watch the TV under such conditions,set BLUE SCREEN to off. Default Setting From menu, press VOL(-/+), then CH ( / ) and find "default setting" then set - Audiovox FP1500 | Operating Instructions - Page 27
decreasing the volume setting will also disable on mute setting. Channel Display Press the "Display" button and the top right hand corner of the TV screen will display your current viewing channel, program and audio mode. Channel Return Press the "Q-VIEW" button and you will return to your previous - Audiovox FP1500 | Operating Instructions - Page 28
5 PC Setting PC Settings Simply press TV/Video/PC button to locate the PC instructions desired will disappear, press menu button to end selection process. PC PATTERN BRIGHTNESS HOR. POSITION PHAS SHARPNESS LOAD DEFAULT CONTRAST VER. POSITION IMAGE ADJUSTMEMT LANGUAGE NO SIGNAL INPUT Remote - Audiovox FP1500 | Operating Instructions - Page 29
PC Setting 0 2 PC Setting 6 Brightness Press menu, select brightness, and then set the brightness functions Contrast Press menu, select Contrast, and then set the contrast functions Horizontal Position Press menu, select horizontal Position , and then set the horizontal position functions - Audiovox FP1500 | Operating Instructions - Page 30
PC Setting 0 2 7 PC Setting Phase Press menu, select Phase, then set the phase functions Note: Adjust if screen is not clear Clock Press menu, select Clock, then set your current time Load Default Press menu, select, then set the setting to default note: if screen shows "No Signals" this - Audiovox FP1500 | Operating Instructions - Page 31
antenna. Flurries Lots of tiny dots appears on your screen. This is the result of poor reception signals. You may have to re-enforce your antenna signals. note: note: If interferences occur while you are using a cable system, then the problem could be at the cable source and not from your TV - Audiovox FP1500 | Operating Instructions - Page 32
. If they are okay, problem is just with the TV program you are viewing Press the TV/VIDEO/PC button on the remote or on the top of the unit to get to the desired display option If you are using outdoor antenna, please check your connections Please check if your power cord is connected properly, it - Audiovox FP1500 | Operating Instructions - Page 33
0 0 2 3 9 Troubleshooting 0 Troubleshooting Picture too dark Check your brightness level Check your contrast level In the on screen display (OSD) select default Check your LCD monitor for possible demage Remote Control Failure Check TV main power source Check if remote control batteries are - Audiovox FP1500 | Operating Instructions - Page 34
Troubleshooting Before calling our serviceman, please refer to the following chart to see if you can adjust the problems yourself. Trouble Checks and Adjustments TV will not turn on Plug TV in. Plug something else into the outlet to make sure it is working. Make sure batteries in the remote - Audiovox FP1500 | Operating Instructions - Page 35
Watt output Number of Speaker 181 TV channel compatibility Parental Control with V-Chip Closed Caption (CC) SAP Auto Sleep (Power/ Off) VESA mounting standard Mechanical Dimensions: WxHxD WxHxD Weight Power Usage: Power source Power input Power ON Consumption 15" (diagonal) 4:3 1024x768 0.297mm - Audiovox FP1500 | Operating Instructions - Page 36
Dimensions 0 3 3 Dimensions Unit: inch 19.13 inch (486mm) 12.00 inch (305 mm) 13.54 inch (344 mm) 13 3.92 inch(99.7 mm) 1.24 inch(31.7 mm) 6.08 inch (154.5 mm) 2 - Audiovox FP1500 | Operating Instructions - Page 37
Wall Mounting 0 3 Wall Mounting 4 Unit: inch 3.93 inch (100 mm) 3.93 inch (100 mm) VESA 3.93 x 3.93 inch (100 mm x 100 mm) Mounting - Audiovox FP1500 | Operating Instructions - Page 38
Repair 0 3 5 Maintenance / Repair Maintenance: DO NOT wipe LCD with water Clean the LCD using a dry soft cloth such as gauze. If the LCD is heavily soiled, appy a cleaner for LCD REPAIR: (Important) DO NOT SHIP PRODUCT BACK FOR REPAIR WITHOUT FIRST CONTACTING AUDIOVOX AT 1-800-645-4994. AUDIOVOX - Audiovox FP1500 | Operating Instructions - Page 39
Note - Audiovox FP1500 | Operating Instructions - Page 40
Note - Audiovox FP1500 | Operating Instructions - Page 41
Note - Audiovox FP1500 | Operating Instructions - Page 42
Note Customer Record: This Model number and serial number of this product can be found on to aid in identification in the event of theft or loss, and Warranty Service purpose. Model Number: FP1500 Serial Number: Audiovox Electronics Corporation 150 Marcus Blve Hauppauge, NY 11788 1-800-651-4994 - Audiovox FP1500 | Operating Instructions - Page 43
repaired or replaced with reconditioned product ( at the Company's option) without charge for parts and repair labor. To obtain repair or replacement antenna problems REPAIR OR REPLACEMENT PROVIDED ABOVE AND, IN NO EVENT , SHALL THE COMPANY'S LIABILITY EXCEED THE PURCHASE PRICE AUDIOVOX ELECTRONICS - Audiovox FP1500 | Operating Instructions - Page 44
Dealer 70-010019
-
 1
1 -
 2
2 -
 3
3 -
 4
4 -
 5
5 -
 6
6 -
 7
7 -
8
-
9
-
10
-
11
-
12
-
13
-
14
-
15
-
16
-
17
-
18
-
19
-
20
-
21
-
22
-
23
-
24
-
25
-
26
-
27
-
28
-
29
-
30
-
31
-
32
-
33
-
34
-
35
-
36
-
37
-
38
-
39
-
40
-
41
-
42
-
43
-
44
 |
 |
15" LCD TV
O
perating
I
nstr
uctions
Model No.
FP1500
For assistance, please call: 1-800-645-4994
Or visit us at
Before connecting, operating or adjusting this product, please read these instructions completely
.
Please keep this manual for future reference
128-6729