Audiovox PVR1000 User Manual - Page 13
Photo Player - review
 |
View all Audiovox PVR1000 manuals
Add to My Manuals
Save this manual to your list of manuals |
Page 13 highlights
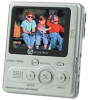
A. Photo Player To view photos, you have to enter Photo Player category. In this category you can review photos, record voice clip, add special effects to photos and more. To enter the Photo Player category: Press OK button or press the center button of the scroller. • Scroll up/down the scroller to select previous/next photo • Press OK button to magnify/shrink the selected photo • Press MENU button to enter the Photo Menu. To exit the menu, press MENU again The Photo menu contains the following: Display Attach Voice MULTIPLE / SINGLE photo display Press OK button to enter Display setting. Scroll up/down to select the preferred setting and press the center button of the scroller to confirm. Scroll down and press the center button of the scroller to enter Attach Voice setting. A message will show on the bottom of the screen. Scroll up/down to select the photo you want to attach voice narration and press the RECORD button to start recording. A icon will then show on the top of the screen. To stop recording, press STOP button. When the recording completes, a icon will appear on the photo to which the voice narration has been attached. PVR User Guide 13
-
 1
1 -
2
-
3
-
4
-
5
-
6
-
7
-
 8
8 -
 9
9 -
 10
10 -
 11
11 -
 12
12 -
 13
13 -
 14
14 -
 15
15 -
 16
16 -
 17
17 -
 18
18 -
19
-
20
-
21
-
22
-
23
-
24
-
25
-
26
-
27
-
28
-
29
-
30
-
31
-
32
-
33
-
34
-
35
-
36
-
37
-
38
-
39
-
40
-
41
-
42
 |
 |
