Audiovox VBP4000 Owners Manual
Audiovox VBP4000 - VBP 4000 DVD Player Manual
 |
UPC - 044476006265
View all Audiovox VBP4000 manuals
Add to My Manuals
Save this manual to your list of manuals |
Audiovox VBP4000 manual content summary:
- Audiovox VBP4000 | Owners Manual - Page 1
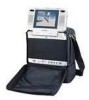
VBP4000 VIDEO IN A BAG SYSTEM WITH DETACHABLE 5.6" LCD MONITOR & DVD PLAYER - Audiovox VBP4000 | Owners Manual - Page 2
Crystal Display (LCD) Monitor and a DVD Player. The system utilizes the latest state of the art electronics and is designed for use in vehicles, hotels, offices or your home. The "Video in a Bag" System is constructed to provide years of reliable, trouble-free service. The system is compact so that - Audiovox VBP4000 | Owners Manual - Page 3
when the ignition key is in the Run and/or Accessory positions. To prevent battery discharge, disconnect the "Video in a Bag" System jack from the cigarette lighter socket when the unit is not in use. Use only the supplied power cable matching this set to avoid electric hazards. Always disconnect - Audiovox VBP4000 | Owners Manual - Page 4
Contents 1. 1 x Detachable Monitor & DVD Player Combo 2. 1 x DIN Cable 3. 1 x AC to DC Adapter 4. 1 x Cigarette Lighter Adapter 5. 1 x Remote Control 6. 1 x Pouch 7. 1 x Travel Bag with 4 Straps 8. 1 x Instruction Manual 9. 1 x Gift Box D. Power Source 1. Powering the system indoors (Refer to Figure - Audiovox VBP4000 | Owners Manual - Page 5
Powering the system in the vehicle (Refer to Figure 2) Figure 2 Unzip the lower compartment of the bag and take the cigarette lighter adapter. Plug one end into the DC 12V jack on the left side of the main unit, then plug other end into the cigarette lighter socket. 3. Powering the detached monitor - Audiovox VBP4000 | Owners Manual - Page 6
unit, you can connect the PORT on the right side of the monitor to either MONITOR 1 port or MONITOR 2 port on the left side of the main unit with the supplied DIN cable. When the monitor is connected to the main unit with the DIN cable, DC 12V power, Audio/Video and IR signals will all be sup- 6 - Audiovox VBP4000 | Owners Manual - Page 7
plied through the DIN cable to the connected monitor. So there is no need for another power source to be connected to the DC 12V jack on the right side of the detached monitor. Figure 5 Figure 6 7 - Audiovox VBP4000 | Owners Manual - Page 8
reach back to the ring. 4). Adjust the straps tightly so that the bag is secured. 5). Unzip the bag and flip down the front flap. Ensure the inside Velcro straps of the bag is fastened to prevent the unit from falling. Swing the monitor upwards and adjust the screen for the desired viewing angle. 8 - Audiovox VBP4000 | Owners Manual - Page 9
reach back to the ring. 3). Adjust the straps tightly so that the bag is secured. 4). Unzip the bag and flip down the front flap. Ensure the inside Velcro strap of the bag is fastened to prevent the unit from falling. Swing the monitor upwards and adjust the screen for the desired viewing angle. 9 - Audiovox VBP4000 | Owners Manual - Page 10
up) on the back seat. Guide the vehicles safety belt through the short strap sewn on the back of the bag. Then secure and adjust the safety belt so that the system is not free to move around. Finally uncover the bag, swing the monitor upward and adjust the screen for a desired viewing angle. Ensure - Audiovox VBP4000 | Owners Manual - Page 11
the pouch is tightly secured. 3). Insert one end of the DIN cable into the PORT on the right side of the detached monitor, and the other end into either MONITOR 1 port or MONITOR 2 port on the left side of the main unit. 5. Placing the system in a hotel/office/home (Refer to Figure 11) Figure 11 - Audiovox VBP4000 | Owners Manual - Page 12
the screen for the proper viewing angle. This can be done with or without the monitor inside its pouch. Insert one end of the DIN cable into the PORT on the right side of the detached monitor, and the other end into either MONITOR 1 or MONITOR 2 port on the left side of the main unit. F. Controls - Audiovox VBP4000 | Owners Manual - Page 13
21). Next Button 22). Stop Button 23). Eject Button 24). Remote Control Sensor 25). Power On/Off Button for Monitor 26). Audio R Input Jack for Monitor 27). Audio L Input Jack for Monitor 28). Video Input Jack for Monitor 29). Monitor Port (Input) 30). DC 12V Input Jack for Monitor 31). DVD Slot 13 - Audiovox VBP4000 | Owners Manual - Page 14
2. Remote Control View (Refer to Figure 13) 1). Power Button 2).Display Button EJECT 3). Angle Button 4). Subtitle Button 5). Audio Button 6) A DVD After connecting power to the unit, press the power button on the main unit momentarily and press the power button on the side of the monitor. - Audiovox VBP4000 | Owners Manual - Page 15
1. Basic Operation POWER OPEN/CLOSE PLAY SLOW PAUSE STOP NEXT PREVIOUS FORWARD REVERSE UP/DOWN/LEFT /RIGHT ENTER NUMBERS Return MENU REPEAT A-B DISPLAY ANGLE SUBTITLE AUDIO ZOOM SETUP Turn on/off the unit Eject/load the disc Start Play Play at 1/2, 1/4, or 1/8 times speed Still Picture (1 time) - Audiovox VBP4000 | Owners Manual - Page 16
divided into sections called title and chapter. When you play a DVD, a root menu of the disc will appear on the screen of your TV or Monitor. The contents of the menu vary from disc to disc. Press MENU during playing to display the menu, and press ENTER or PLAY to start - Audiovox VBP4000 | Owners Manual - Page 17
(Menu 2) c. Press DISPLAY the 3rd time to display the elapsed time for the chapter. The heading will disappear automatically in about 3 seconds. (Menu 3) Press DISPLAY the 4th time to display the remaining time for the chapter. The heading will disappear automatically in about 3 seconds. (Menu 4) - Audiovox VBP4000 | Owners Manual - Page 18
2). Angle During play back press ANGLE to view angles for discs containing multi-angles, with the current angle number (1) and the total number of angles (2) displaying. Go on to press ANGLE to select other angle, and finally exit to return to normal viewing angle. The angle display will disappear - Audiovox VBP4000 | Owners Manual - Page 19
During play back press AUDIO to select the audio language you desire, with the current audio channel number (1) and the total number of audio channels (2) displayed. Press AUDIO again to select another audio language. The audio display will disappear automatically if the AUDIO button isn't pressed - Audiovox VBP4000 | Owners Manual - Page 20
6). A-B Repeat a. During play back press A-B to set the starting point A. (Menu 9) b. Press A-B to set the ending point B and the player will repeatedly play the part between Point A and Point B. (Menu 10) c. Press A-B a 3rd time to cancel A-B repeat. Normal play back will resume from Point A. (Menu - Audiovox VBP4000 | Owners Manual - Page 21
7). Repeat a. During play back press REPEAT to repeatedly play the cur- rent chapter. (Menu 12) b. During play back press REPEAT again to repeatedly play the current title. (Menu 13) 3. During play back press REPEAT a 3rd time to cancel the repeated playing and resume normal play back. The repeat - Audiovox VBP4000 | Owners Manual - Page 22
ENTER to confirm the setting. Press LEFT to return. * NORMAL/PS: When the player is connected to a normal TV, and a wide picture is shown on the full screen, with a portion may be cut off automatically. * NORMAL/LB: When the player is connected to a normal TV, and a wide picture is shown on the - Audiovox VBP4000 | Owners Manual - Page 23
the submenu. (Menu 17) Select the video system on the screen using UP/DOWN, and press ENTER to confirm the setting. Press LEFT to return. * MULTI: The connected TV is multi system. * NTSC: The connected TV is NTSC system. * PAL: The connected TV is PAL system. c. Select ANGLE MARK using UP/DOWN - Audiovox VBP4000 | Owners Manual - Page 24
/DOWN, and then press ENTER to return to the main page. (Menu 19) 2). When there's no disc inside the player, select PREFERENCES using UP/DOWN, and then press ENTER to enter the preferences page. (Menu 20) a. Select AUDIO using UP/DOWN, and then press RIGHT to en ter the submenu. Select the - Audiovox VBP4000 | Owners Manual - Page 25
LEFT to return. (Menu 22) Note: Language selection is only available for discs recorded in above listed languages. If not, the player will play and display on the screen the original recorded language contained in the disc. d. Select PARENTAL using UP/DOWN, and then press RIGHT to enter the submenu - Audiovox VBP4000 | Owners Manual - Page 26
Select the parental level you desired using UP/DOWN for discs with lock-out function or multiple rating levels. It's listed from the lowest level (1 Child) to the highest level (8 Adult). Press ENTER to enter the password verify page. (Menu 24) Input the password in 4 digits, and then press ENTER to - Audiovox VBP4000 | Owners Manual - Page 27
using it to set the parental level and change the password, you may note this default password by other means and delete it from this manual. Some discs can be limited depending on the age of users while some discs can not. f. Select DEFAULTS using UP/DOWN, and then press RIGHT - Audiovox VBP4000 | Owners Manual - Page 28
main unit, which takes priority to the built-in DVD Player. Adjust the volume control and the brightness control on the monitor for individual preference. 2.Plug the video output from your game system into the yellow video jack and the Audio L and Audio R into the applicable jacks on the right side - Audiovox VBP4000 | Owners Manual - Page 29
: The AC adapter can drive only 1 main unit and 1 monitor either combined or detached). Connect the PORT on the additional monitor to either MONITOR 1 port or MONITOR 2 port on the left side of the main unit with the supplied DIN cable. After plugging in the main unit, DC 12V power, Audio/ Video and - Audiovox VBP4000 | Owners Manual - Page 30
, and Red (Audio R) to Red. 3. Using S VIDEO output (Refer to Figure 14) Connect the S VIDEO jack on the left side of the main unit to the S VIDEO connector on your TV for a high quality picture. K. Specification Disc format: DVD/CD Color system: NTSC Screen size": 5.6" DVD video format: Horizontal - Audiovox VBP4000 | Owners Manual - Page 31
, compact discs, speakers, accessories, or vehicle electrical systems. This Warranty does not apply to any product or part thereof which, in the IS LIMITED TO THE REPAIR OR REPLACEMENT PROVIDED ABOVE AND, IN NO EVENT, SHALL THE COMPANY'S LIABILITY EXCEED THE PURCHASE PRICE PAID BY PURCHASER FOR THE - Audiovox VBP4000 | Owners Manual - Page 32
For Custom er Service Visit O ur W ebsite At 999.audiovox.com Product Inform ation, Photos, FA Q 's O w ner 's M a nuals © 2002 Audiovox Electronics Corp., Hauppauge, NY 11788 128-6291
-
 1
1 -
 2
2 -
 3
3 -
 4
4 -
 5
5 -
 6
6 -
 7
7 -
8
-
9
-
10
-
11
-
12
-
13
-
14
-
15
-
16
-
17
-
18
-
19
-
20
-
21
-
22
-
23
-
24
-
25
-
26
-
27
-
28
-
29
-
30
-
31
-
32
 |
 |

VBP4000
VBP4000
VBP4000
VBP4000
VBP4000
VIDEO IN A BAG SYSTEM WITH
DETACHABLE 5.6" LCD MONITOR & DVD PLAYER