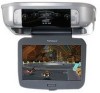
Audiovox VOD10PS2 Operation Manual - Page 15
Wireless Controller 2.4ghz, How To Use - remote
 |
UPC - 044476068119
View all Audiovox VOD10PS2 manuals
Add to My Manuals
Save this manual to your list of manuals |
Page 15 highlights
WIRELESS CONTROLLER (2.4GHz) Carefully read the information before use. For detailed connection and usage methods, refer to the Owner's Manual for the PIayStation2 system. HOW TO USE Battery Installation: The wireless controller uses two "AA" batteries. 1. Turn your controller upside down and remove the lid on the bottom by pressing against the lip and pulling the lid away. 2. Insert the batteries as indicated in the controller. 3. Once the batteries are inserted, put the lid back in its place and cover the batteries. Safety Precaution: Follow the battery manufacturer's instructions as well as there important safety tips. Do not open or mutilate batteries as they might leak dangerous chemicals. The wireless transceivers are pre-installed in the controller ports on your PlayStation2 system. Turning On the Controller: 1. Turn on your PlayStation2 system. Press the green reset button on the remote control if the PlayStation2 does not come on when the main unit is turned on. 2 Place the ON/OFF switch for your controller, which is located between the dual analog joy sticks, to ON. The POWER LED will illuminate green. 3. Once the controller has been powered on, the PlayStation2 will recognize the wireless controller. The MODE LED indicator will illuminate red on the wireless controller, indicating the connection between the wireless controller and the receiver. The green Rx LED on the PlayStation2 transceiver will illuminate a steady green. 15 ON/OFF Switch POWER LED MODE LED
-
 1
1 -
2
-
3
-
4
-
5
-
6
-
7
-
8
-
9
-
 10
10 -
 11
11 -
 12
12 -
 13
13 -
 14
14 -
 15
15 -
 16
16 -
 17
17 -
 18
18 -
 19
19 -
 20
20 -
21
-
22
-
23
-
24
-
25
-
26
-
27
-
28
 |
 |
