Audiovox XMB10 User Guide - Page 11
the Boom Box and Receiver. - antenna
 |
View all Audiovox XMB10 manuals
Add to My Manuals
Save this manual to your list of manuals |
Page 11 highlights
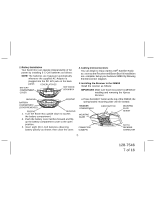
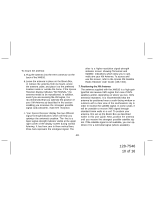
NOTE: Do not cut the antenna cable and attempt to splice it or attach alternative connectors or cable. The cable and connectors used in your XMB10 are specially chosen and attached at the factory to ensure that they will work with XM's unique frequency band. Use an XMapproved antenna extension kit from your local consumer electronics retailer. Failure to do so could damage the unit. a. Apply power to the XMB10 Boom Box as outlined previously in paragraph 3c and obtain an audio output. If no audio is heard, move the antenna to different positions on the surface until an audio output is heard. This is the desiredantenna position and should be marked. b. After determining the optimum position, turn off XMB10 and Receiver power, disconnect the power adapter from the wall outlet receptacle (if indoors) and disconnect the antenna cable. c. When indoors, plan the routing of the antenna cable to the cradle. Make sure you avoid any obstructions that could crimp, kink or twist the cable; use protective grommets wherever rough openings are encountered. d. If the antenna is mounted outside, route the cable from the antenna position to the interior of the home, working the cable through the basement,under a window sill, etc.; make adjustments and take up slack whenever necessary. e. If outdoors, either leave the antenna in place atop the XMB10, or remove the antenna and find a location free from overhead obstructions such as tree branches, or the roof of a tent or other temporary shelter. f. Plug the antenna cable into the ANT connector on the back of the Boom Box. g When not using battery power as the primary power source, plug the female end of the DC Adapter cable into the "DC 12V receptacle on the rear of the Boom Box. h. Plug the other end of the DC adapter cable into a 110-volt wall receptacle. Apply power to the Boom Box and Receiver. i. You are now ready to enjoy XM programming outdoors or within your home. -11- 128-7546 11 of 16
-
 1
1 -
2
-
3
-
4
-
5
-
 6
6 -
 7
7 -
 8
8 -
 9
9 -
 10
10 -
 11
11 -
 12
12 -
 13
13 -
 14
14 -
 15
15 -
 16
16
 |
 |