Audiovox XMCK5 User Guide - Page 15
Step 4: Making Your Vehicle's FM Radio an XM Radio
 |
UPC - 044476037436
View all Audiovox XMCK5 manuals
Add to My Manuals
Save this manual to your list of manuals |
Page 15 highlights
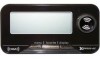
vehicle installation XpressEZ user guide0407.qxp:Layout 1 5/9/07 12:33 PM Page 15 15 Step 4: Making Your Vehicle's FM Radio an XM Radio Your XpressEZ contains a built-in FM modulator that requires the use of either the included XM SureConnect or the optional FM Direct Adapter (sold separately) to transmit the XM audio signal to your vehicle's FM radio. First, turn on your car stereo. You will need to find a suitable FM frequency in order to get the best sound. A suitable FM frequency is an unused frequency or weak station that is not located near a strong FM station in your area. Press Menu, look for this screen: Press the XM button, then turn the knob to scroll through the frequencies. Match the frequency to the frequency you see on your car's FM radio. Choose from frequencies between 88.1 - 107.9. in the
-
 1
1 -
2
-
3
-
4
-
5
-
6
-
7
-
8
-
9
-
 10
10 -
 11
11 -
 12
12 -
 13
13 -
 14
14 -
 15
15 -
 16
16 -
 17
17 -
 18
18 -
 19
19 -
 20
20 -
21
-
22
-
23
-
24
-
25
-
26
-
27
-
28
-
29
-
30
-
31
-
32
-
33
-
34
-
35
-
36
-
37
-
38
-
39
-
40
 |
 |
