Avanti CK3616 Instruction Manual - Page 9
Power Supply Connections, Backsplash Installation
 |
View all Avanti CK3616 manuals
Add to My Manuals
Save this manual to your list of manuals |
Page 9 highlights
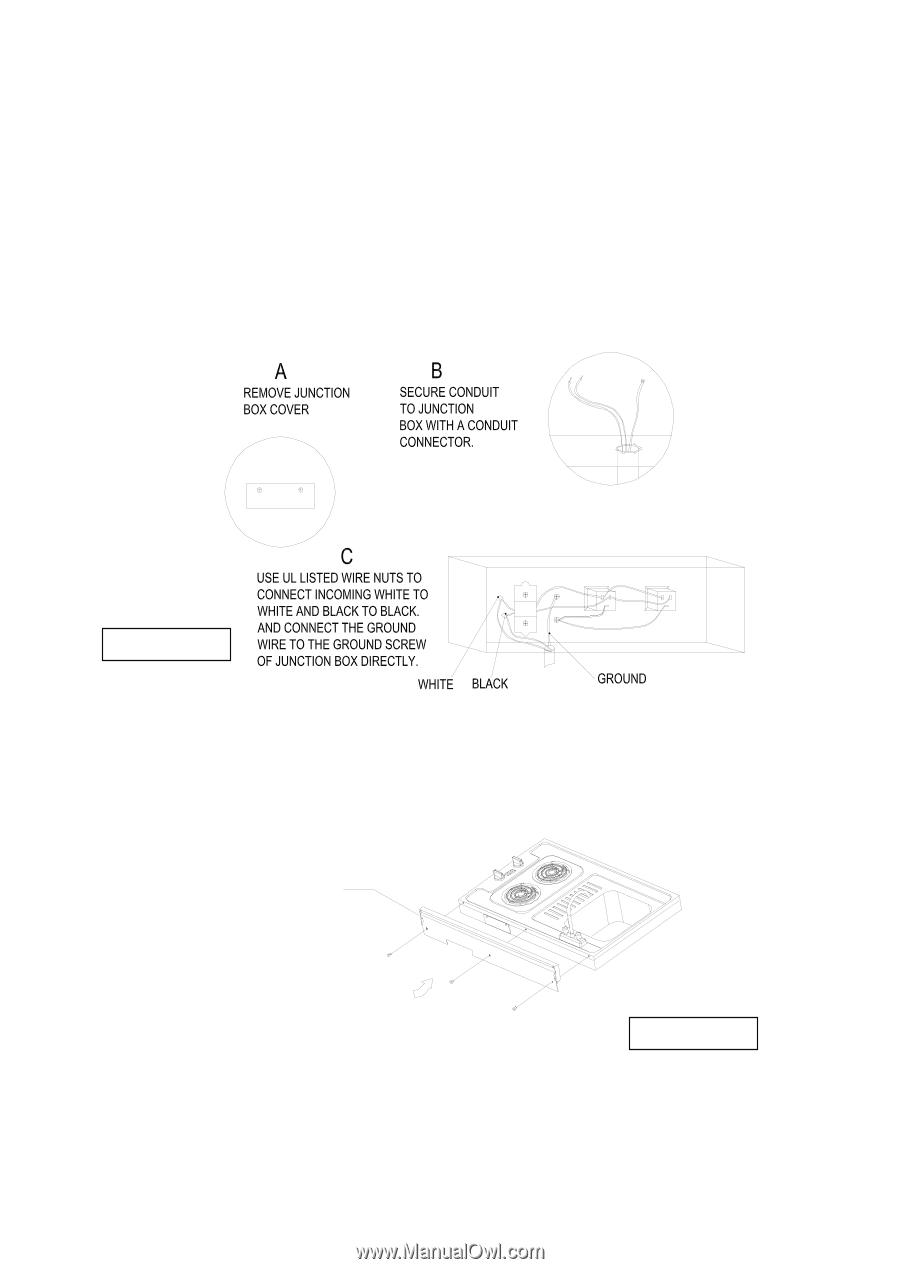
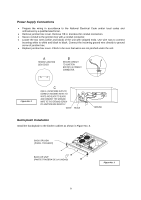
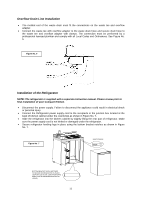
Power Supply Connections • Prepare the wiring in accordance to the National Electrical Code and/or local codes and ordinances by a qualified electrician. • Remove junction box cover. Remove 7/8 in. knockout for conduit connection. • Secure conduit to the junction box with a conduit connector. • Locate the two wires (white and black) of the unit with stripped ends. Use wire nuts to connect incoming white to white and black to black. Connect the incoming ground wire directly to ground screw of junction box. • Replace junction box cover. Check to be sure that wires are not pinched under the unit. Figure No. 2 Backsplash Installation Install the backsplash to the kitchen cabinet as shown in Figure No. 3. BACK SPLASH (PANEL TRASERO) BACK OF UNIT (PARTE TRASERA DE LA UNIDAD) Figure No. 3 9
-
 1
1 -
2
-
3
-
 4
4 -
 5
5 -
 6
6 -
 7
7 -
 8
8 -
 9
9 -
 10
10 -
 11
11 -
 12
12 -
 13
13 -
 14
14 -
15
-
16
-
17
-
18
-
19
-
20
-
21
-
22
-
23
-
24
-
25
-
26
-
27
-
28
-
29
-
30
-
31
-
32
-
33
-
34
-
35
-
36
-
37
-
38
-
39
-
40
-
41
-
42
-
43
-
44
-
45
-
46
-
47
-
48
-
49
-
50
-
51
-
52
-
53
-
54
-
55
-
56
 |
 |