Avanti WCR683DZD-2 Instruction Manual - Page 9
Operating Your Wine Chiller, Installing Stainless Steel Handle
 |
View all Avanti WCR683DZD-2 manuals
Add to My Manuals
Save this manual to your list of manuals |
Page 9 highlights
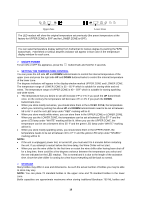
INSTALLING STAINLESS STEEL HANDLE This wine chiller includes a stainless steel handle that is not required to operate this unit. To install the handle please follow the below instructions: 1. Pull away the door gasket in the area where the handle is to be installed on the left side as shown below in Illustration # 1. The gasket is easily displaced by hand, no tools are necessary. 2. Using a Flat head screwdriver remove the two (2) pre-installed decorative plugs from the backside of the door as shown below in Illustration #1. Save the decorative plugs for future use. 3. Insert the two (2) Phillips head handle screws with the lock washers and flat washers attached through the gasket side of the door frame until the screws pass through the door frame. Follow the sequence shown below in Illustration # 2. 4. Align the handle with the screws installed in the above step # 3. Tighten the screws using a Phillips head screwdriver until the handle sets both flush and secured tightly against the door frame. (DO NOT overtighten as this will cause damage to the handle assembly). 5. Replace the door gasket to its original position. ① Gasket ④ Lock W asher ② Decorative Screw ⑤ Flat W asher ③ Phillips Head Screw S/S Handle OPERATING YOUR WINE CHILLER It is recommended you install the Wine Chiller in a place where the ambient temperature is between 72-78 degrees Fahrenheit. If the ambient temperature is above or below recommended temperatures, the performance of the unit may be affected. For example, placing your unit in extreme cold or hot conditions may cause interior temperatures to fluctuate. The range of 40-65 degrees Fahrenheit may not be reached. Recommended Temperatures for Chilling Wine. Red Wines Dry/White Wines Rose Wines Sparkling Wines 15º - 18º C 9º - 14º C 10º - 11º C 5º - 8º C 58 - 65º F 48 - 57º F 49 - 51º F 40 - 47º F 9
-
 1
1 -
2
-
3
-
 4
4 -
 5
5 -
 6
6 -
 7
7 -
 8
8 -
 9
9 -
 10
10 -
 11
11 -
 12
12 -
 13
13 -
 14
14 -
15
-
16
-
17
-
18
-
19
-
20
 |
 |
