Axis Communications P1224-E P12 Network Camera Series - Installation Guide - Page 12
Install the hardware, AXIS P12 Series Installation Guide
 |
View all Axis Communications P1224-E manuals
Add to My Manuals
Save this manual to your list of manuals |
Page 12 highlights
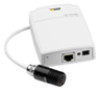
Page 12 AXIS P12 Series Installation Guide Install the hardware ! IMPORTANT! - The casing of the main unit is not approved for outdoor use - the product may only be installed in indoor environments. Make a note of the serial number (S/N) located on the product label. This number may be required during installation. The main unit for the AXIS P1204/P1214/P1214-E/P1224-E can be mounted on a DIN rail or using the supplied mounting rail. 1. If using the mounting rail, fasten it with screws to the wall or ceiling, using screws and plugs appropriate for the wall/ceiling material. Note the direction of the two tabs on the rail, the tabs align with the upper side of the main unit. 2. Attach the upper end of the main unit to the DIN rail or the mounting rail and snap the lower end into place. 3. Proceed with the instructions for the appropriate camera model below.
-
 1
1 -
2
-
3
-
4
-
5
-
6
-
 7
7 -
 8
8 -
 9
9 -
 10
10 -
 11
11 -
 12
12 -
 13
13 -
 14
14 -
 15
15 -
 16
16 -
 17
17 -
18
-
19
-
20
-
21
-
22
-
23
-
24
-
25
-
26
-
27
-
28
-
29
-
30
-
31
-
32
-
33
-
34
-
35
-
36
-
37
-
38
-
39
-
40
-
41
-
42
-
43
-
44
-
45
-
46
-
47
-
48
-
49
-
50
-
51
-
52
-
53
-
54
-
55
-
56
-
57
-
58
-
59
-
60
-
61
-
62
-
63
-
64
-
65
-
66
-
67
-
68
-
69
-
70
-
71
-
72
-
73
-
74
-
75
-
76
-
77
-
78
-
79
-
80
-
81
-
82
-
83
-
84
-
85
-
86
-
87
-
88
-
89
-
90
-
91
-
92
-
93
-
94
-
95
-
96
-
97
-
98
-
99
-
100
-
101
-
102
-
103
-
104
 |
 |
