Behringer BX2000H Quick Start Guide - Page 6
ULTRABASS BX2000H Controls - manual
 |
View all Behringer BX2000H manuals
Add to My Manuals
Save this manual to your list of manuals |
Page 6 highlights
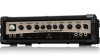
10 ULTRABASS BX2000H ULTRABASS BX2000H Controls (1) (3) (5) (7) (9) (10) (11) (12) (14) (16) (19) (2) (4) (6) (8) (21) (13) (15) (17) (18) (20) (22) (23) (24) 11 Quick Start Guide (EN) Controls (1) LEVEL - This VU meter indicates the input signal level that is applied to the preamp circuitry of the BX2000H. (2) PASSIVE/ACTIVE INPUTS - These are the inputs for your electric bass guitar. The PASSIVE jack is for passive basses, the ACTIVE jack is for active basses with high output levels. (3) GAIN - Use this control to adjust the input gain on your BX2000H. Turn down the gain to minimum or press MUTE before connecting or disconnecting your guitar. (4) FOOTSWITCH - Connect a dual non-latching footswitch with a ¼" TRS connector to control the MUTE and FX INSERT effects loop functions. (Footswitch not included). (5) COMP - Use this control to adjust the compressor threshold level. When the signal exceeds the threshold, compression will begin, and the THRESH LED will light. (6) MUTE - Press this switch to mute the input signal. The switch will illuminate when engaged. (7) BASS - This control allows you to boost or cut the bass level at approximately 50 Hz. (14) SHAPE - When the SHAPE switch is pressed in, you can use this control to modify the filter sound. The filter position is adjustable from 200 Hz to 800 Hz. (15) SHAPE - This switch activates the SHAPE filter. The switch will illuminate when engaged. (16) OUTPUT - Use this control to adjust the overall output volume. The CLIP LED will light if the output signal is clipping. Turn down the level if the CLIP LED comes on. (17) SEND/TUNER - Connect this output to the input of your effects device or tuner. (18) RETURN - Connect the output of your effects device to this input. Since the BX2000H features a serial effects path, the mix ratio must be set on your effects device. (19) DI - Use this balanced XLR output to feed the audio signal from your BX2000H to an external mixing console. The signal tap is post-EQ and independent from the OUTPUT control. (20) LINE OUT - Use this unbalanced ¼" TRS output to connect your BX2000H to a mixing console or secondary amplifier that has no balanced inputs. (8) DEEP - Press this switch to increase the levels (21) POWER SWITCH - Use the POWER switch to in the low frequency range from 30 to 200 Hz. switch the BX2000H on or off. Make sure the The switch will illuminate when engaged. POWER switch is always readily accessible when (9) 140 Hz - This control allows you to boost or cut the using the amplifier. upper-bass level at approximately 140 Hz. (22) POWER CONNECTION - Connect the included (10) MIDDLE - This control allows you to boost or cut the low-midrange level at approximately 500 Hz. power cable to this socket and to a mains outlet properly configured for your model. (11) 1.6 kHz - This control allows you to boost or cut the high-midrange level at approximately 1.6 kHz. (23) PARALLEL SPEAKER OUTPUTS - Use these outputs to connect your loudspeaker. The outputs are wired in parallel using two professional locking (12) TREBLE - This control allows you to boost or cut loudspeaker connectors. Pin 1+ and 2+ are the high frequency level at approximately 7.5 kHz. positive, Pin 1- and 2- are negative. (13) BRIGHT - Use this switch to enable or disable the BRIGHT effect, which adds some brilliance to the treble frequencies in the range from 2 kHz to 20 kHz. The switch will illuminate when engaged. (24) FAN - An internal fan is used to cool the amplifier. Make sure that the fan and the cooling vents are unobstructed. Check Out behringer.com for Full Manual
-
 1
1 -
 2
2 -
 3
3 -
 4
4 -
 5
5 -
 6
6 -
 7
7 -
 8
8 -
 9
9 -
 10
10 -
 11
11 -
 12
12
 |
 |
